
Menu
Apr
30
Shot of the Month – April 2026
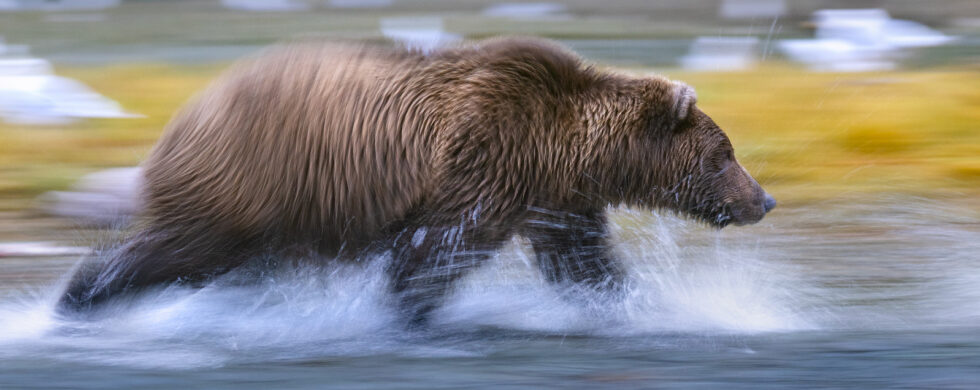
Each year, millions of mature salmon leave the ocean in search of the inland tributary where they were born. If they survive this epic Ulyssesian journey, they will mate and die at their birthplace. The sudden bounty of food in the rivers attracts numerous predators and fuels entire ecosystems.
You can read more about this natural wonder here:
I have visited Katma National Park twice to witness this epic event. Standing on the bank, we watched the river’s surface churn as thousands of fish coursed through the water. Massive brown bears were all around us, but we were in little danger as the bears were solely and completely focused on catching the calorie-rich salmon.
At times, the scene was chaotic as the bears would bound into the water, the fish fleeing in every direction, some leaping out of the water to escape teeth and claws. The shrill calls of the seagulls nearby only added to the cacophony as they impatiently waited to feast on the remains of the partially eaten salmon.
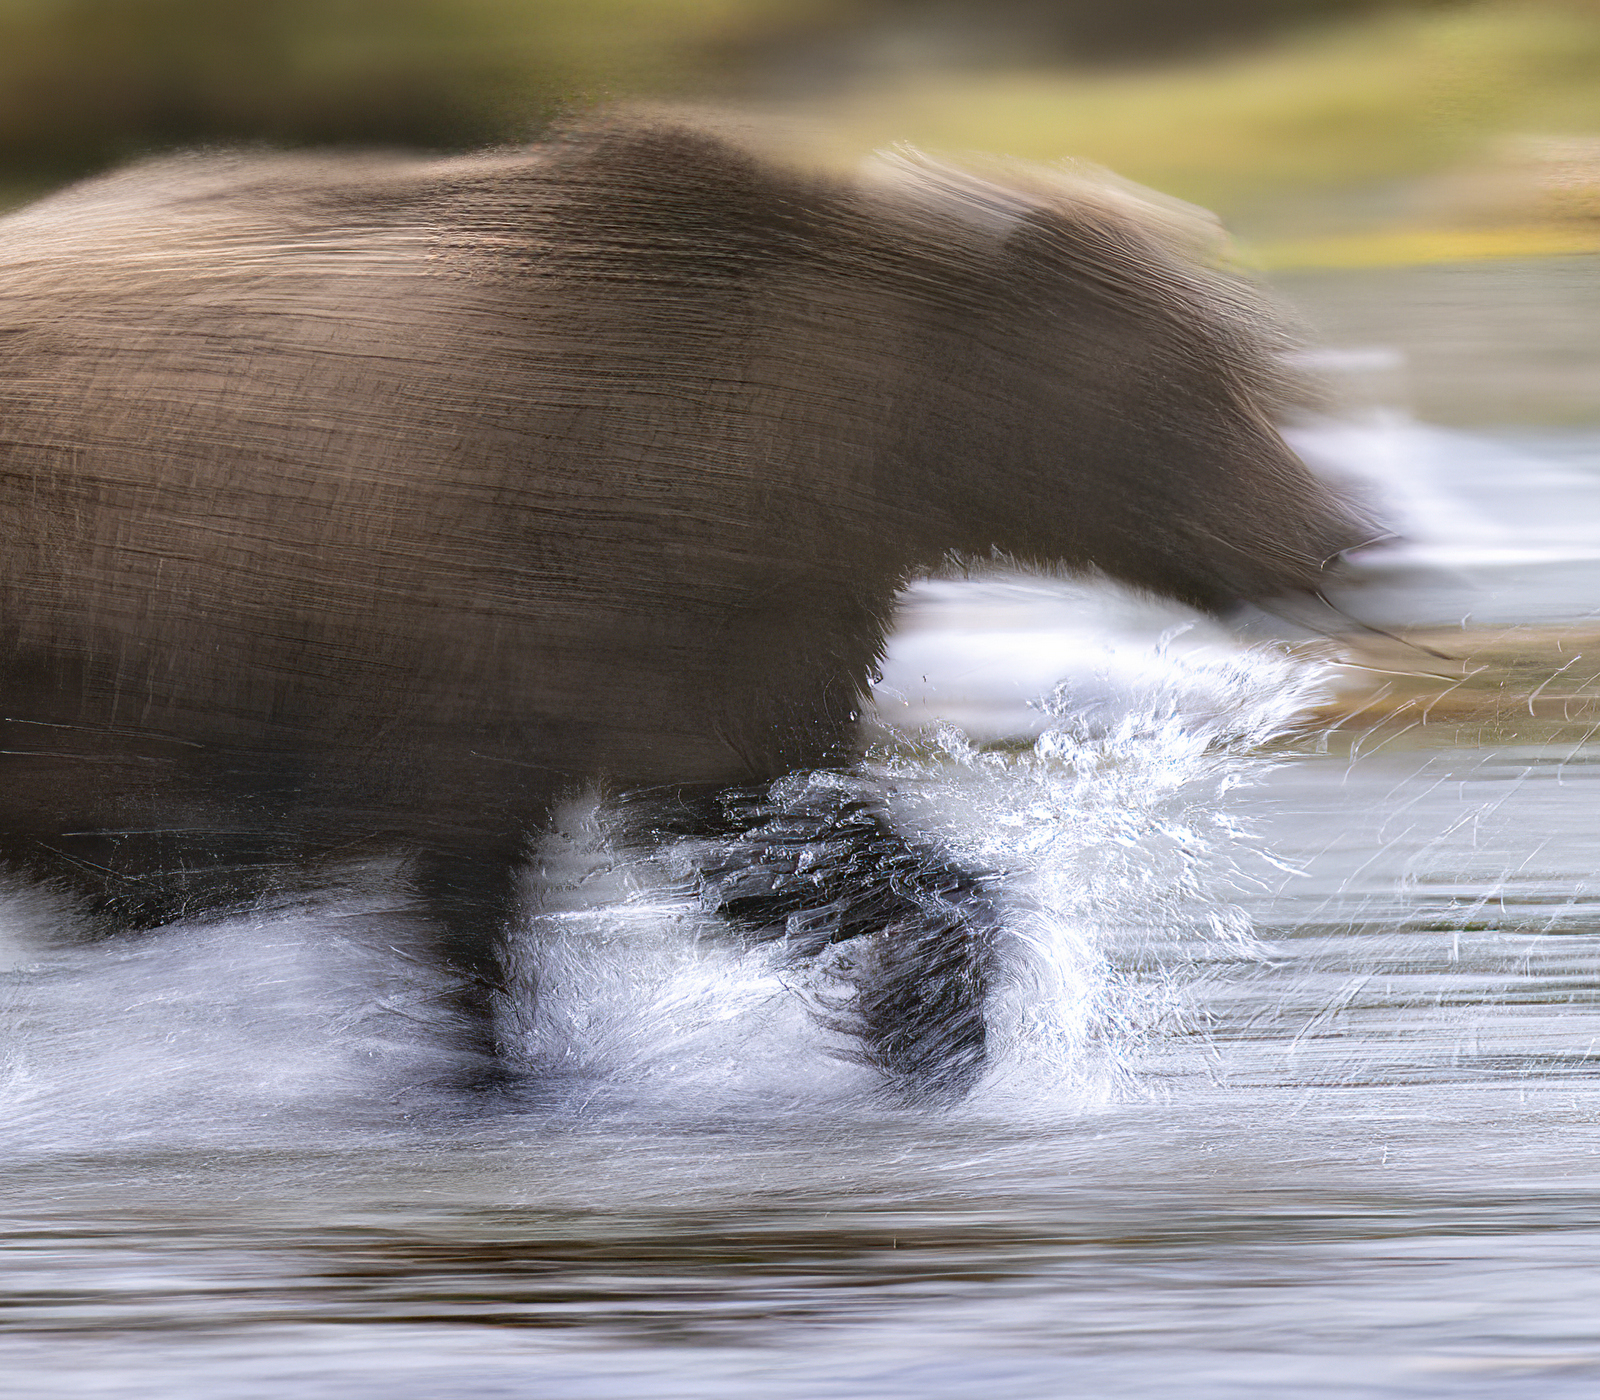
In the image above, I used a slow shutter speed to convey the mad rush, highlighting the splashing water and chaos. The swirling fur adds to the sense of motion. I like how the image is divided into three horizontal layers, and how the bright yellow grass in the middle adds a nice contrast to the brown bear and the gunmetal blue water.
Here’s a bit more on how to use a slow shutter speed to convey motion: Capturing Speed
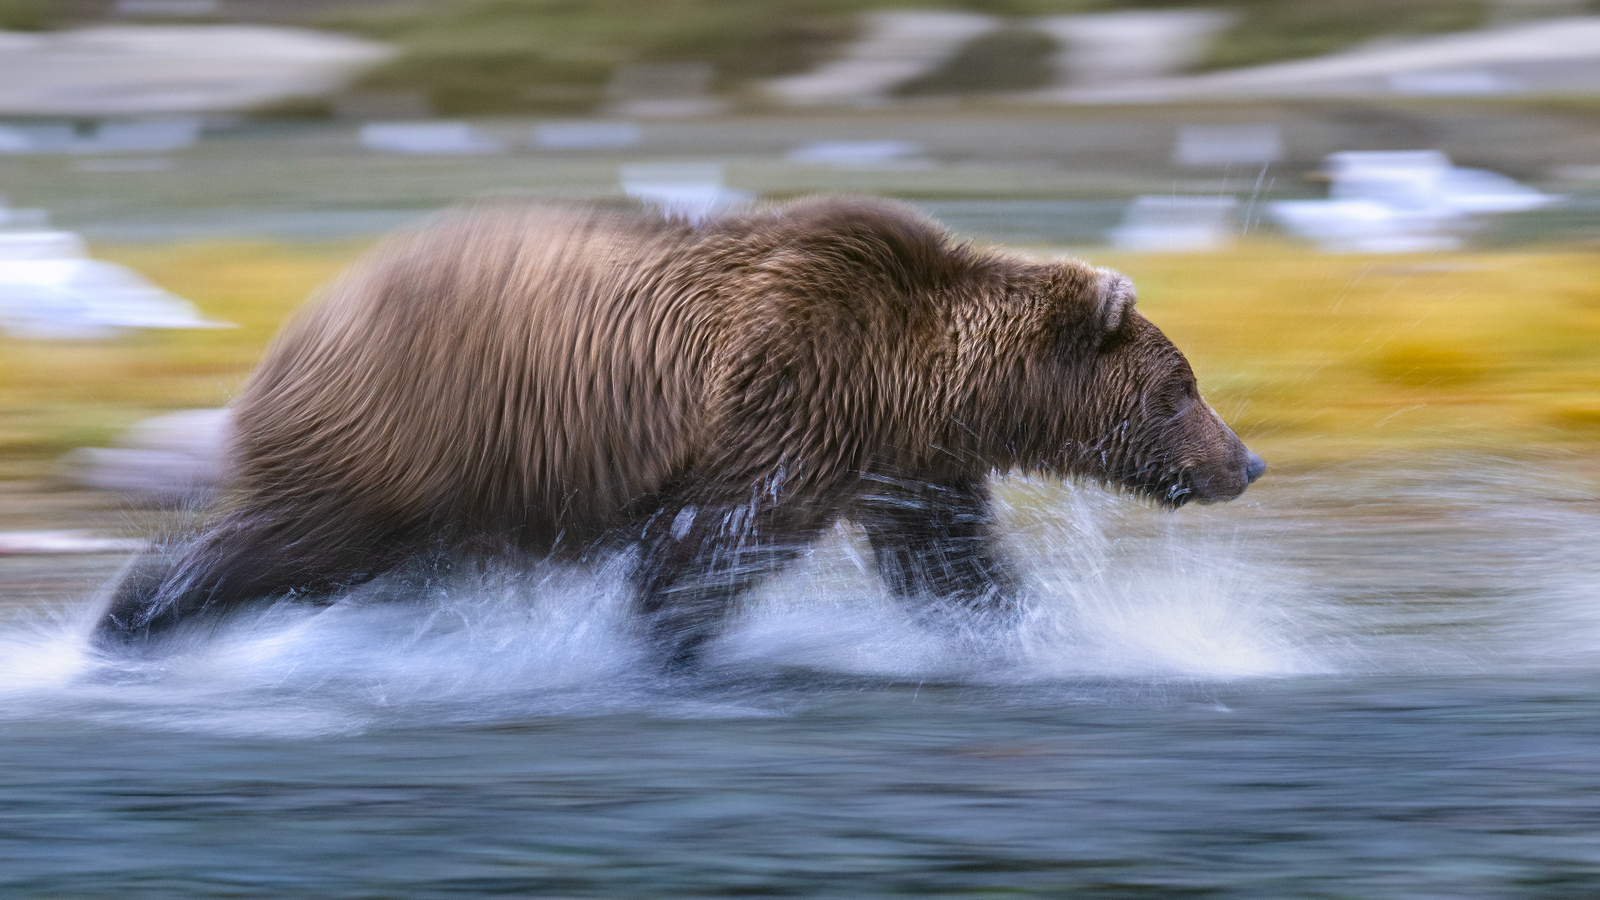
Here is another slow shutter attempt (I don’t like this one as much):
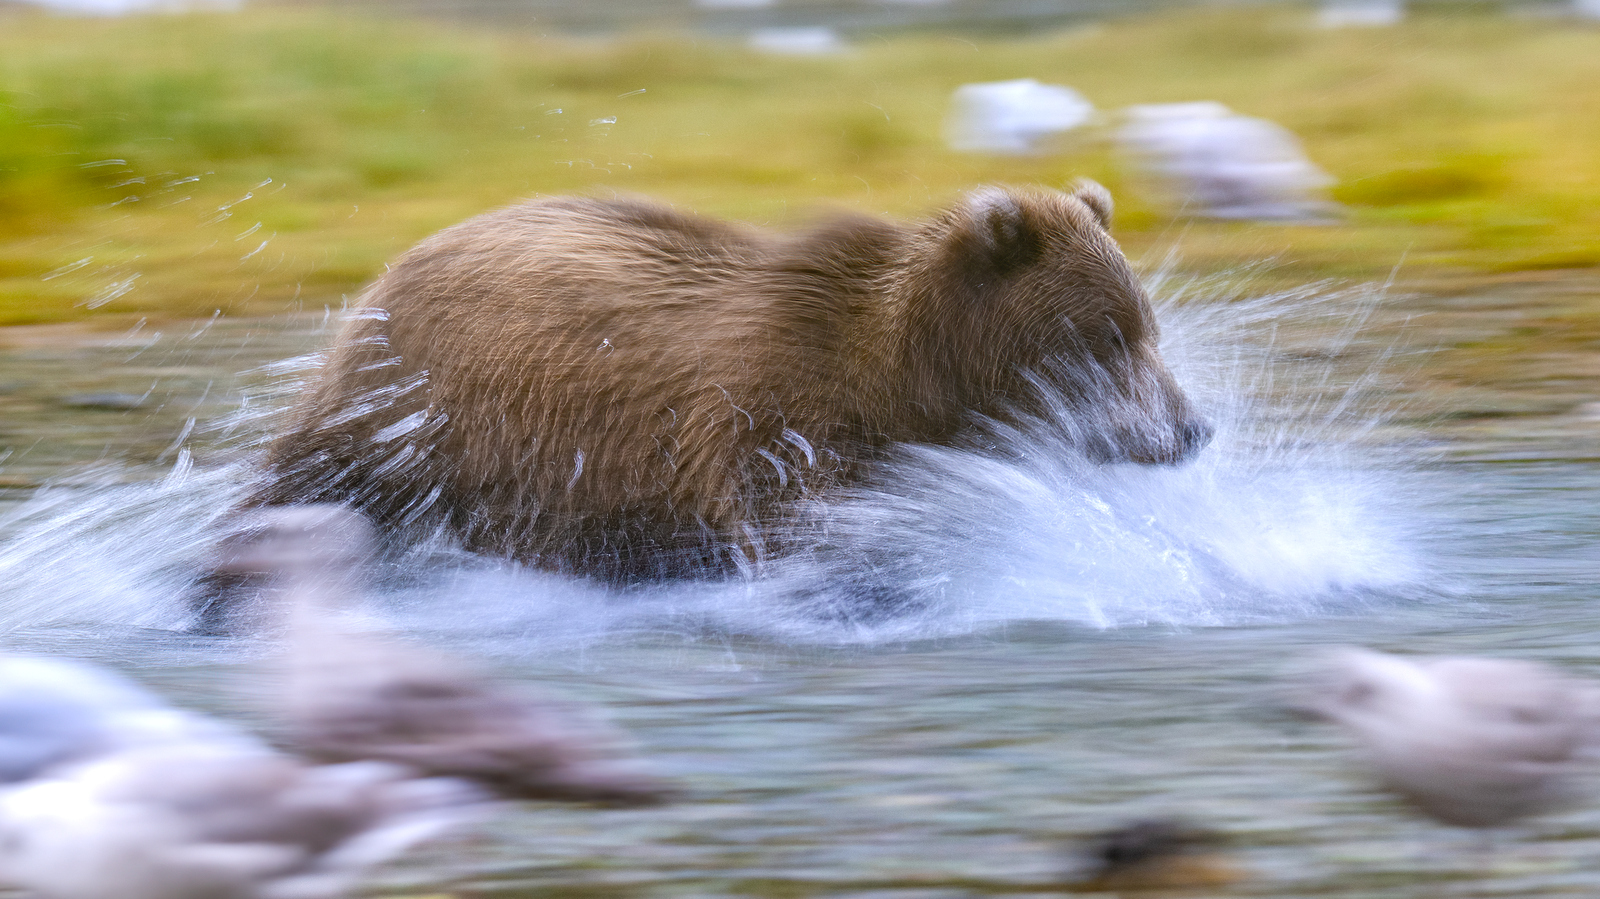
And another:
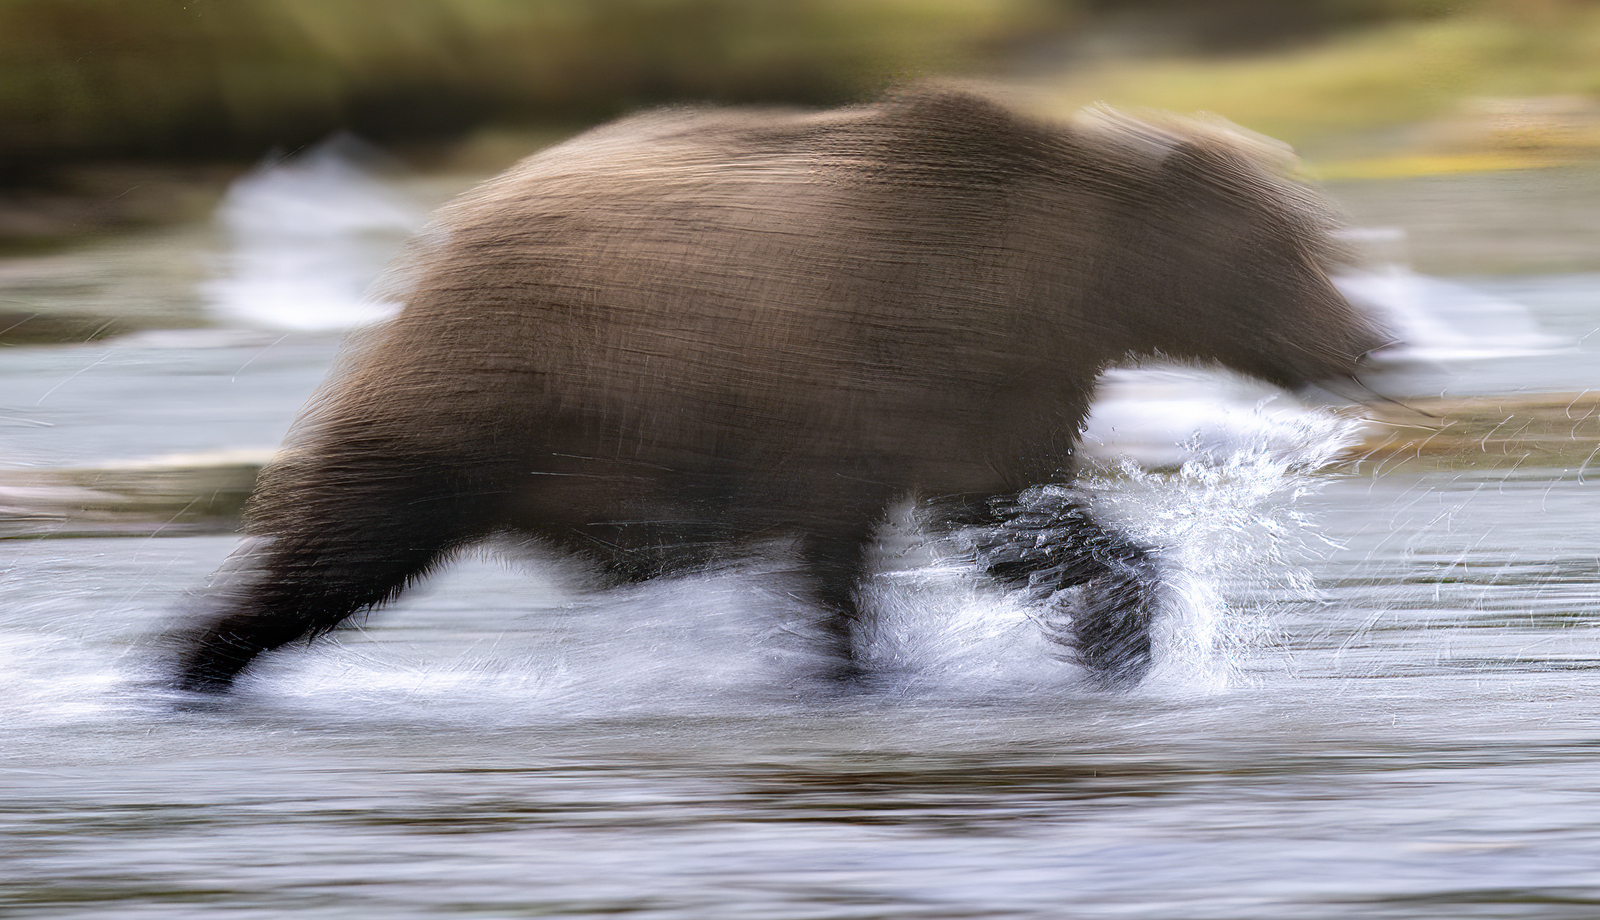
I like this closer view that highlights those massive claws:
Here is a slow-motion video that I shot that captures a brown bear in hot pursuit (this is the mother of the first bear):
You can read about more Brown Bear adventures here:
Using a slow shutter speed is a high-risk proposition, and one can easily shoot hundreds or even thousands of images before finding the right mix of blur, motion, and sharpness. But when it all falls into place, a blurry image can sometimes convey the essence of a natural scene better than the standard “all-sharp” capture.
Until next month…..m
Nikon Z9, Nikkor 100-400mm, f/5.6, 1/20 sec, ISO 250
Mar
31
Shot of the Month – March 2026
Every year, about 2 million people flock to the Columbia River Gorge (CRG) to enjoy the endless hiking trails, take in the glorious vistas, and to admire the numerous waterfalls. The CRG stretches for 80 miles along the border between Oregon and Washington. The gorge was carved by, yep you guessed it, the Columbia River.
The waterfalls found here are the main attraction, well, at least for landscape photographers, and most focus (no way to avoid this pun, sorry) on the Oregon side as it is home to 90-ish waterfalls, while the Washington side is the neglected stepchild with only about 15-20 falls to admire
Most visitors head to the “Waterfall Corridor” on the Oregon side, where quick hikes concentrated along an 8.5-mile portion of the Historic Columbia River Highway will allow you to visit a dozen or more waterfalls. Here is a good overview of what can be seen there. Multnomah Falls, Oregon’s tallest falls, is found here and is often the KEY attraction for most visitors.
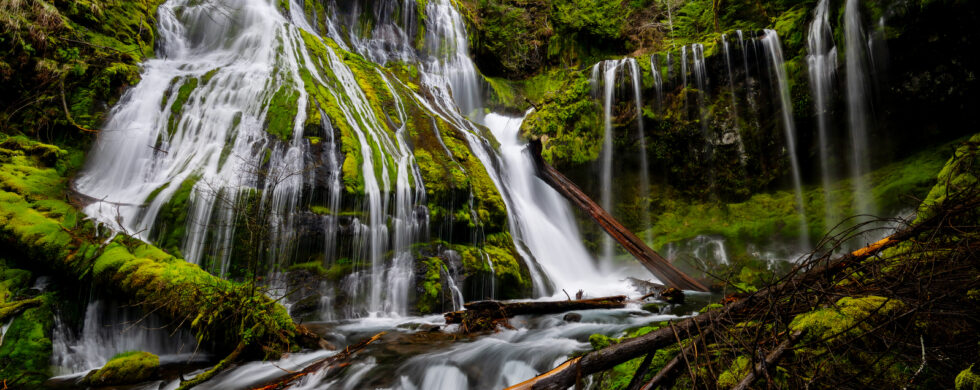
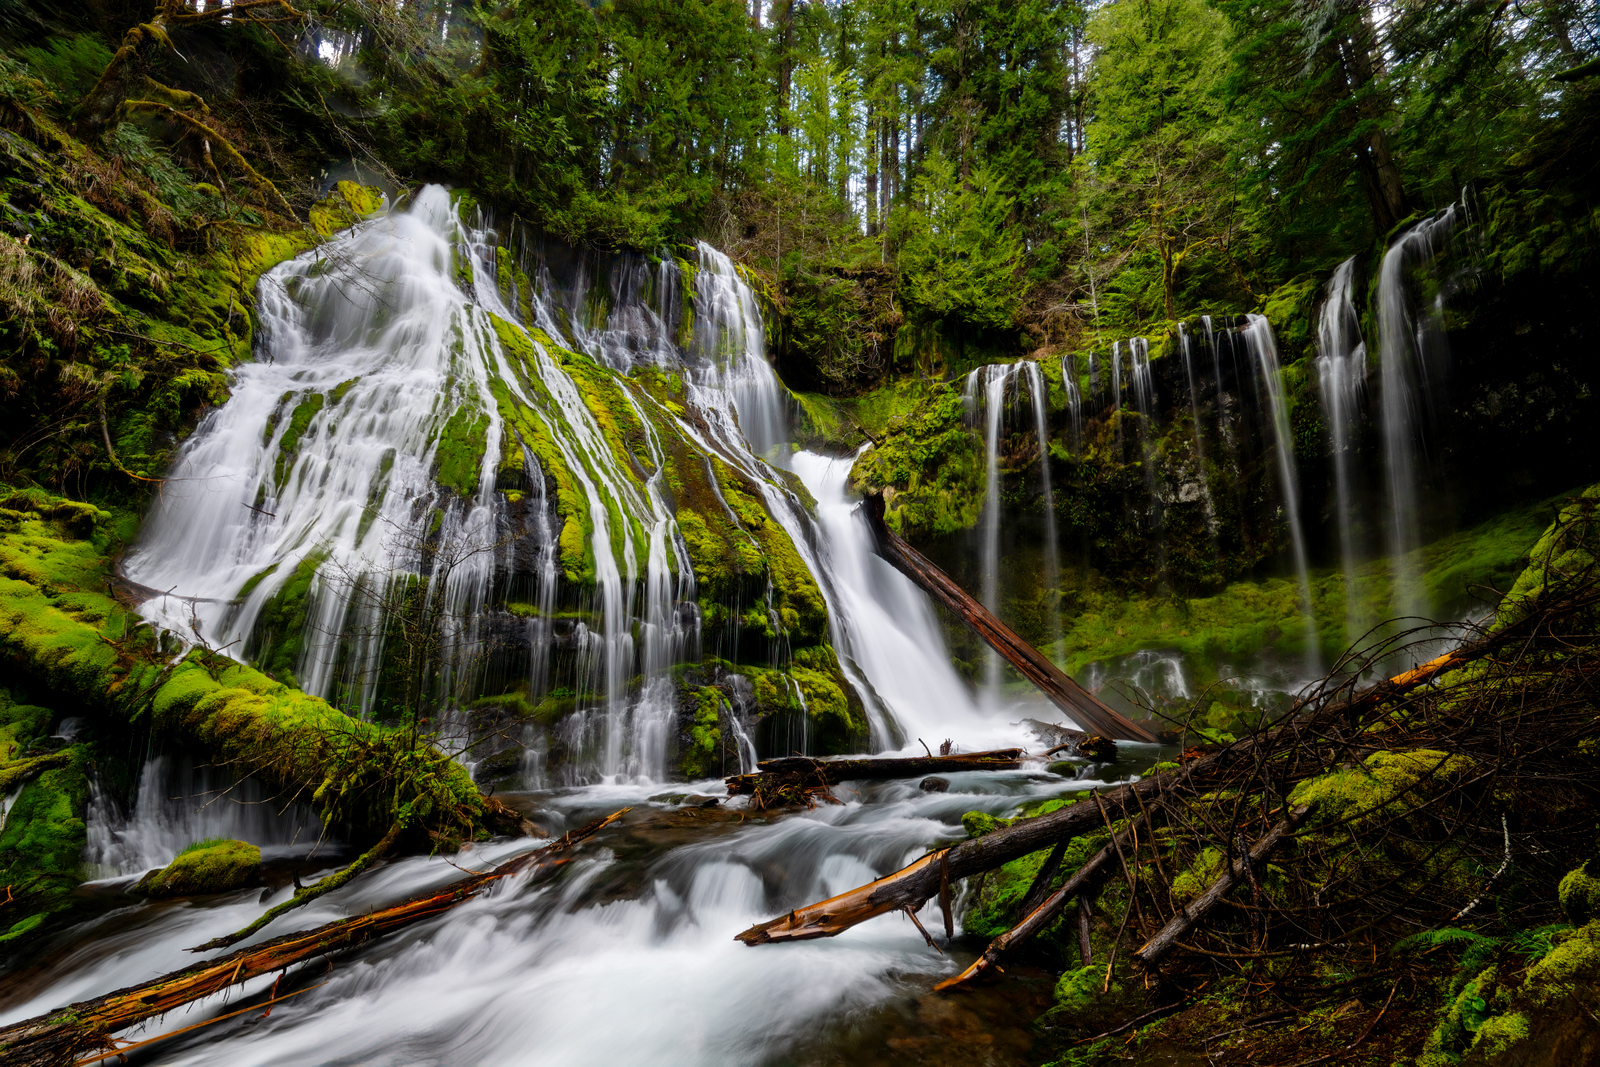
Despite Oregon’s waterfall numerical superiority, my favorite waterfall (so far) is actually found on the lesser-visited Washington side of the Columbia River. For my money, the Panther Creek Falls (PCF), as shown in the image above, is the most beautiful waterfall I have ever seen. The waterfall forms a bowl that wraps around, creating a magical, lush, green, ever-misty universe of tranquility. The main fall drops 100 feet and then a secondary fall (not shown in my image) drops another 30 feet into the river below. When the water flow is especially heavy, like during the spring when the snowmelt is at its greatest, some water will escape through the mossy field to the right of the main falls. PCF is located in Gifford Pinchot National Forest. Directions can be found here.
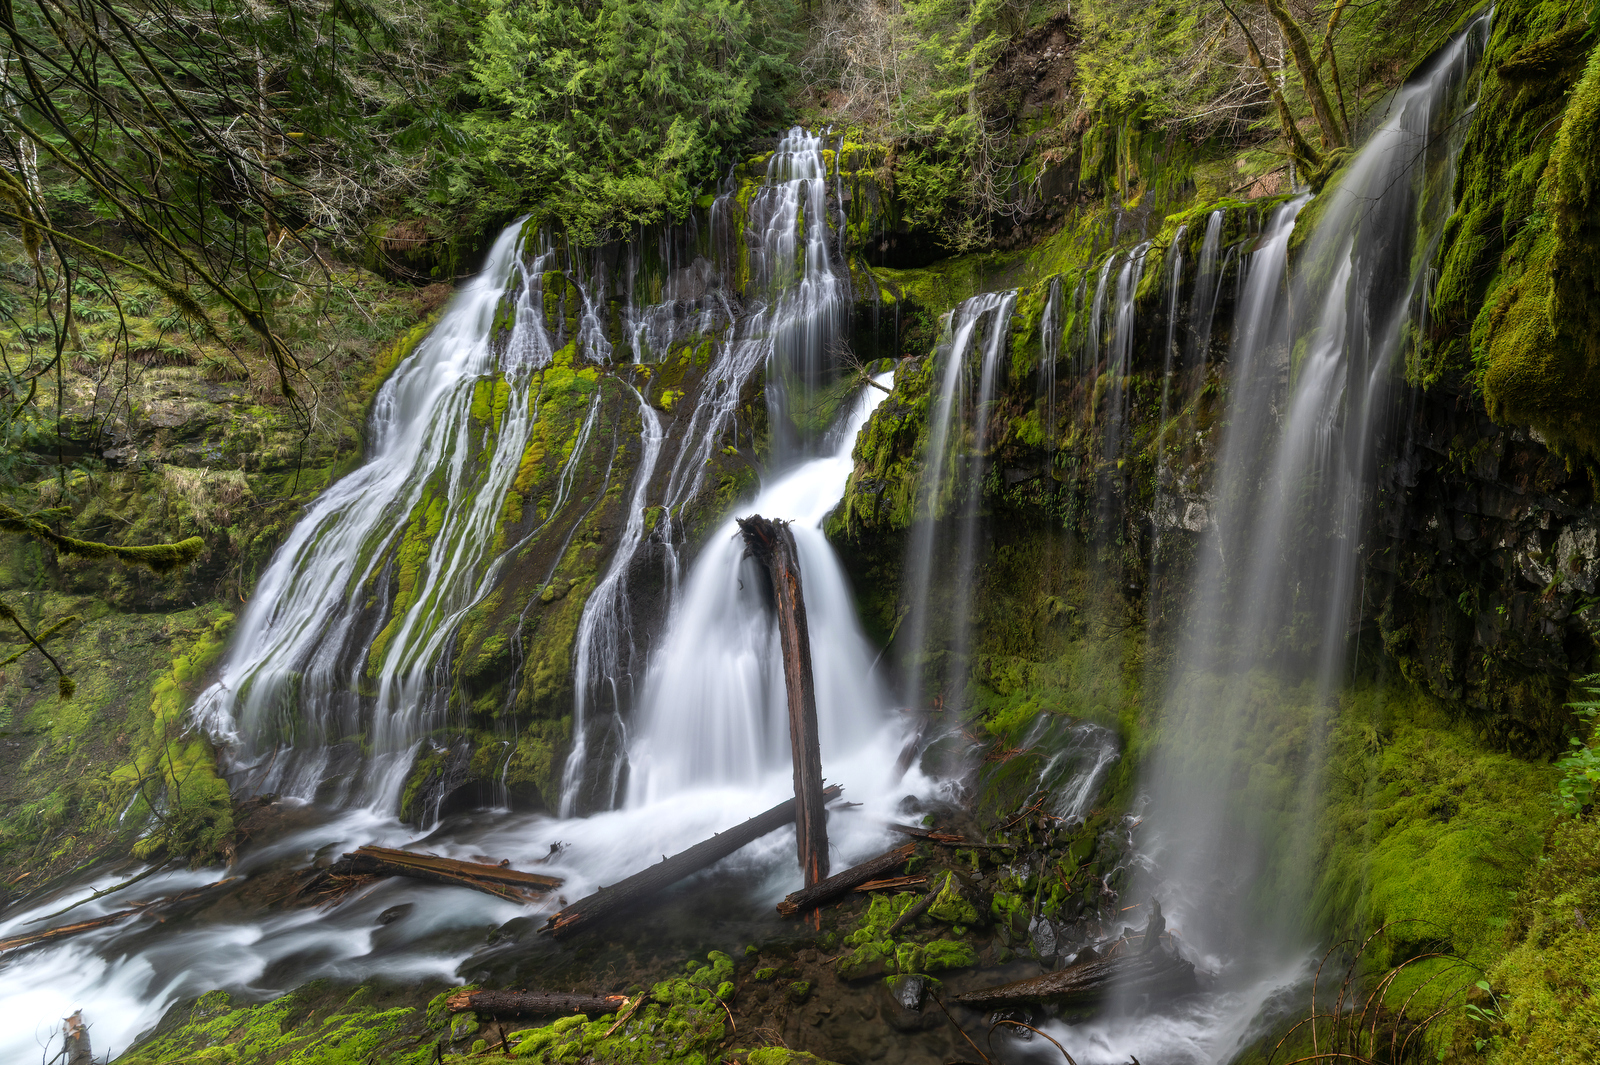
In the image below, we see the main falls off to the left, while to the right, in the foreground, we see smaller, more intricate channels that run off through moss-covered cliffs.
Here is a lower view as the water goes rushing by:
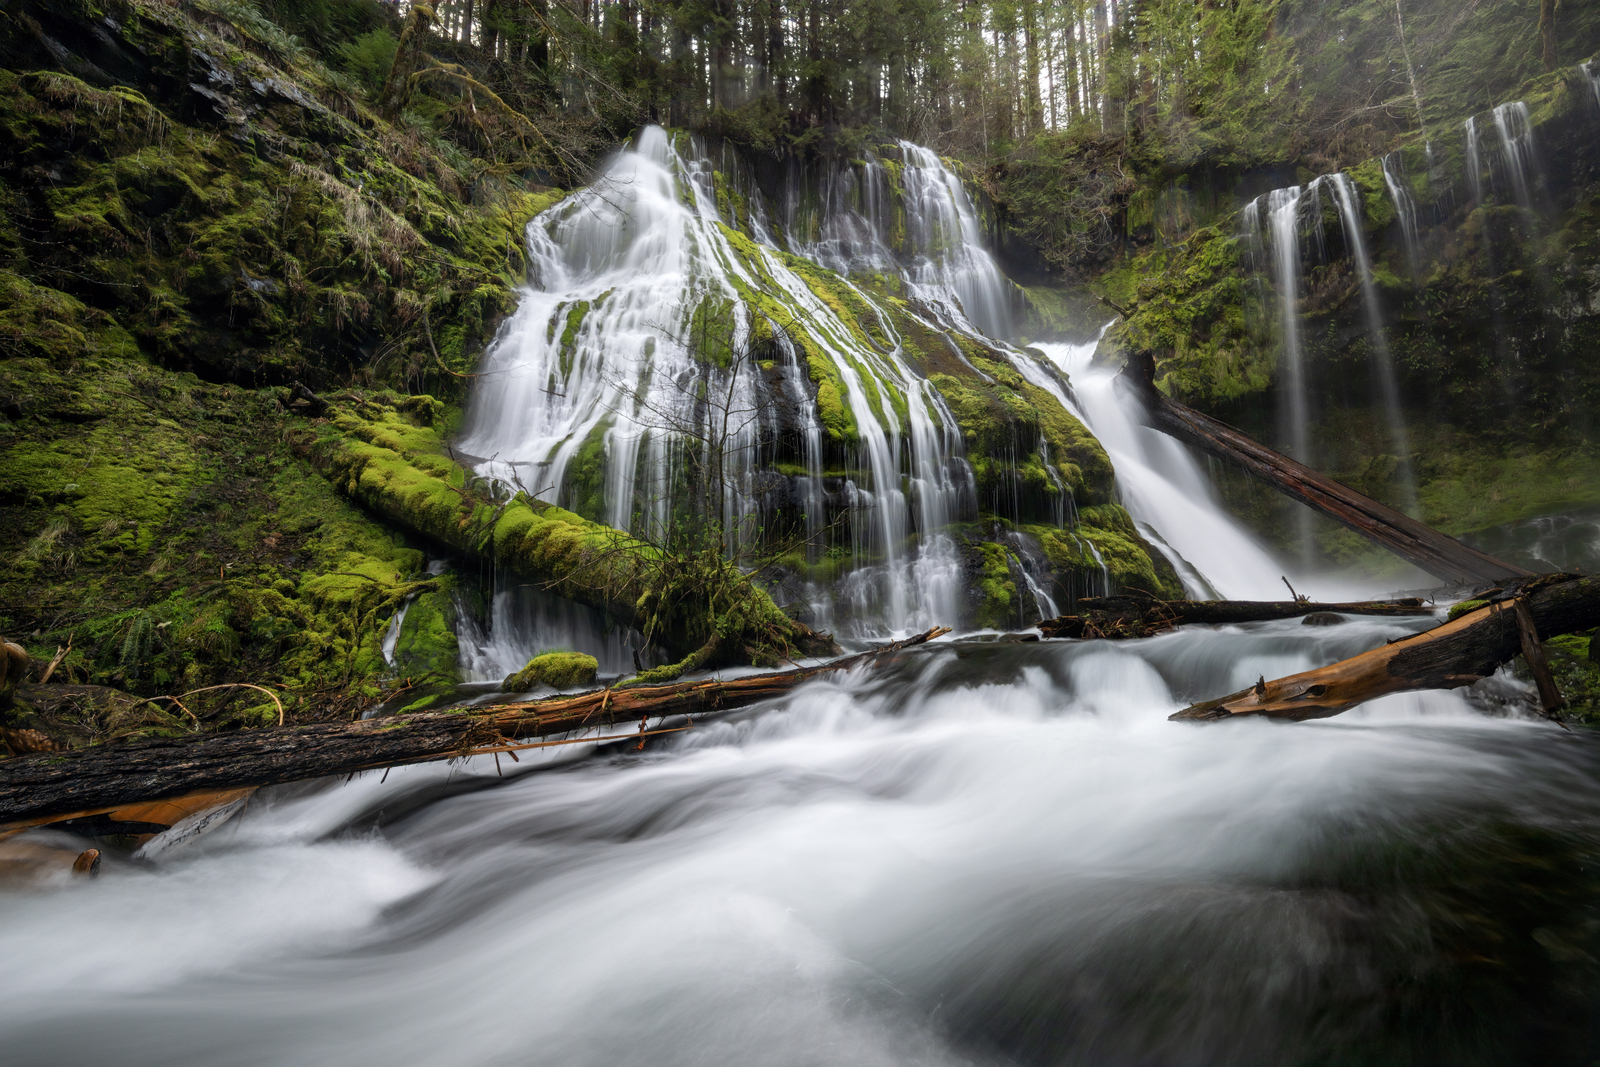
Another shot from below the falls:
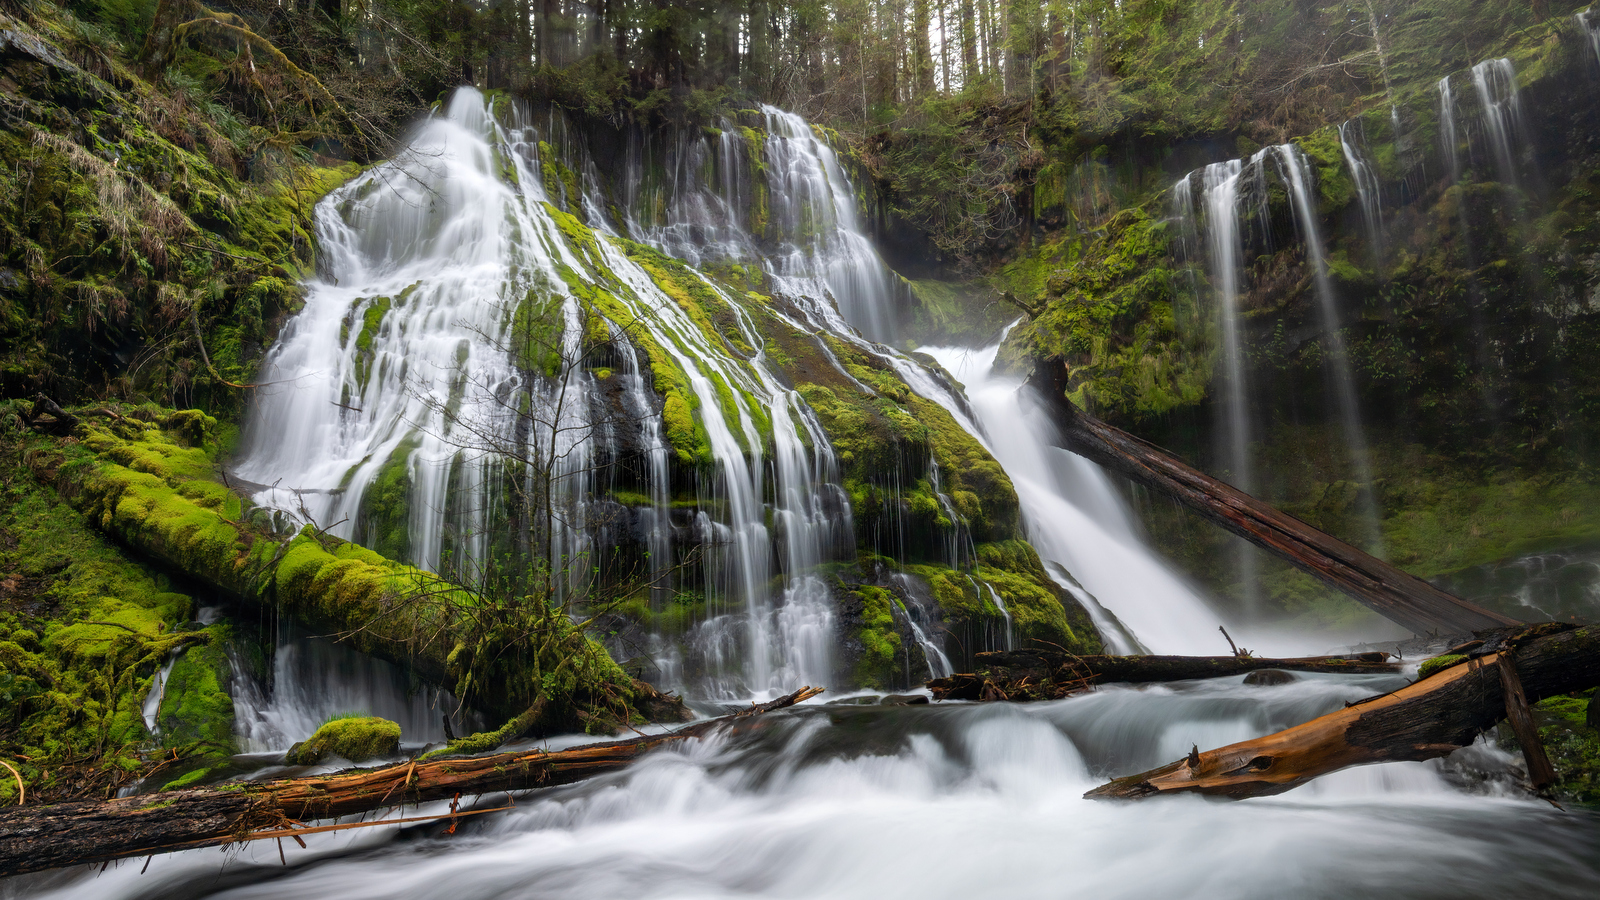
And a final perspective focused on the main section of the falls:
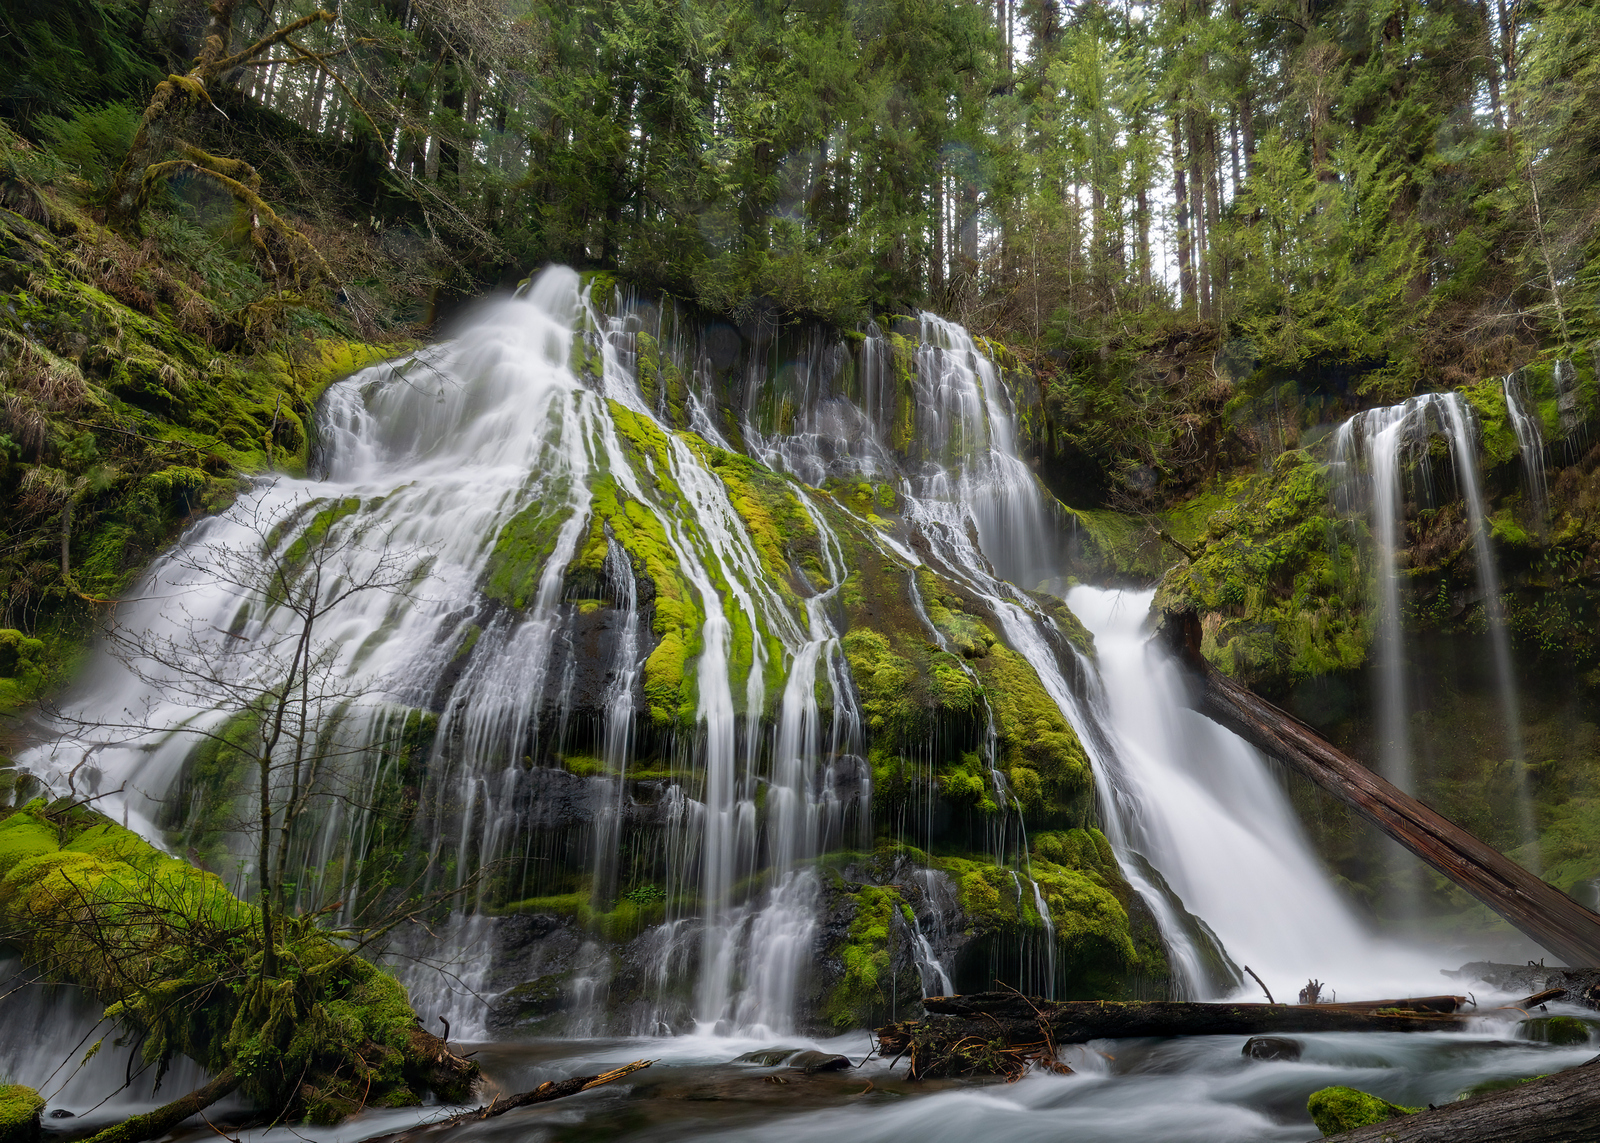
If you are heading to the Columbia River Gorge, of course, hit the Oregon side and feast on the buffet of endless options of hikes and waterfalls along that 8.9-mile stretch of road. But, if you can, get off the beaten path and visit the Panther Creek Falls for a tranquil treat. In the spring, these falls are bursting with water and shades of green and are at their misty best. Go early in the morning to beat the crowds (for the tranquil part) and bring a raincoat as the falls emit an endless fine spray that will leave you soaked if you linger. It’s glorious.
Until next month…..m
Nikon Z9, Nikkor Z 14-30 mm (@15mm), f/9, 1/3 sec, ISO 64
Feb
28
Shot of the Month – February 2026
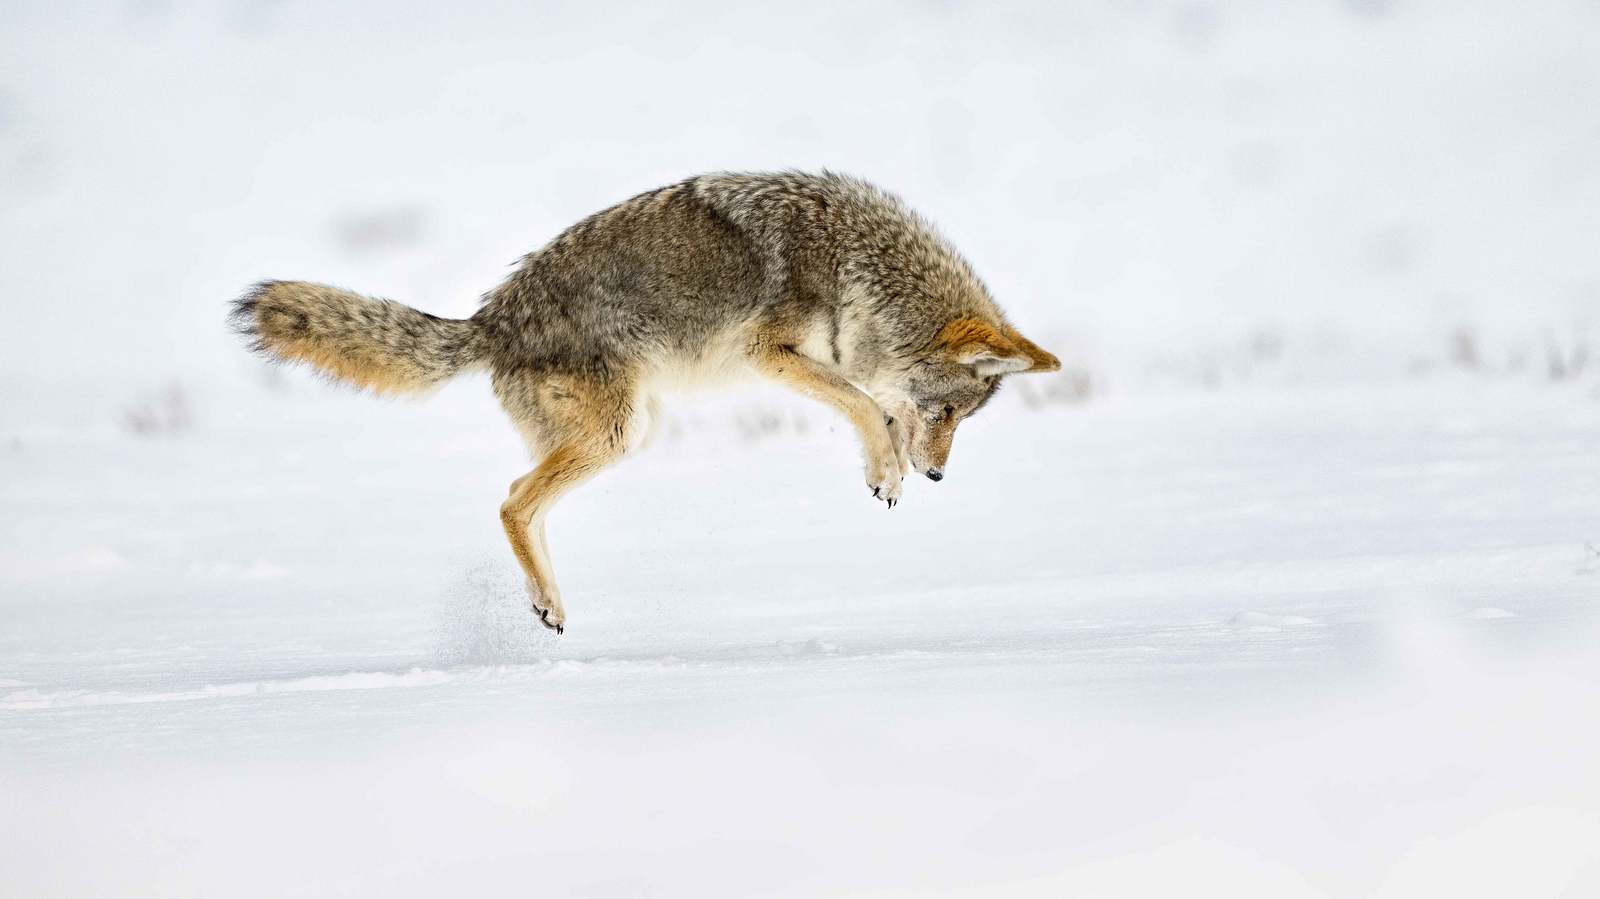
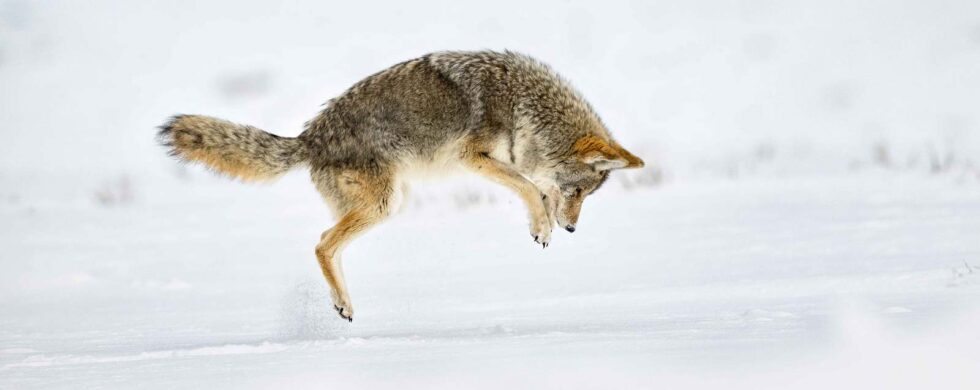
Life as a predator seems all glamorous and cool but catching other critters is hard work. I know we feel sad for that cute, fluffy thing with big eyes being chased by the thing with sharp teeth, but Fluffy actually wins most of those encounters. Predator success rate varies widely by species, but broadly speaking, ol’ Sharp Teeth is only successful about 10% – 30% of the time (for many large mammal carnivores).
Animals that have small rodents on the menu sometimes use “mousing” as a technique to catch said rodents. How does that work? The coyote in the image above is demonstrating the maneuver. It usually goes something like:
- Listen for prey hiding under snow or other cover;
- Stalk quietly
- Listen. Triangulate. Leap!!
- Drive front paws and muzzle downward to grab the unsuspecting prey.
During the winter, mousing is a vital survival skill for coyotes in Yellowstone National Park when large prey is scarce. Because wolves often dominate kills of larger animals, coyotes avoid direct competition by focusing on smaller prey, such as mice and voles, that wolf packs typically ignore.
In the image above, I caught this Yellowstone coyote at peak leap while mousing.
No luck on that last leap, let’s try again:
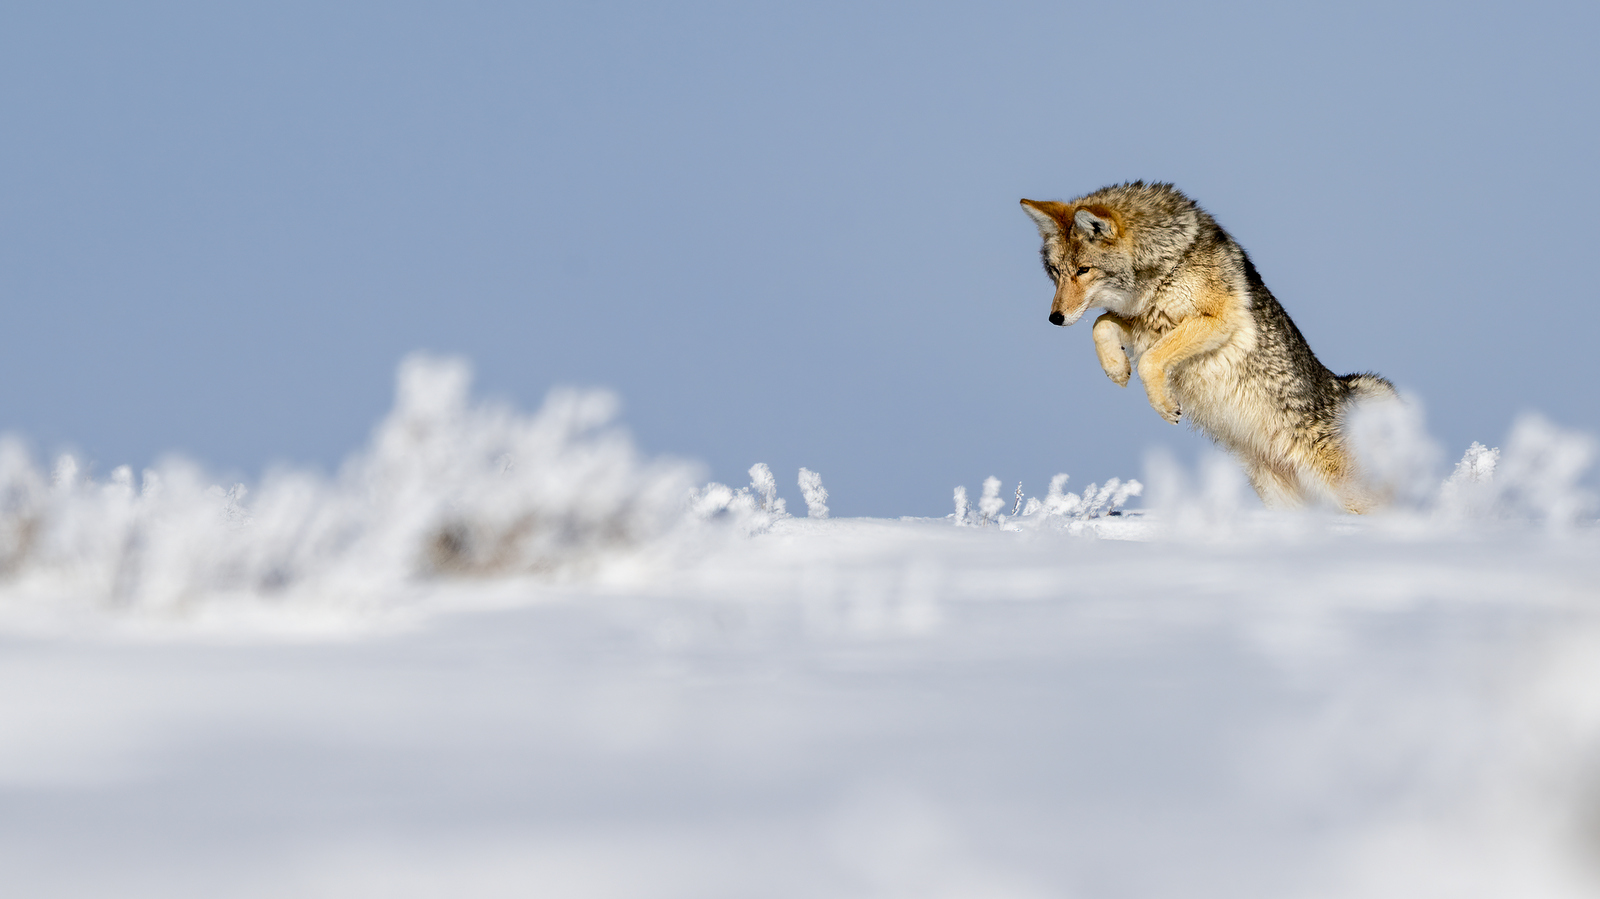
Drat. Missed. Let’s keep looking…
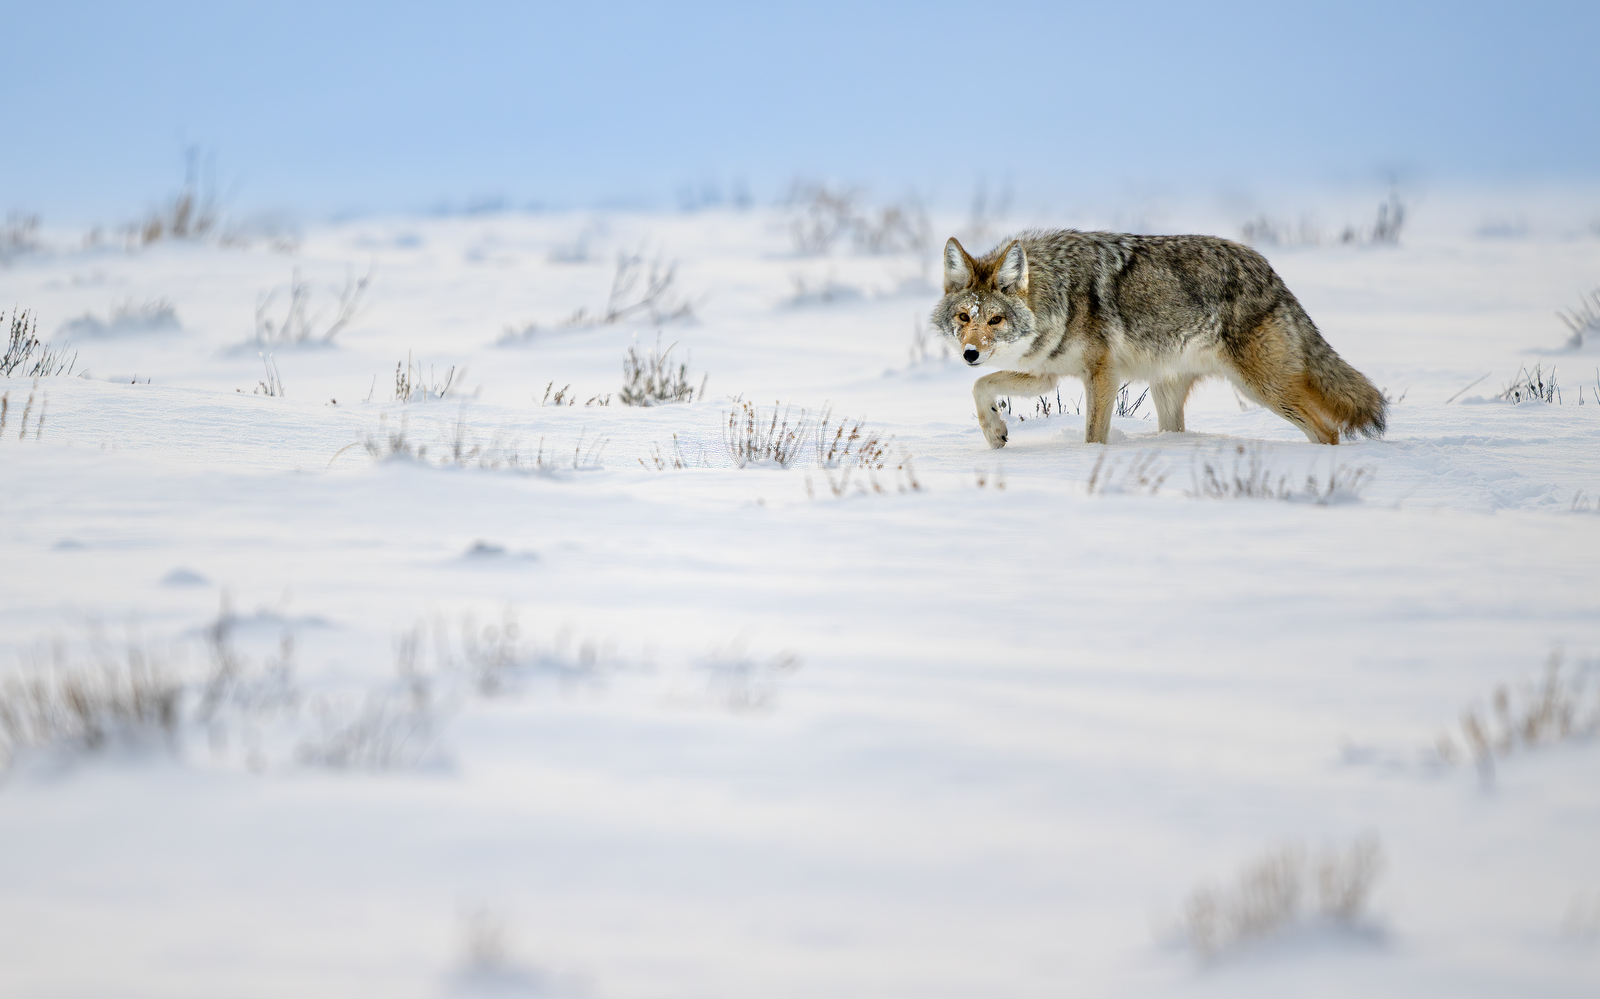
Hmmn. He can hear faint rustling noises as the mice run through their tunnels under the snow.
Launch:
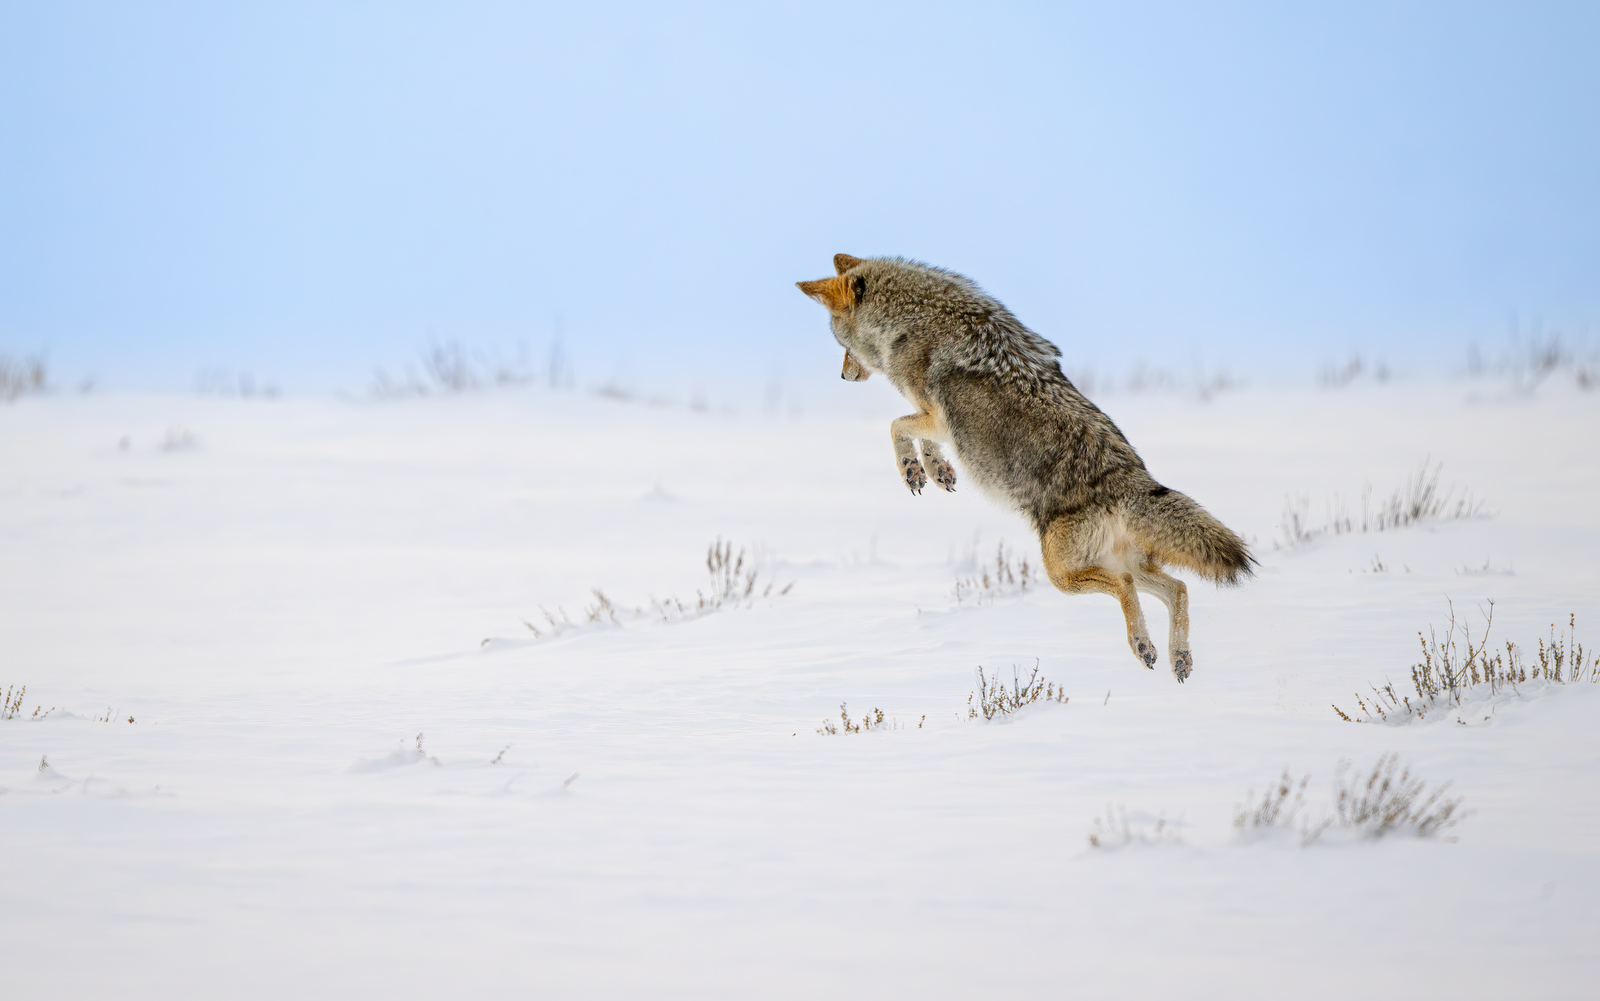
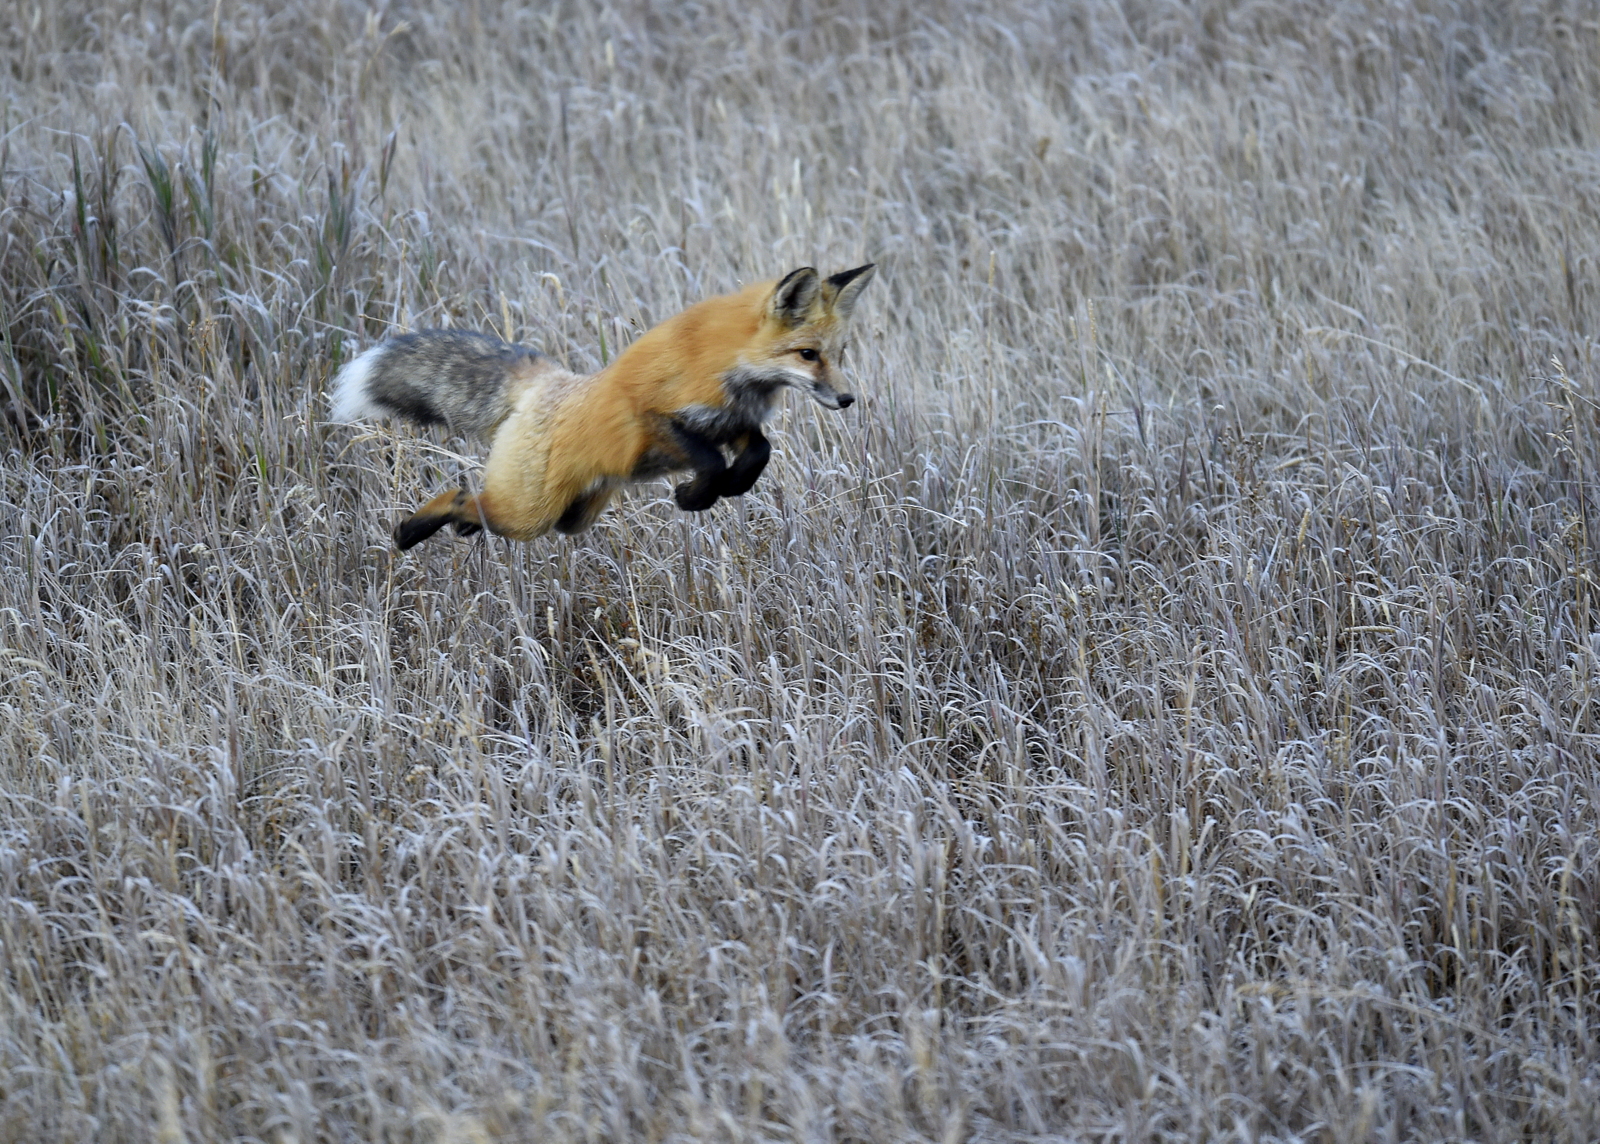
Foxes are famous for their mousing. I photographed this fellow also in Yellowstone one fall:
Here the BBC captured mousing at its finest…the music, the setting…glorious:
And many owls use a similar approach. Here is a Great Gray Owl with a catch:
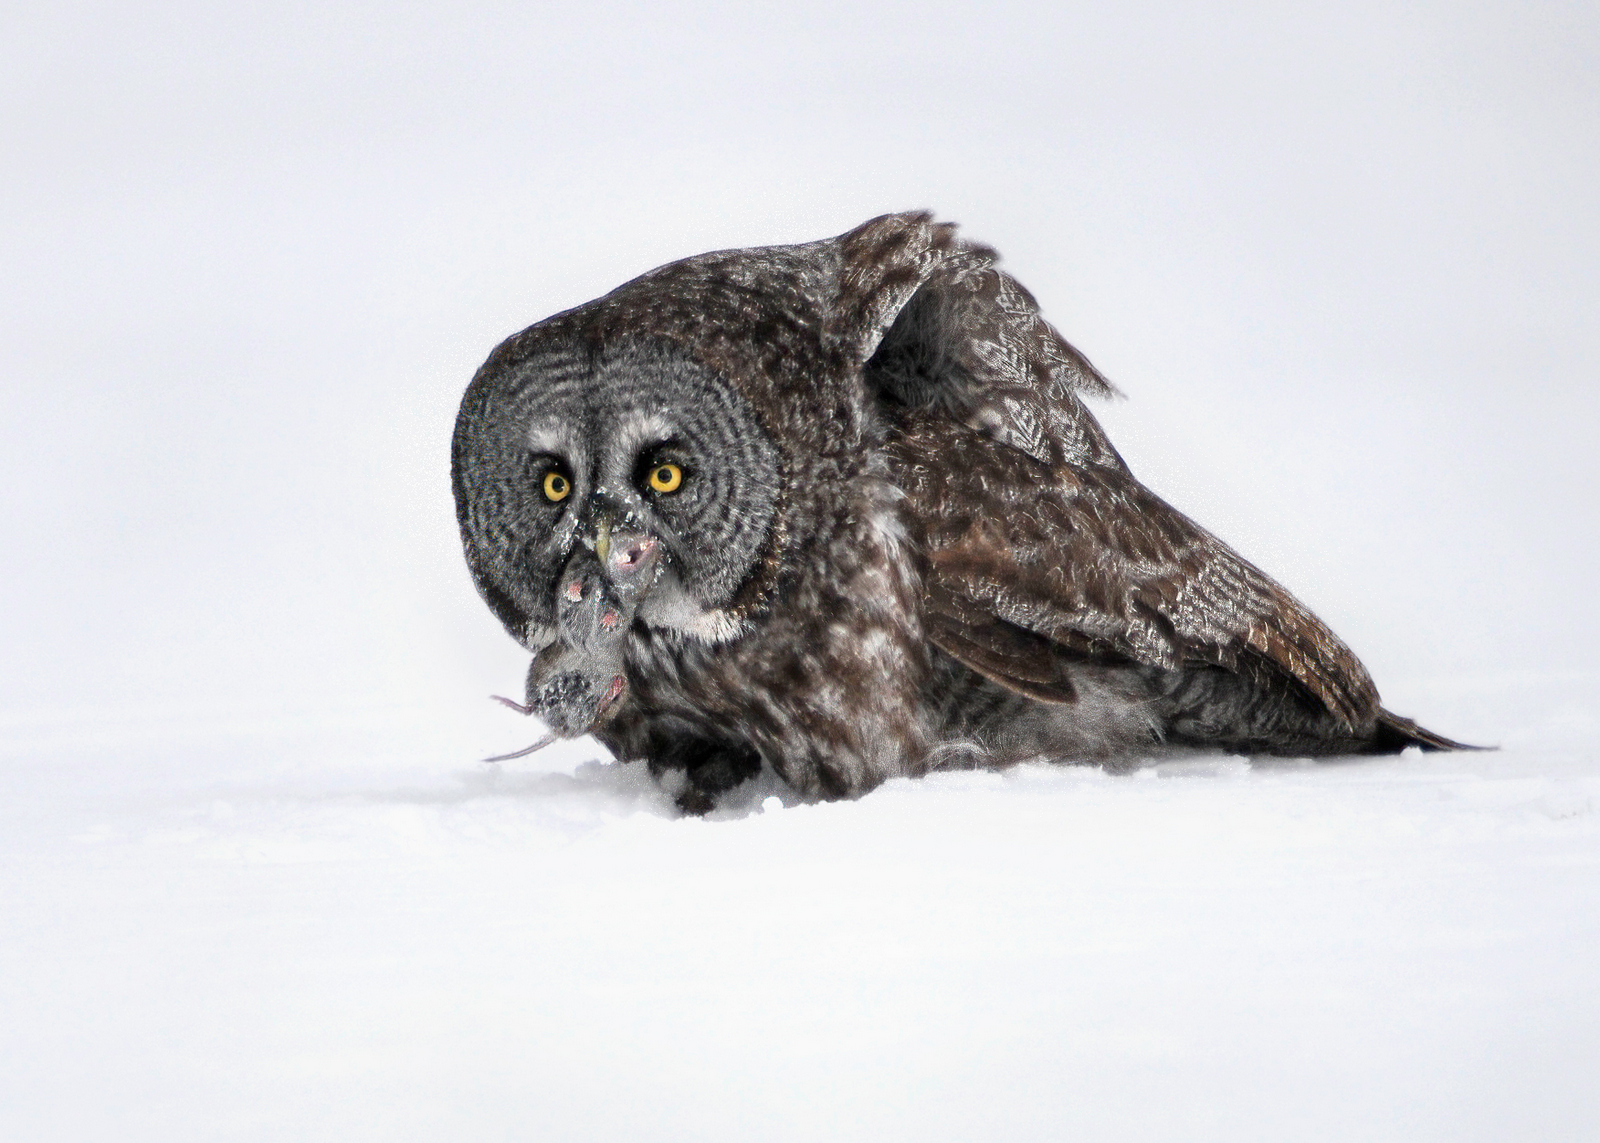
You can read about this adventure here.
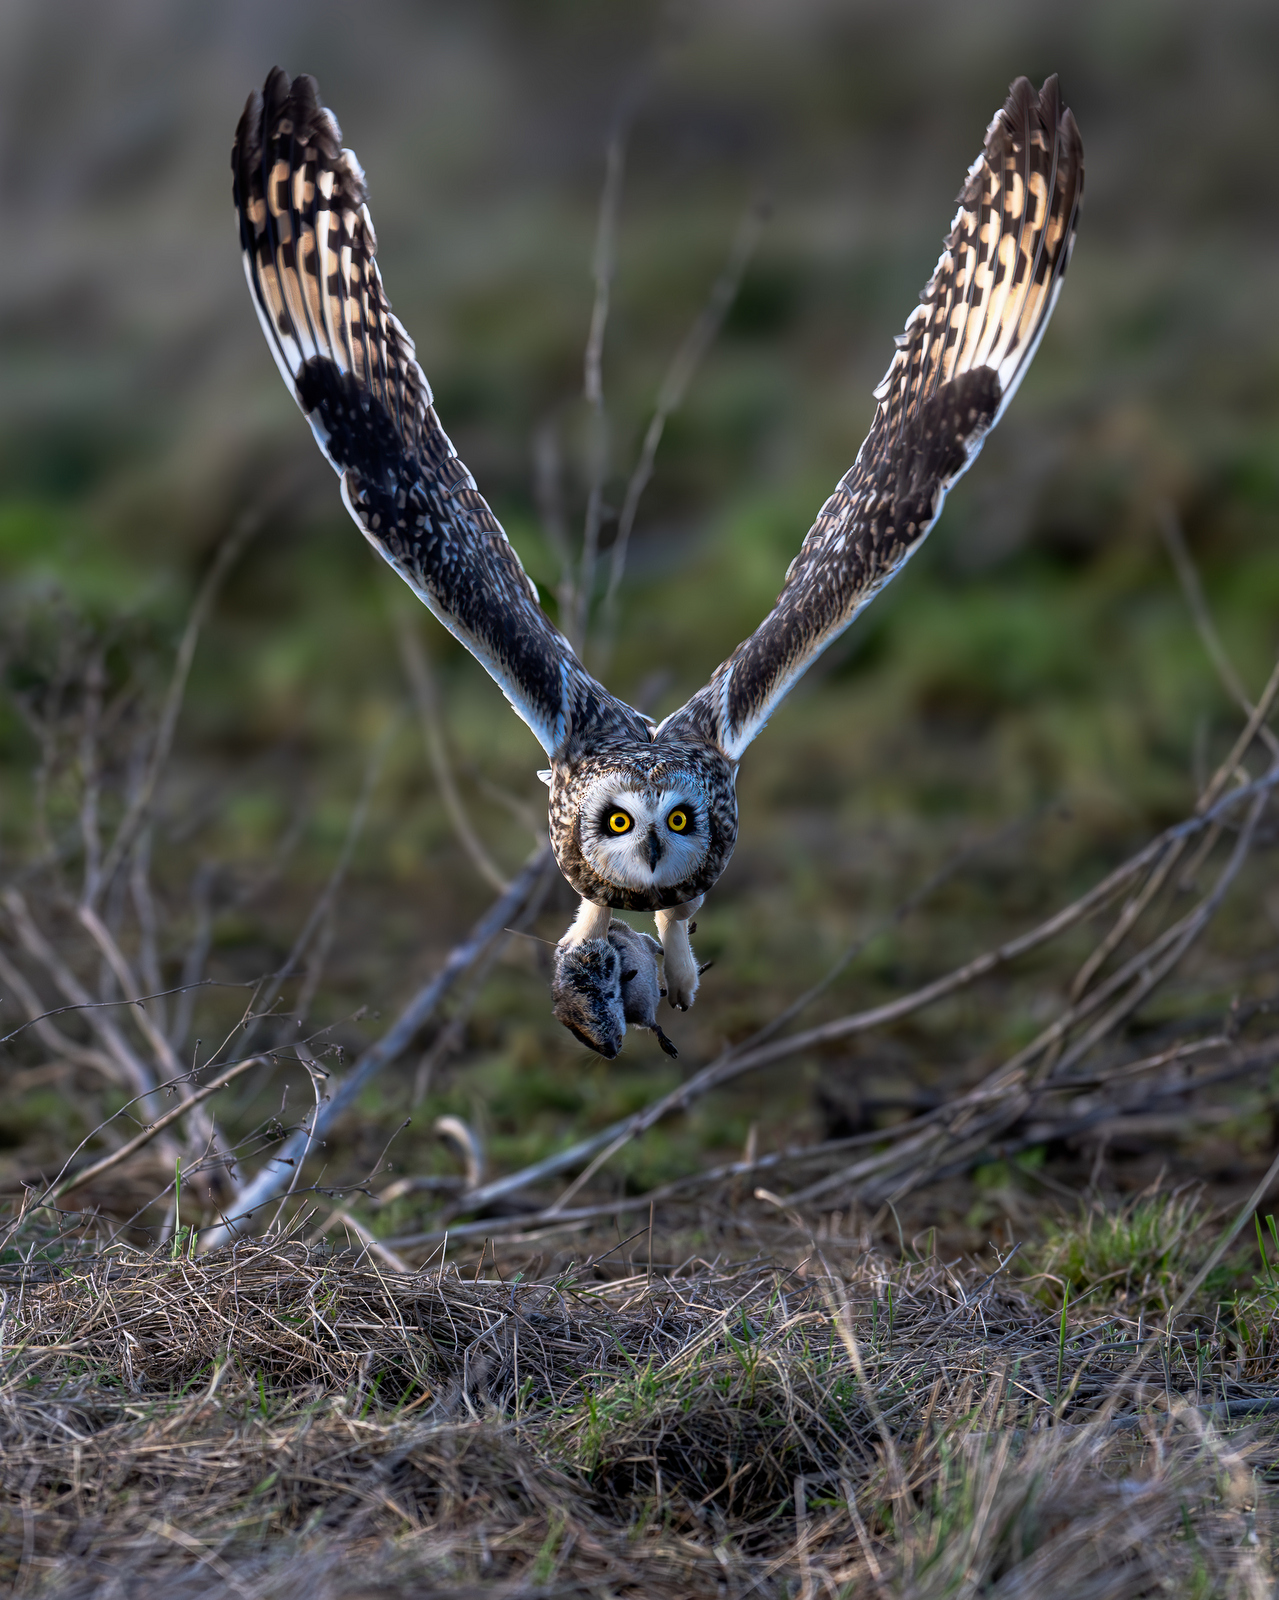
Using an aerial approach to mousing, short-eared owls often glide silently above the grass, listening below. Here is a successful catch:
Other predators that use the mousing technique include weasels, lynx, jackals, some bears, other raptors, servals, and other small felines. Mousing is so popular because small rodents (mice, voles, pocket gophers, etc.) are:
- Abundant
- Energy-rich
- Relatively easy to catch compared to large prey
- Are available year-round
And for many predators, mousing is:
- An efficient “daily calories” strategy
- A way for younger animals to practice hunting skills
- An important survival behavior during the lean seasons
Who knew that “mousing around” was such a vital skill?
Until next month…..michael
Nikon Z9, Nikon 600mm, f/7, 1/2000 sec, ISO 800, EV +0.2/3
Jan
31
Shot of the Month – January 2026
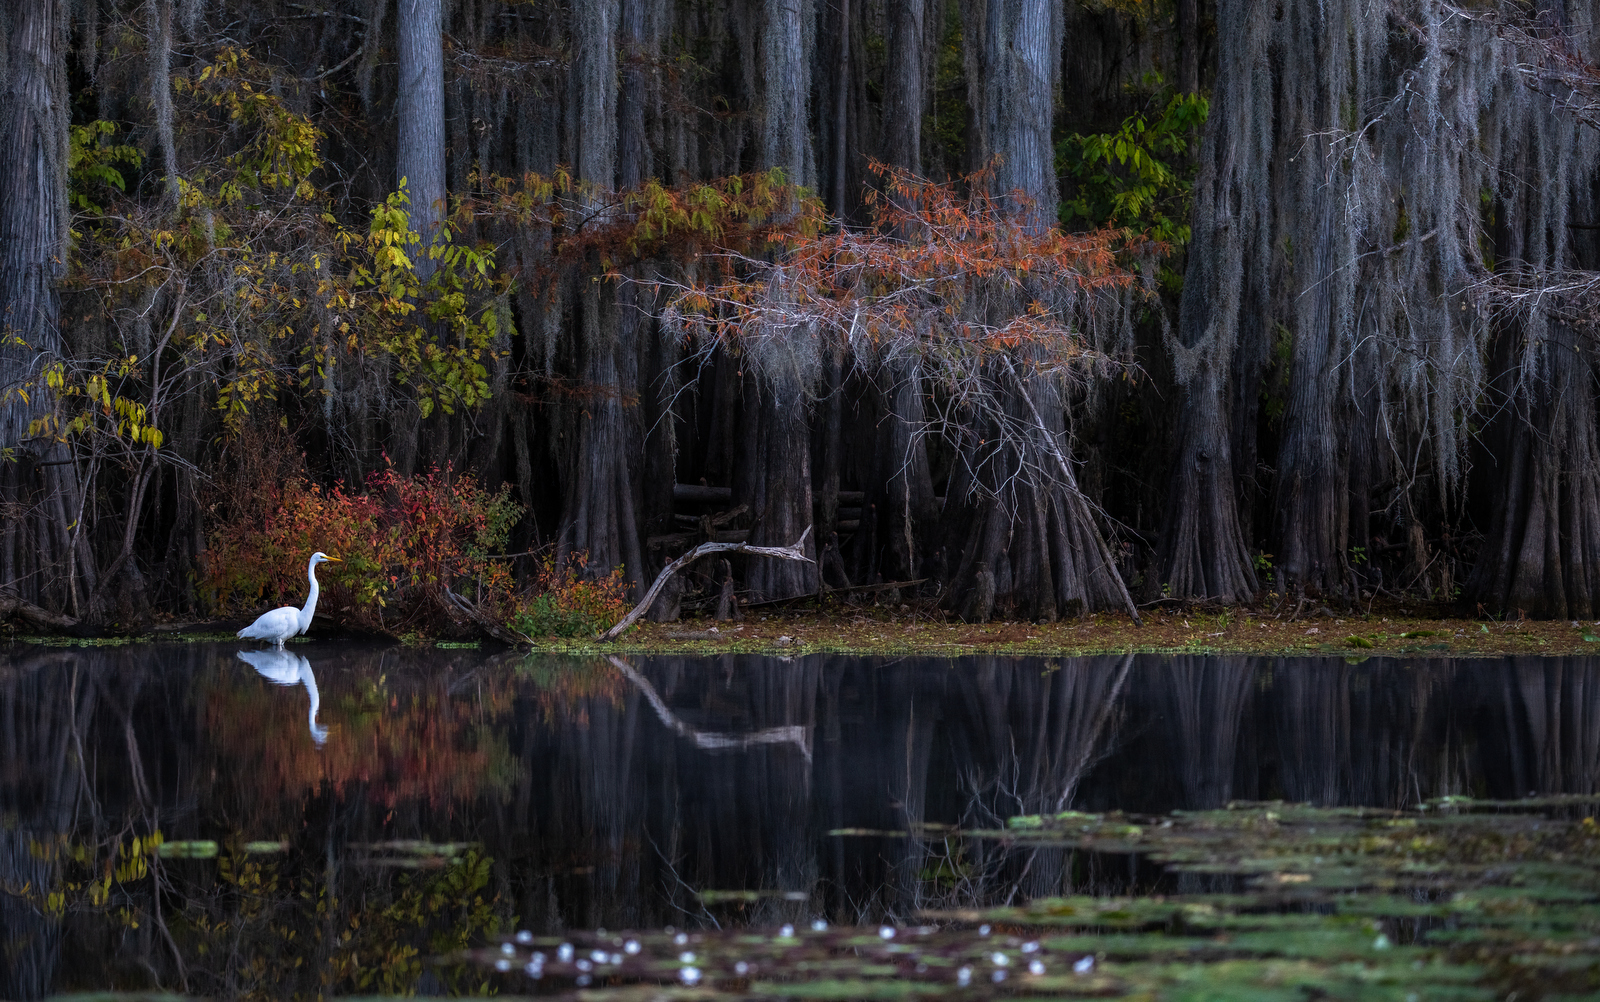
Up long before dawn, I paddled slowly as my kayak cut across the blackened water. Caddo Lake was eerily quiet, and the air was crisp and still. The water’s surface became an ebony mirror. As I glided across the water, I scanned the scene drifting by — this was a landscape photographer’s paradise if you could sharpen your eye and cut through all the visual clutter.
As I came around a corner, I found a Great Egret sitting along the shore waiting for the sun to breach the horizon to begin fishing for a meal. Yes!! I am first a wildlife photographer, so I always feel more comfortable photographing critters. I knew the key here was to compose an image that celebrated both the lovely egret and this magical setting.
For such a complex scene, I wanted to keep both the bird, the foreground, and the background in sharp focus – similar to a classic landscape image. However, shooting from a kayak made this task quite difficult. To have a deep depth of field I needed to use a small aperture. But smaller apertures allow less light to reach the camera so to properly expose the image I would have to leave the shutter open longer (slower shutter speed). On a tripod, this is no problem. But now I was in a kayak that was always moving, even if only a little. To overcome this challenge, I would start each sequence with “faster” shutter speeds, with a corresponding wider aperture (with less depth of field), and then quickly shift to slower and slower shutter speeds, allowing for smaller and smaller apertures (and greater depth of field) until I could no longer hand-hold the camera and get a sharp image. I also experimented with ISO levels – the higher the level, the more sensitive the image sensor, allowing for faster shutter speeds, but at the risk of adding more noise into the image.
As the egret sat near the shore, I paddled along the entire bank, looking for the best composition and lighting. Once spotted, I circled back and found my spot. Ooops, drifted too far. Paddle back. No, too far again. Now I am drifting in the other direction. Ok, quick, put the paddle down! Compose and fire off as many shots as possible while shifting aperture and shutter speeds. Ok, now we have drifted too far. Camera down and paddle back to the best shooting location. I repeated this over and over and over…it was exhausting.
Over time, the egret would fly a bit further down along the shoreline. The good news was that I now had a fresh composition to work with. The bad news was that I had to repeat the entire composition process again…oy vey.
I easily spent more than 45 minutes observing and photographing this egret until he moved into the lovely scene you see above. I had been starting to feel guilty about spending so much time doing “wildlife photography” when I was here to do landscape photography. But then it all came together.
I love this composition. The white egret is perfectly highlighted as he stands in front of the colorful bush. We see the fall colors bursting in sharp contrast to the otherwise dark and somber mood of this pre-dawn scene. The colorless bald cypress trees in the background, draped in Spanish moss, add a mysterious gothic overlay and perfectly capture the unique feel and atmosphere of Caddo Lake. The somber water mirrors the shoreline and subtly conveys the tranquility of the scene. The lily pads in the front, right corner lead the eye into the frame and add visual balance to the composition.
In short, it is a nice picture. Feeling exhilarated, I paddled off deeper into the bayou in search of more traditional landscape scenes…
Caddo Lake? See last month’s post for the deets on this wondrous locale.
Until next month….michael
Nikon Z9, Nikon 100-400 f/4.5-5.6 (@105mm), f/5, 1/320 sec, ISO 1000
Dec
31
Shot of the Month – December 2025
On the map, Caddo Lake is on the border between Texas and Louisiana as shown here:
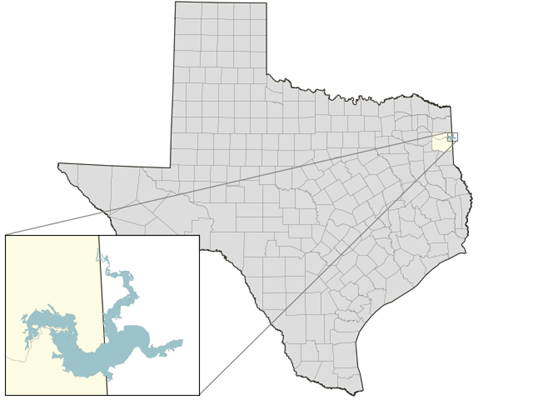
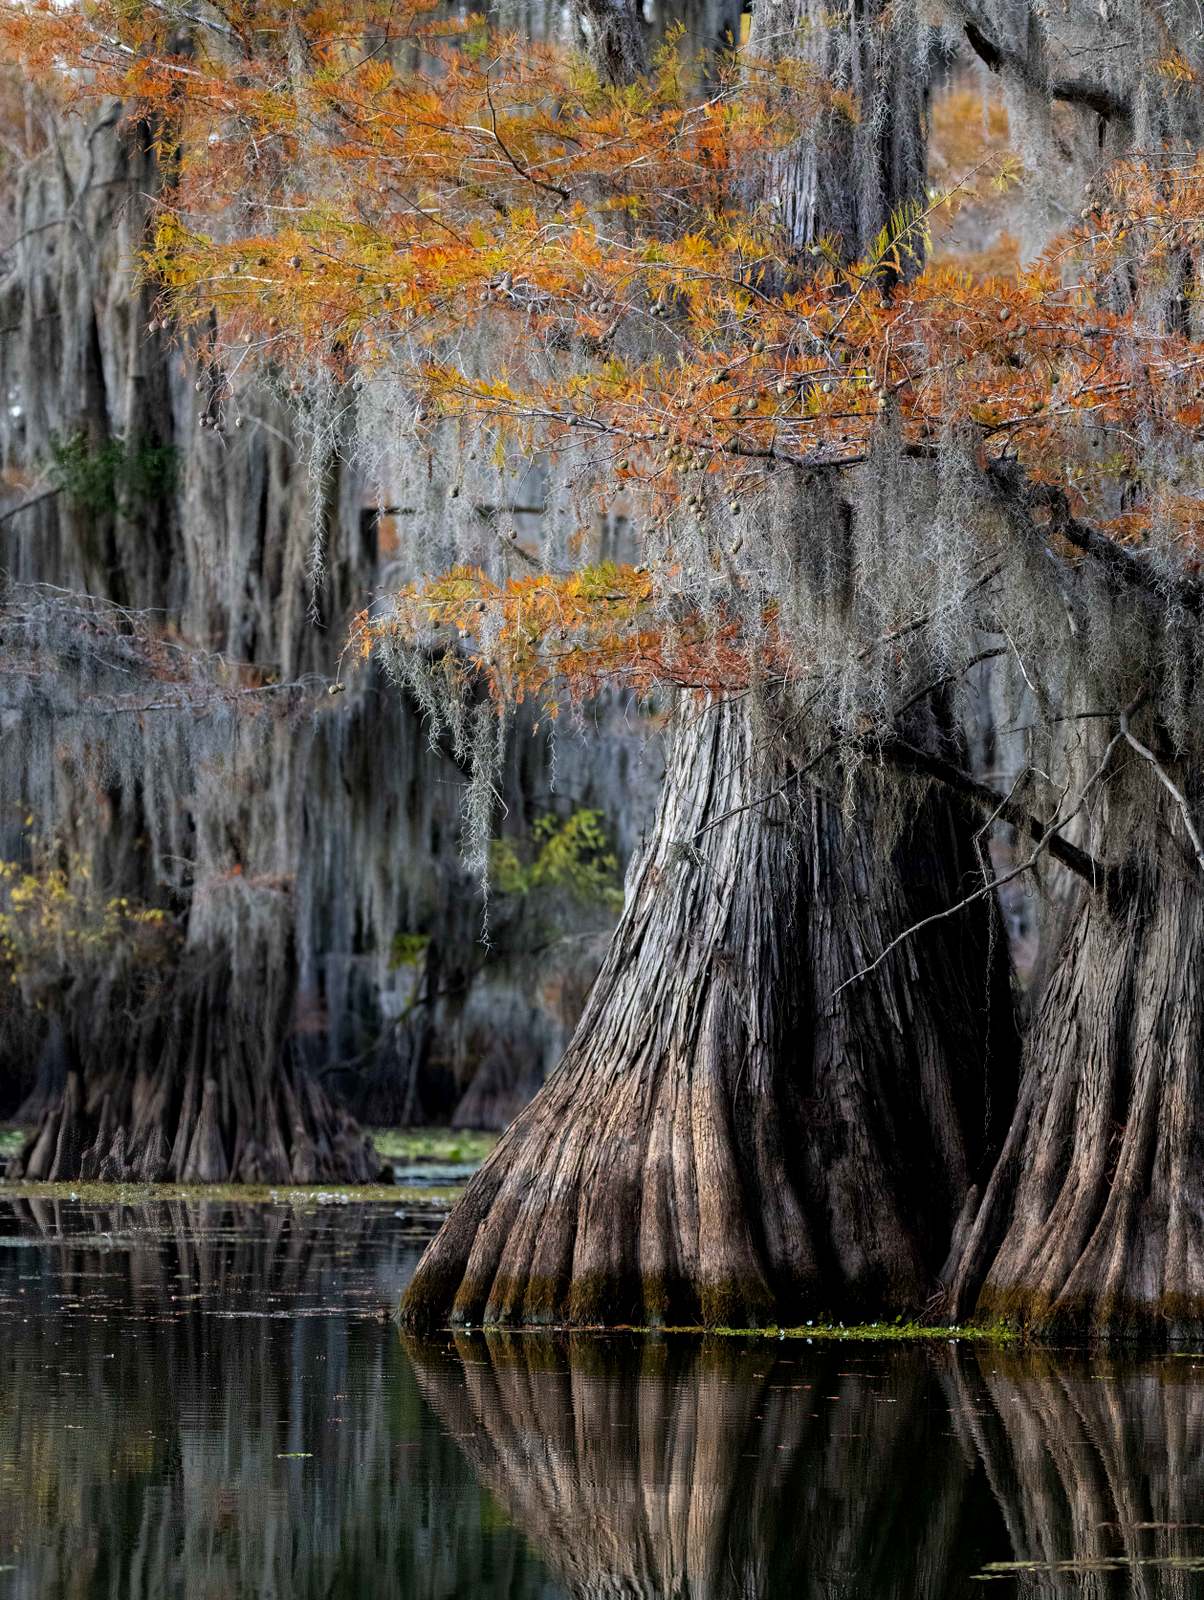
But from behind a camera, Caddo Lake feels like a place only found in dreams and fairy tales. The bayou is dominated by the bald cypress tree and in the fall, these trees are covered in Spanish moss while the leaves transform into hues of copper, rust, orange, and cinnamon brown. In the early morning, fog can hover just above the water, adding to the mystery. One is teleported into a unique, magical landscape of color, textures, and abstract shapes and reflections.
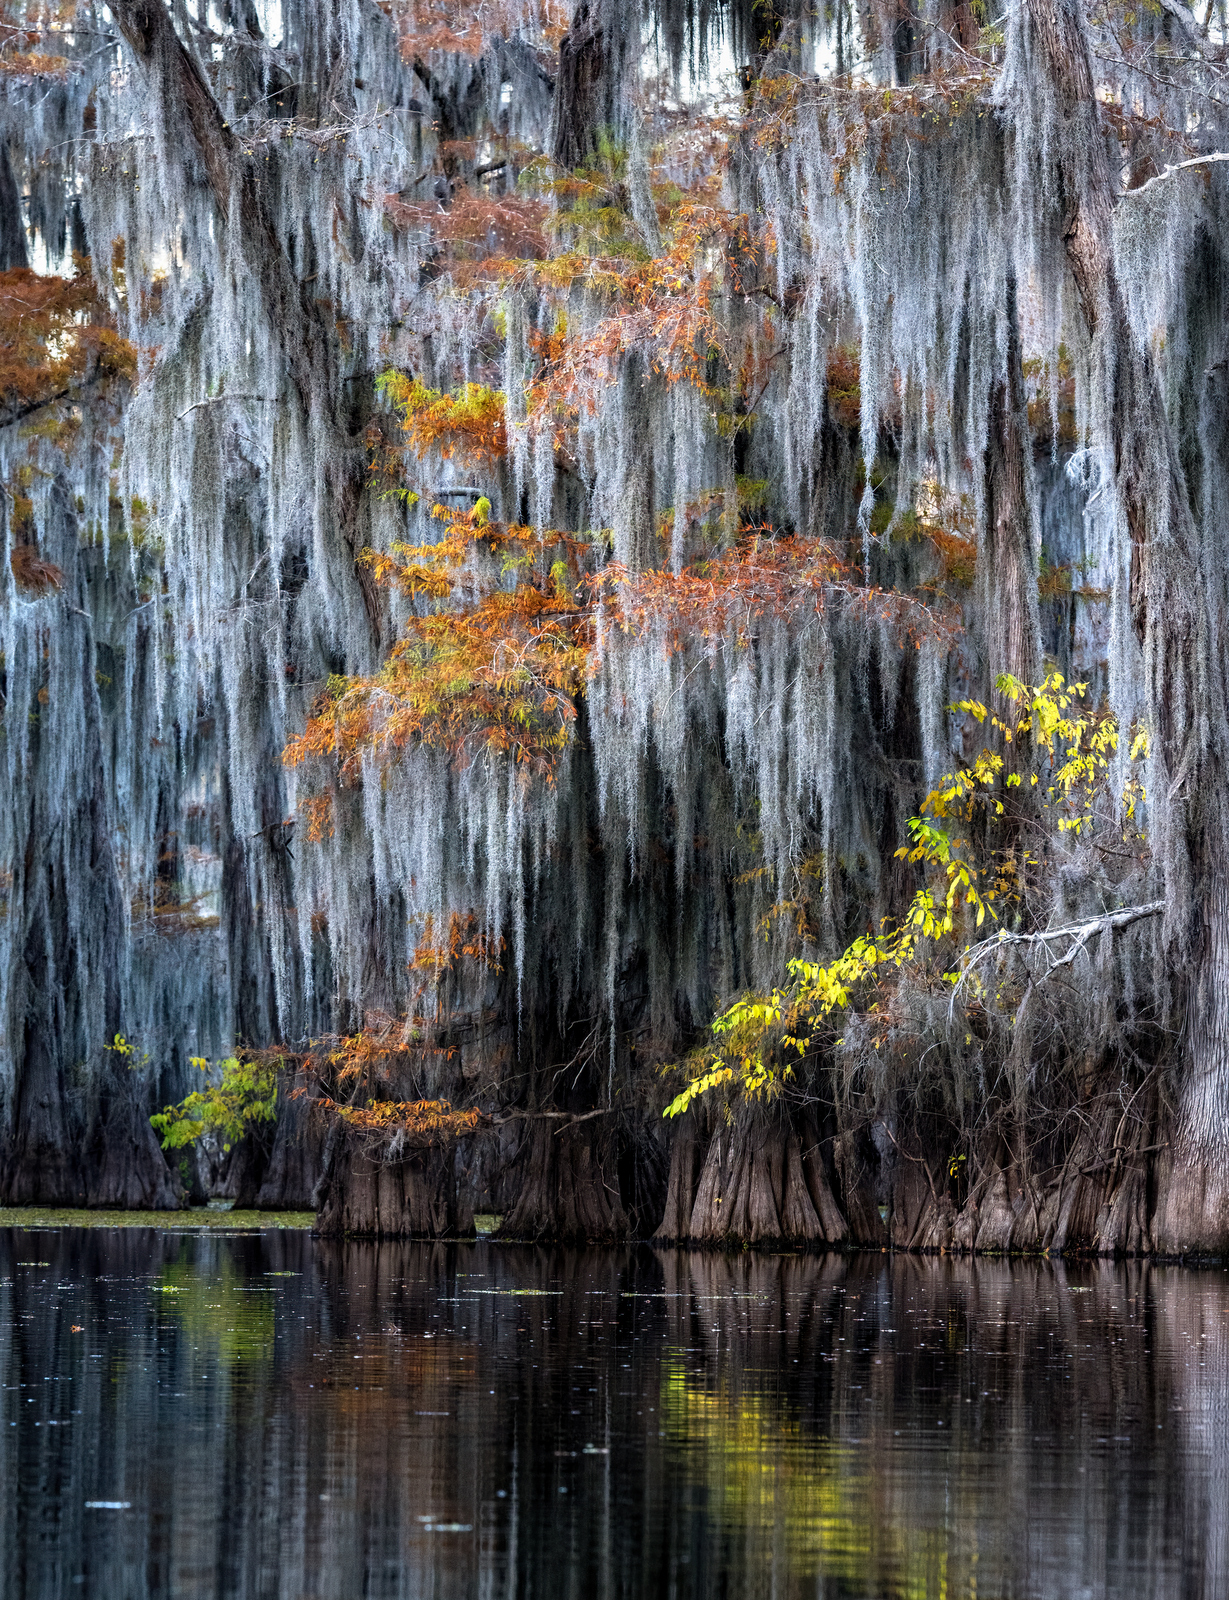
Drifting on a kayak across the still water at sunrise is a balm for the soul unless you are trying to photograph it. Around every corner is an explosion of shapes and colors and contrasting textures – the fatal error is to try and capture it all in one photo. You must really study a scene to find the right mix of elements and avoid a cacophony of sights that create a visual mess.
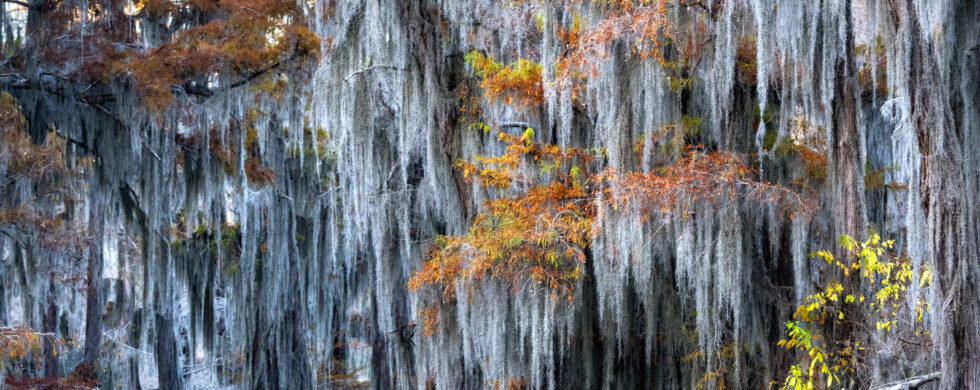
In the image above, the long curtains of Spanish moss offer a delicious color and textural contrast to the orange and yellow leaves. The dark water provides a nice canvas for reflections of the color above.
The massive flaired trunks of the bald cypress descend directly into the water, creating wonderful symmetrical patterns when the water is calm, as shown below.
 The orange leaves, Spanish moss, and seed pods create a richly textured “oil painting” effect in the image above.
As the sun rises, the race is on to find delicate side lighting that brings color, texture, and contrast to life:
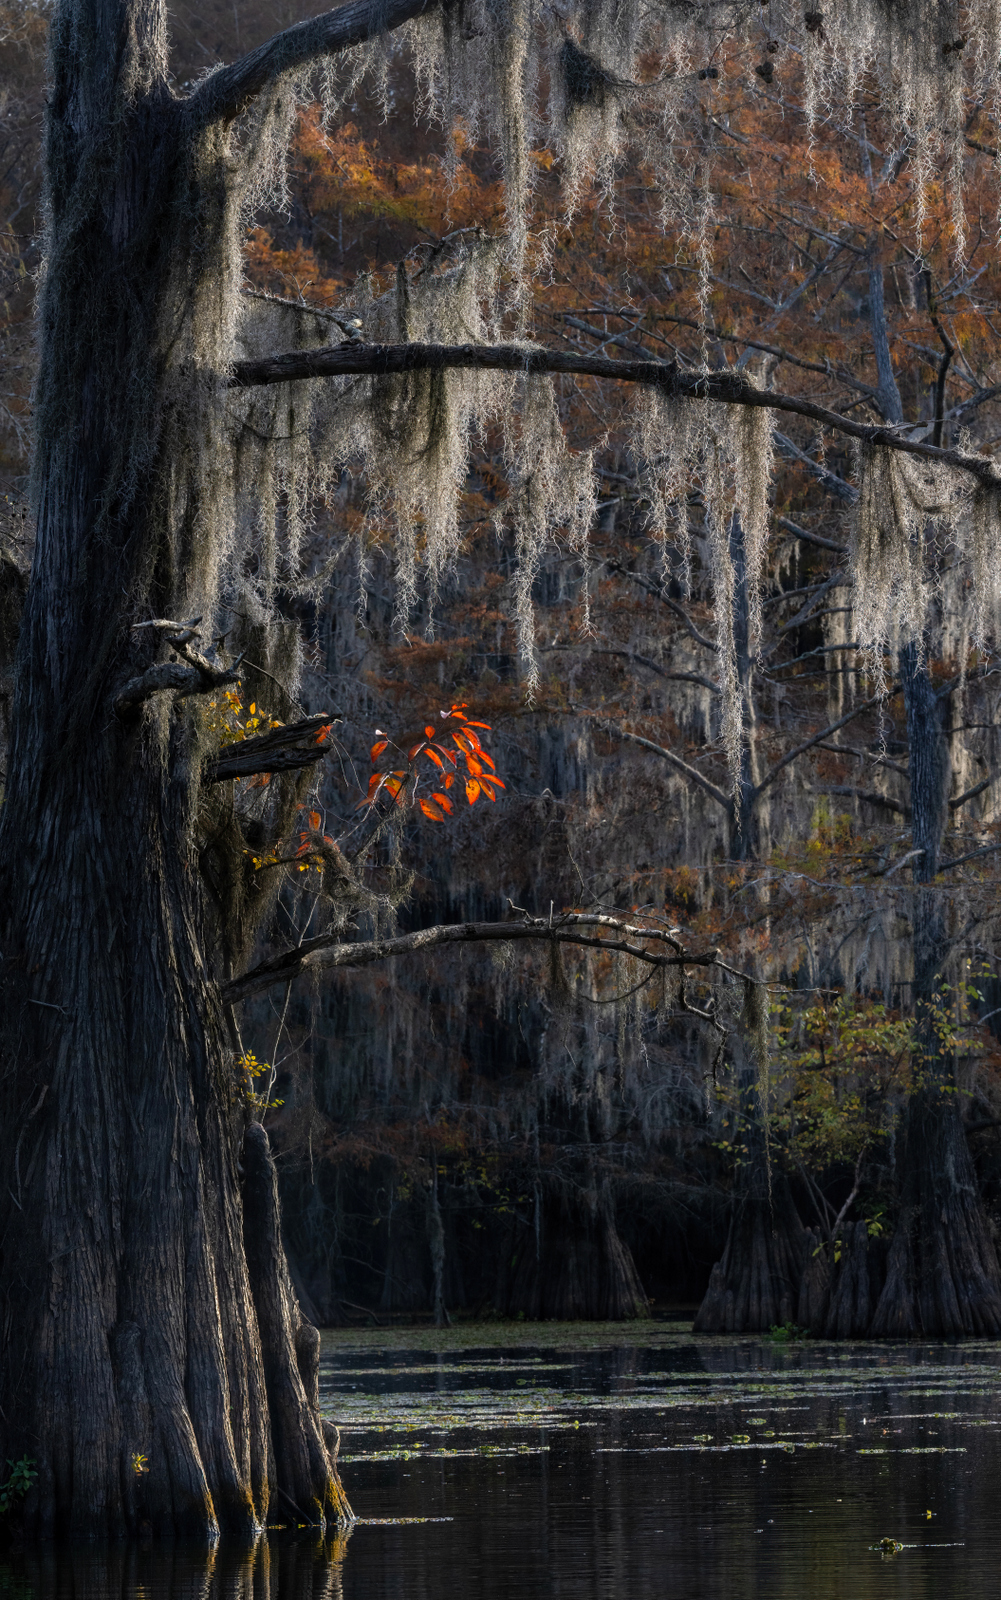
In the next image, I liked how the reflection of the tree leads the eye down the solemn tunnel past the striking caonopy of color:
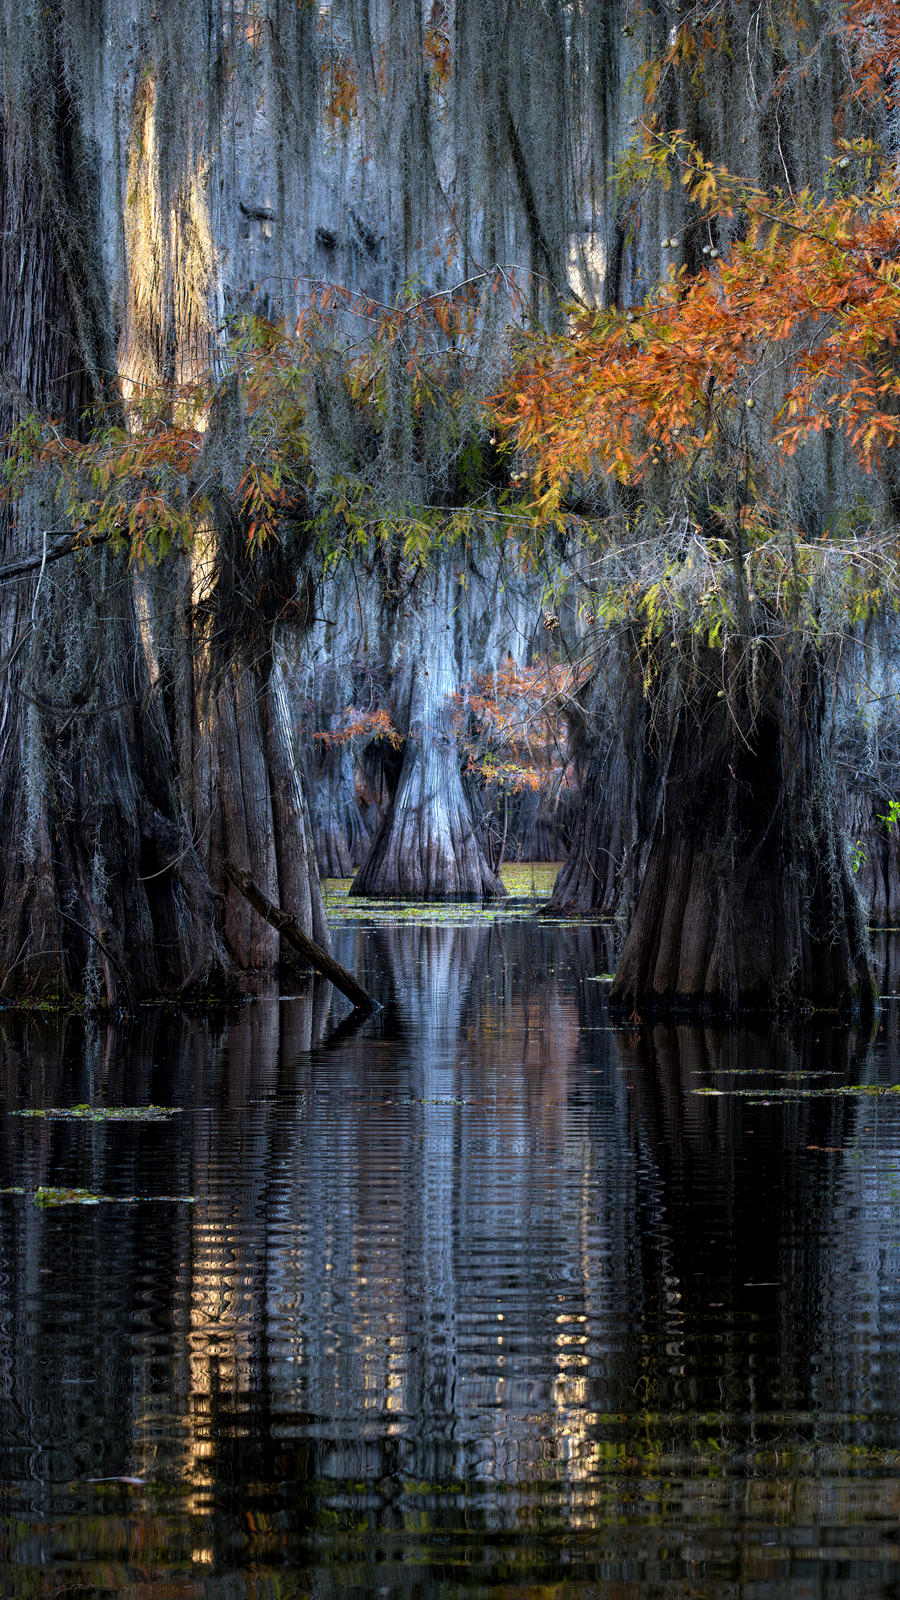
My eye was instantly drawn to the colorful bouquet lurking in the distance:
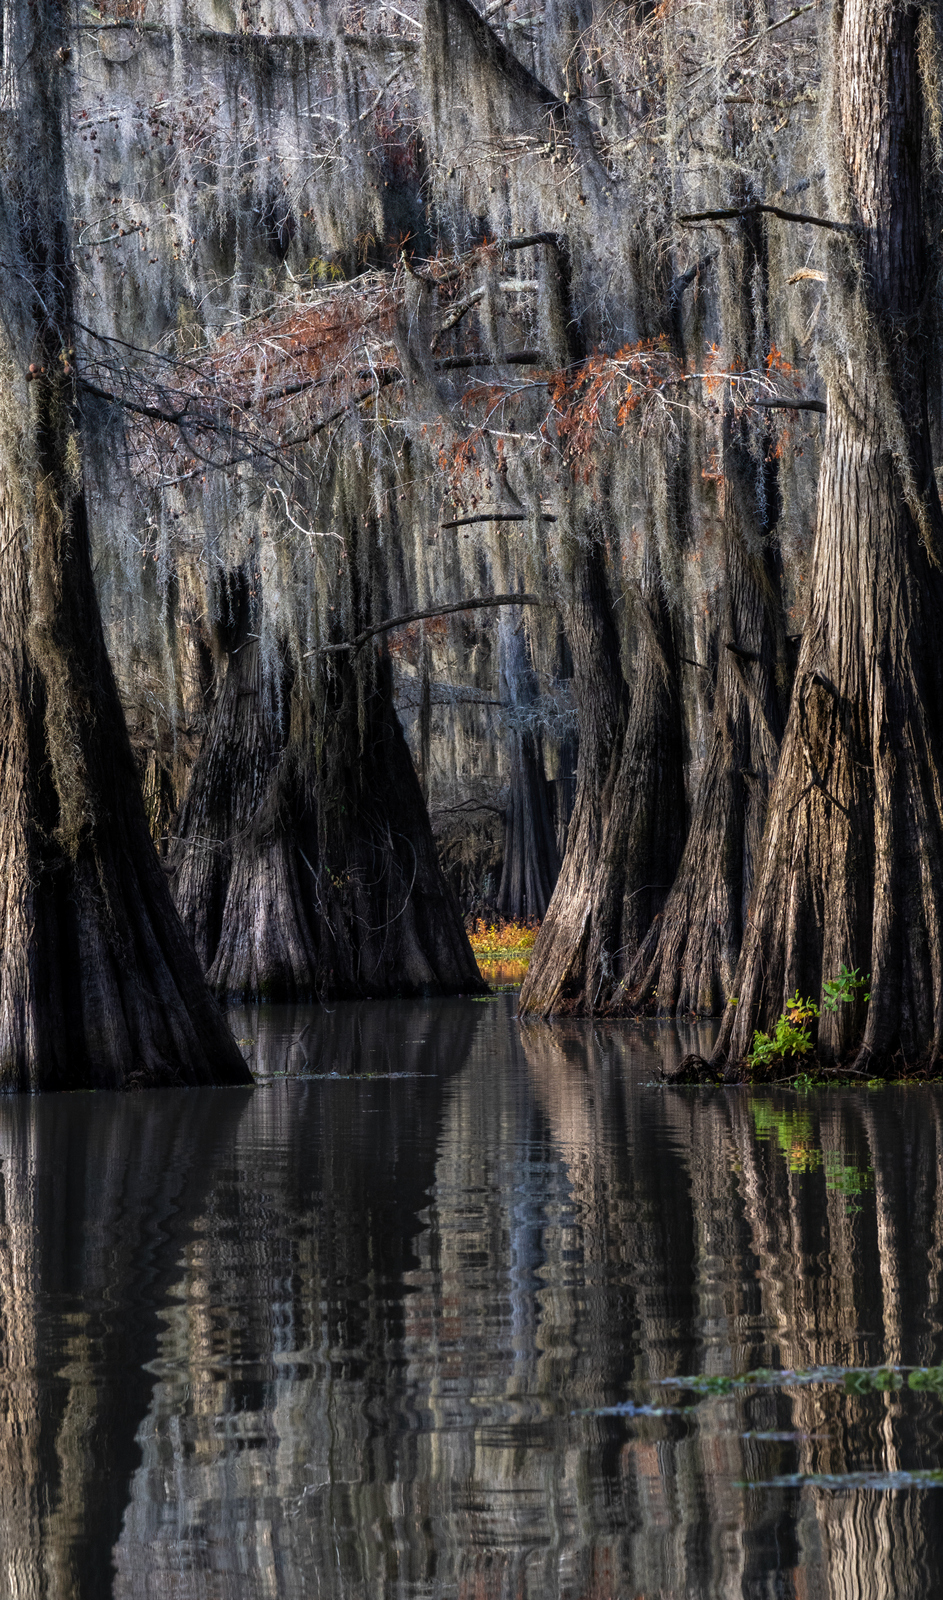
Here is the same image, but with less water visible to celebrate the rich texture and delicate hues of the canopy above:
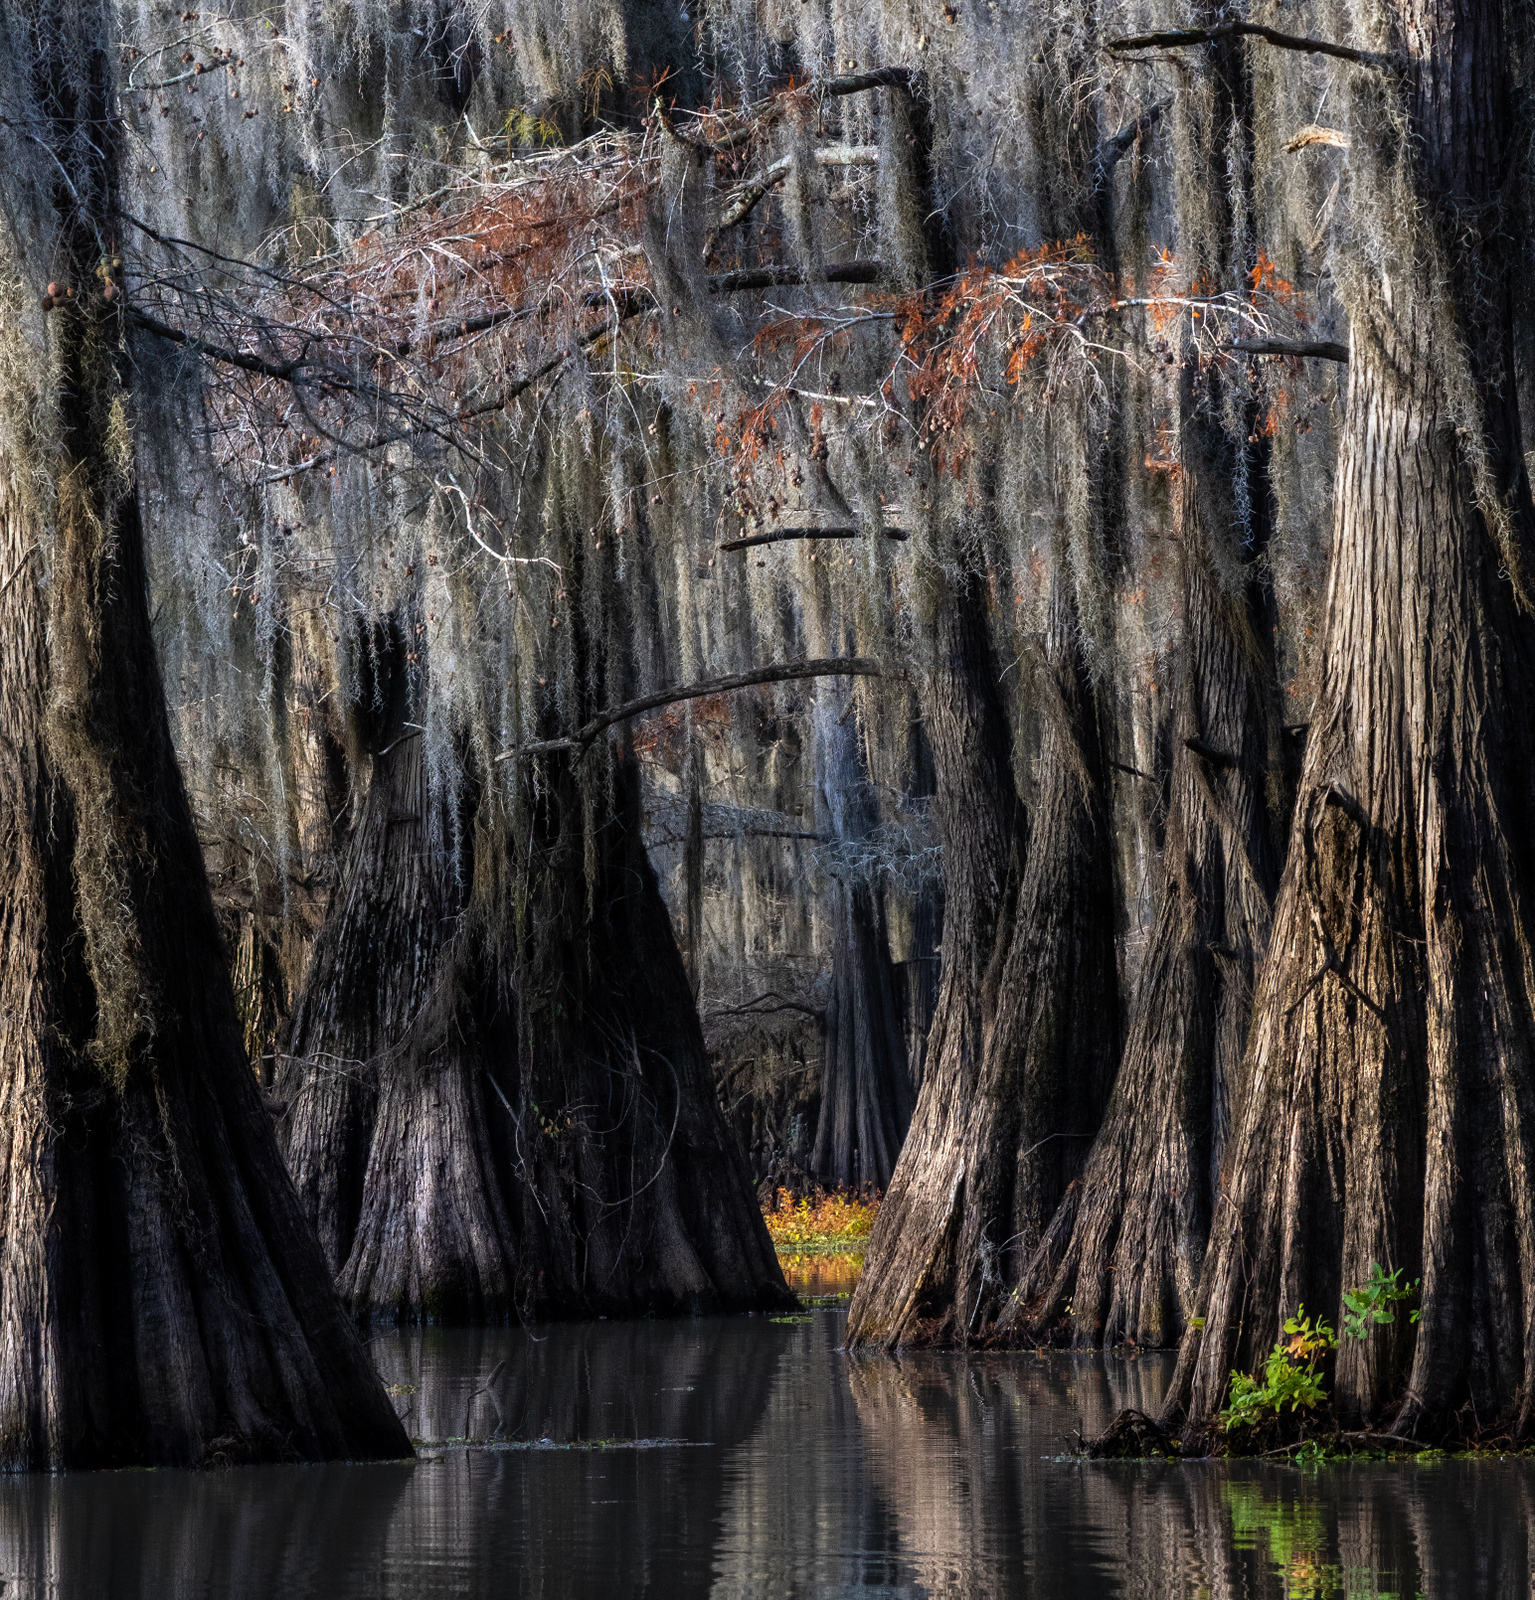
Caddo Lake offers a gothic, moody, atmospheric take on fall photography that will leave you filled with awe and tranquility – just don’t tip the kayak.
Prefer “classic” fall, a la New England? Click here. Or here.
Prefer a Pacific Northwest take on autumn color? Click here.
Mother Nature has something for everyone.
Until next month….michael
Nikon Z9, Nikon 100-400 (@185mm), f/11, 1/80s, ISO 900
Nov
30
Shot of the Month – November 2025
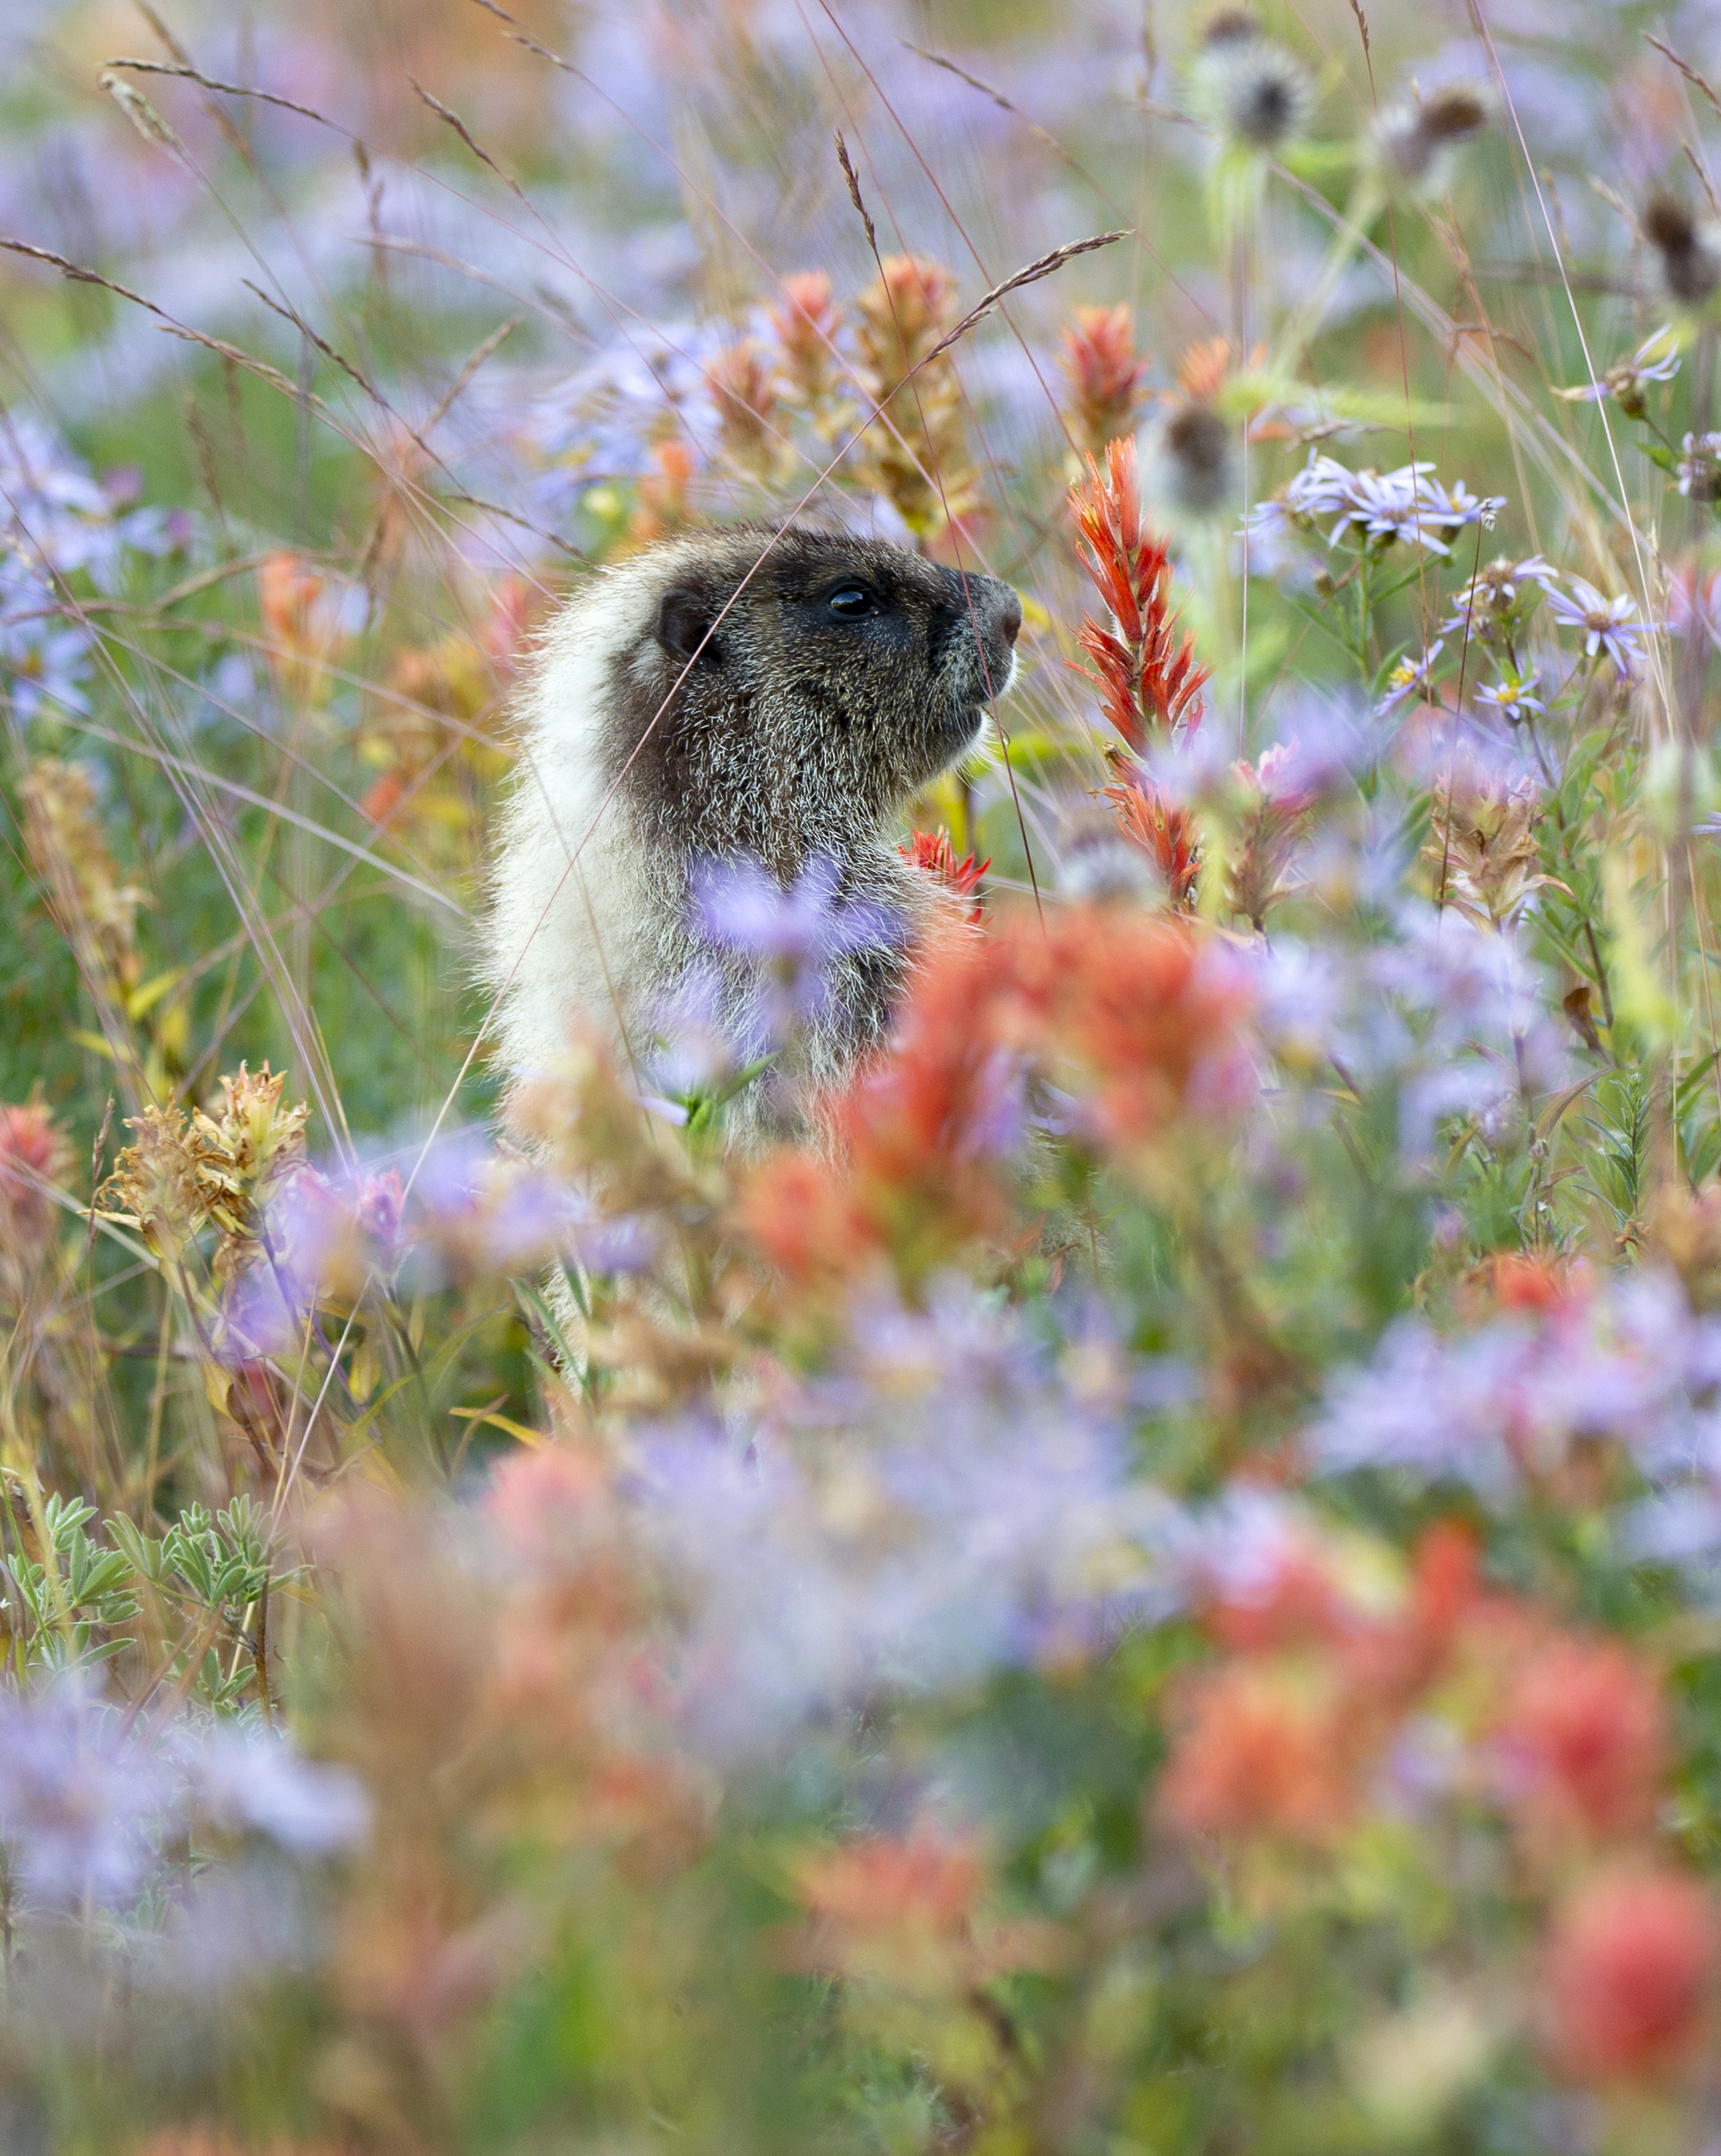
If you visit Mt. Rainier in late summer, the nearby fields and hillsides can be awash in color as mountain flowers rapidly bloom to celebrate the brief respite from the cold and snow. Below we see a Hoary Marmot up to his eyeballs in a cacophony of assorted wildflowers at peak bloom (that he is about to eat!).
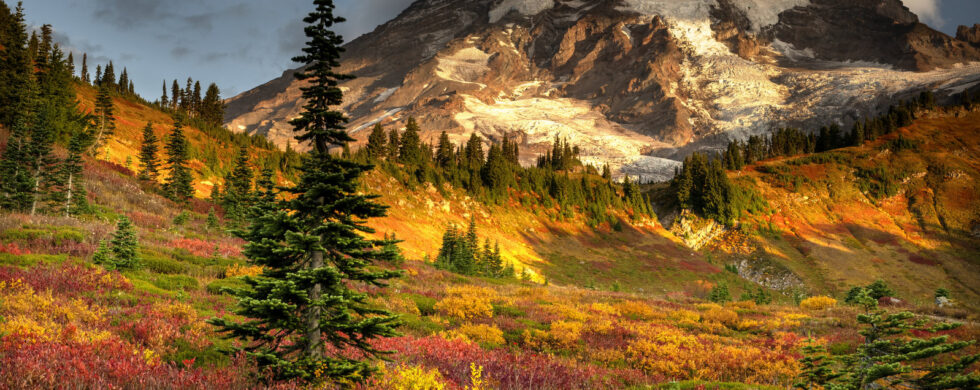
Visit in the fall, and you will find the mountain yet again awash in color of a different sort:
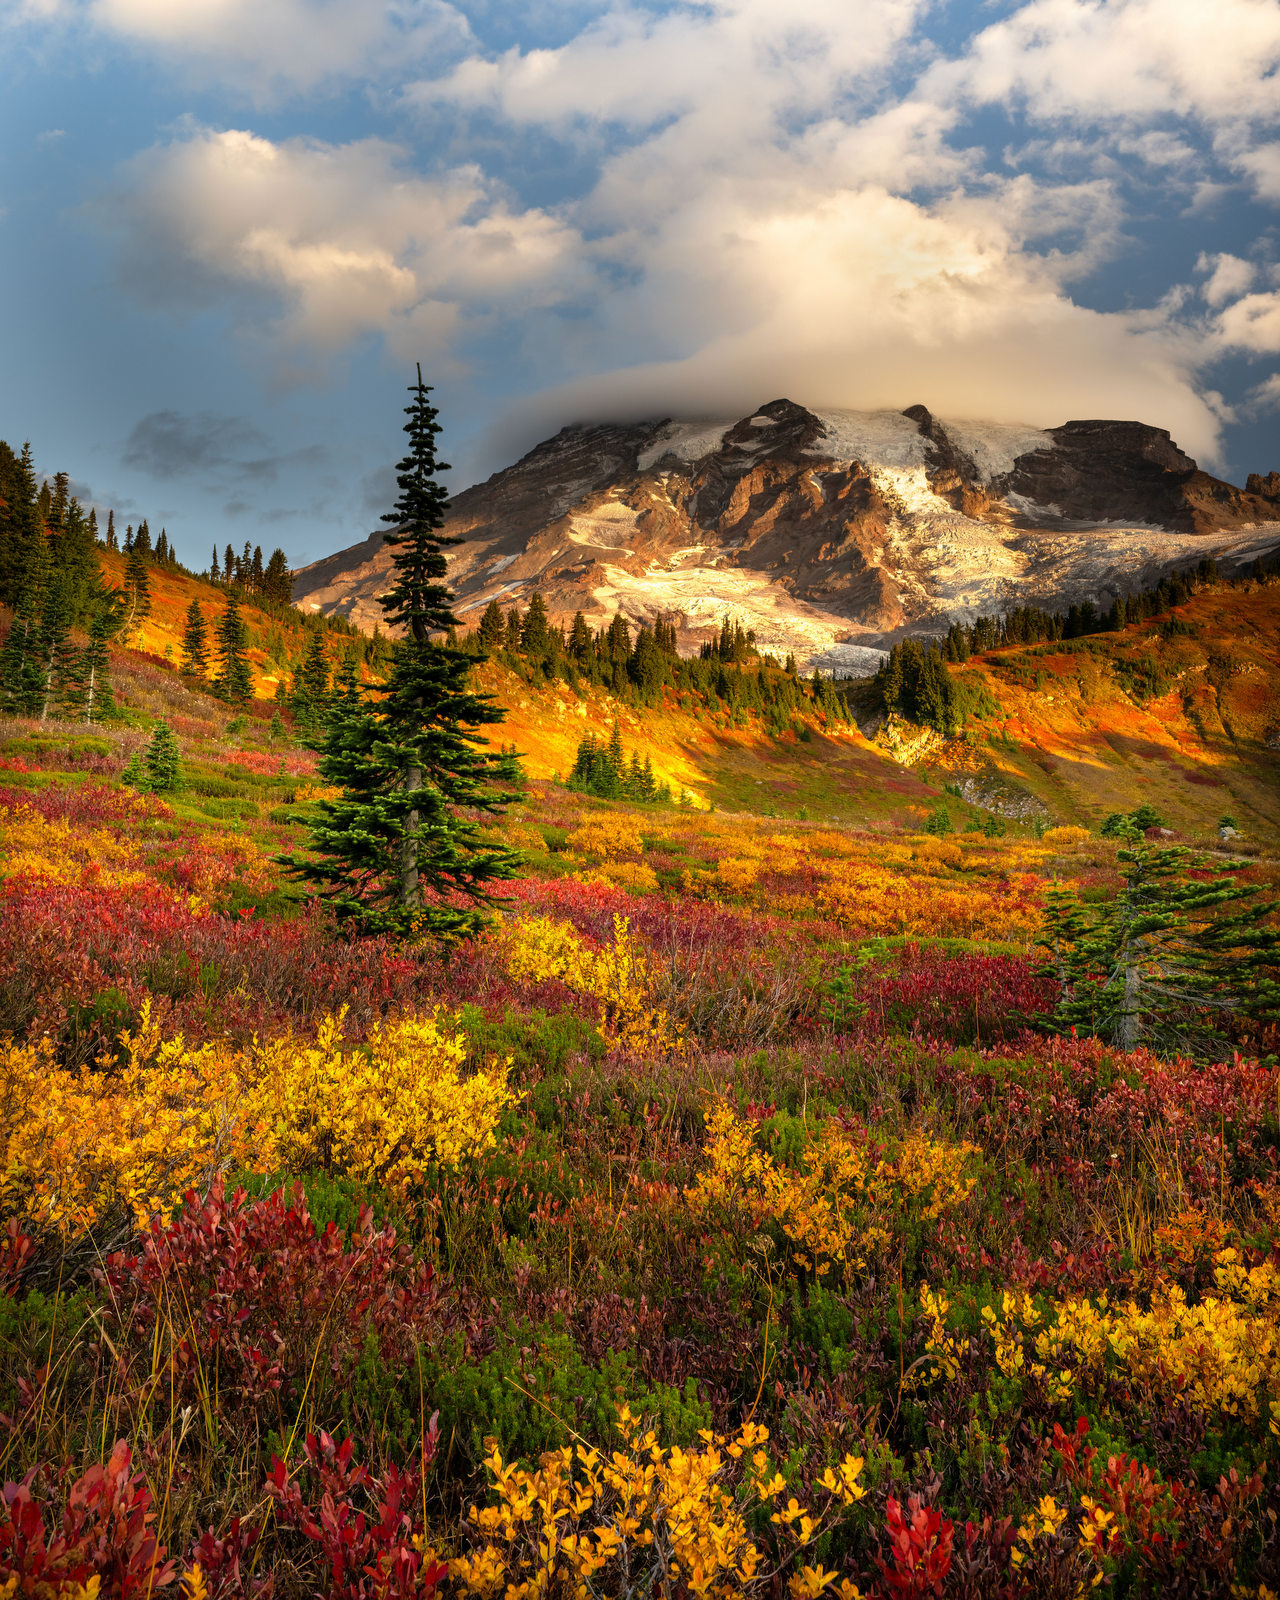
As you may have noted, the fall colors here are quite different than those found in the Northeastern USA. To enjoy the autumn colors there, one must look upward toward the sky as the color is found (mostly) in the trees.
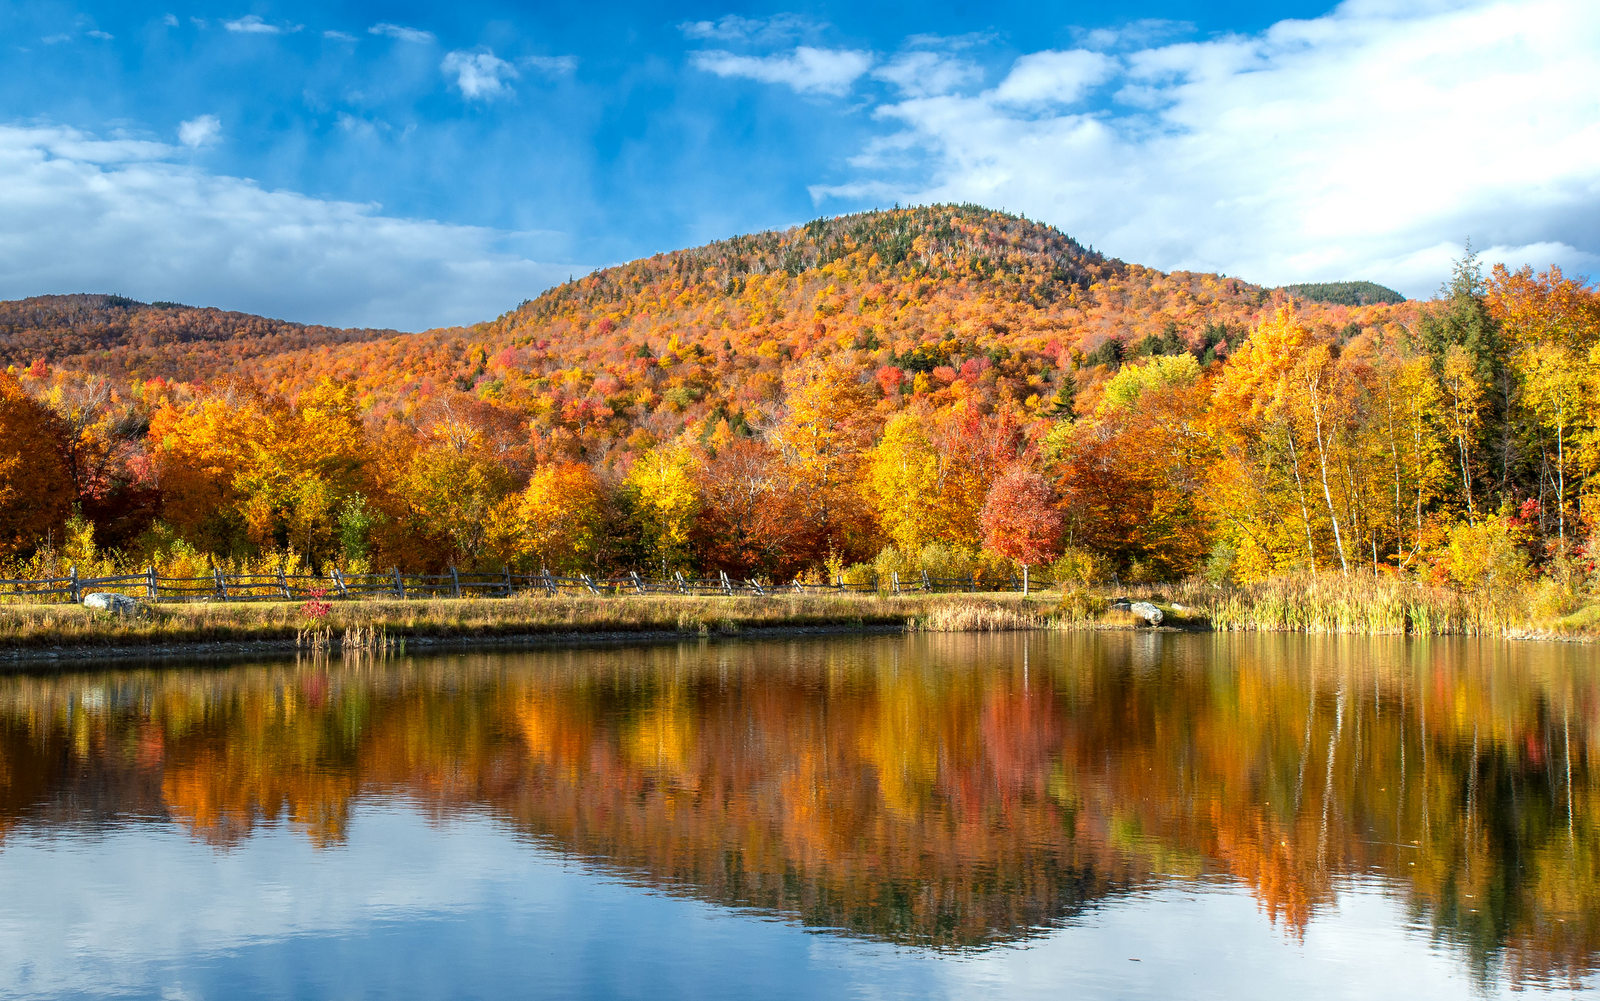
A scene from Vermont:
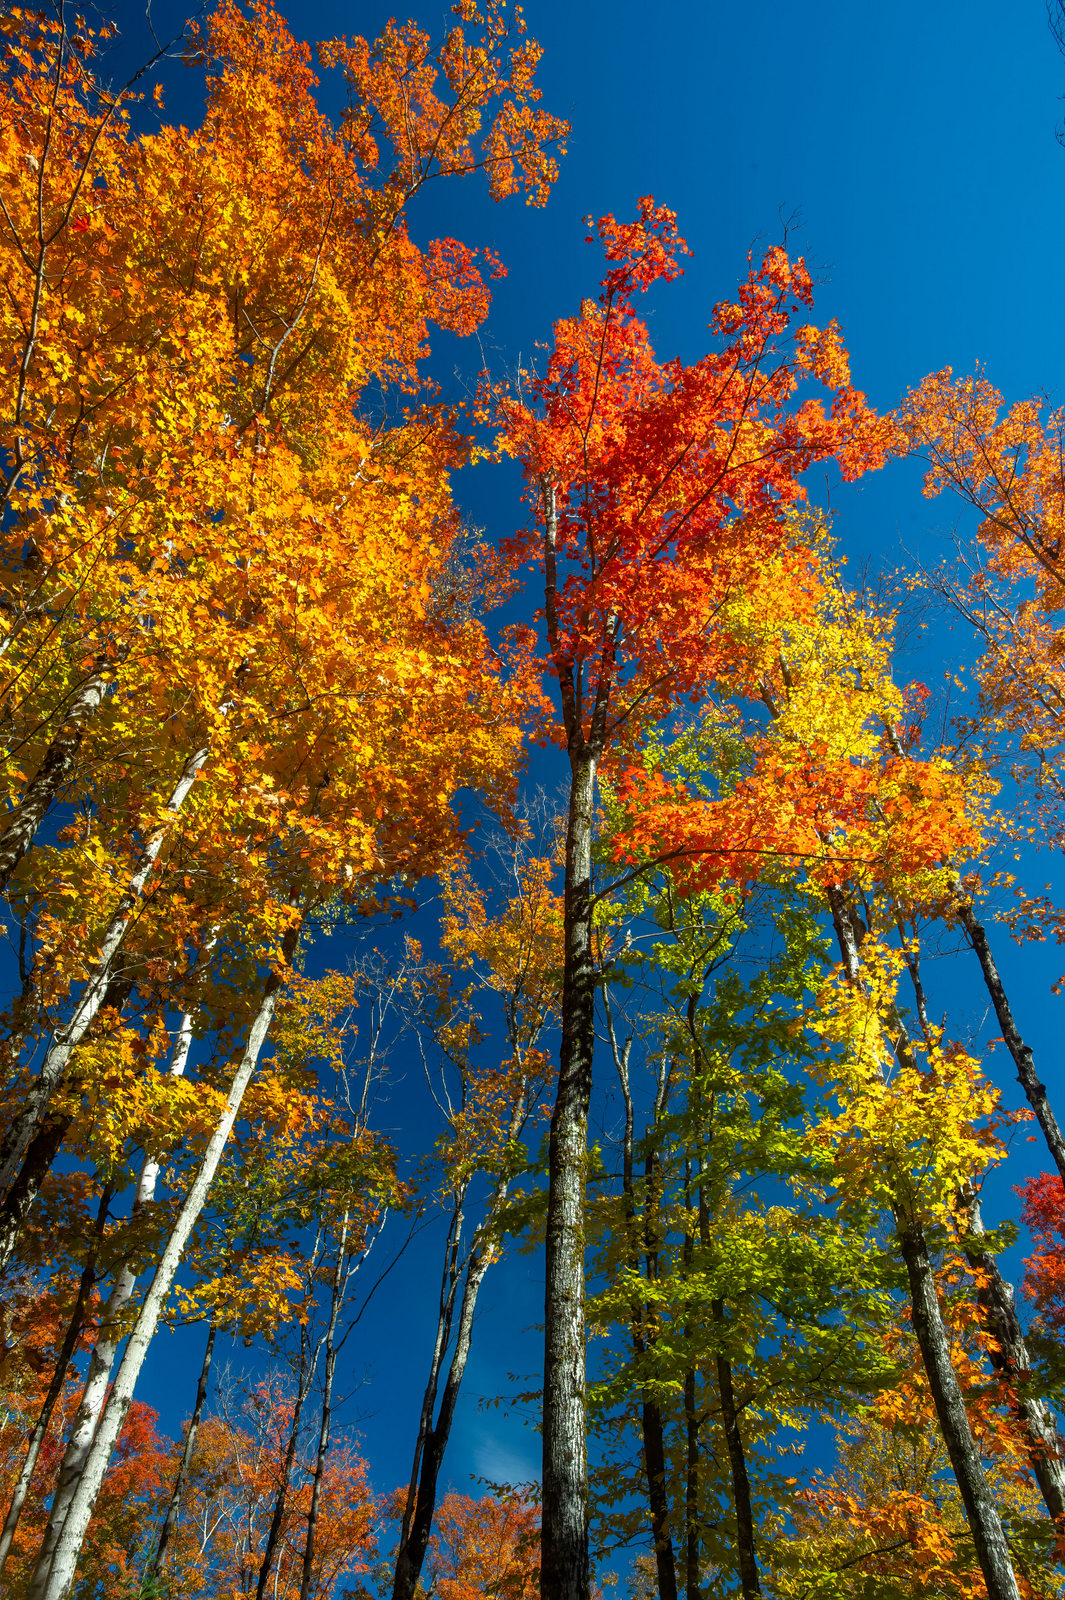
In the Northeast, the stunning fall colors come from a mix of trees:
- Sugar Maples (can turn brilliant yellows, oranges, and reds)
- Red Maples (produce intense reds)
- Beech Trees (golden-yellow)
- Oaks (deep reds and russets)
- Yellow Birch (bright yellows)
These trees can dominate the landscape, creating a wondrous, colorful canopy:
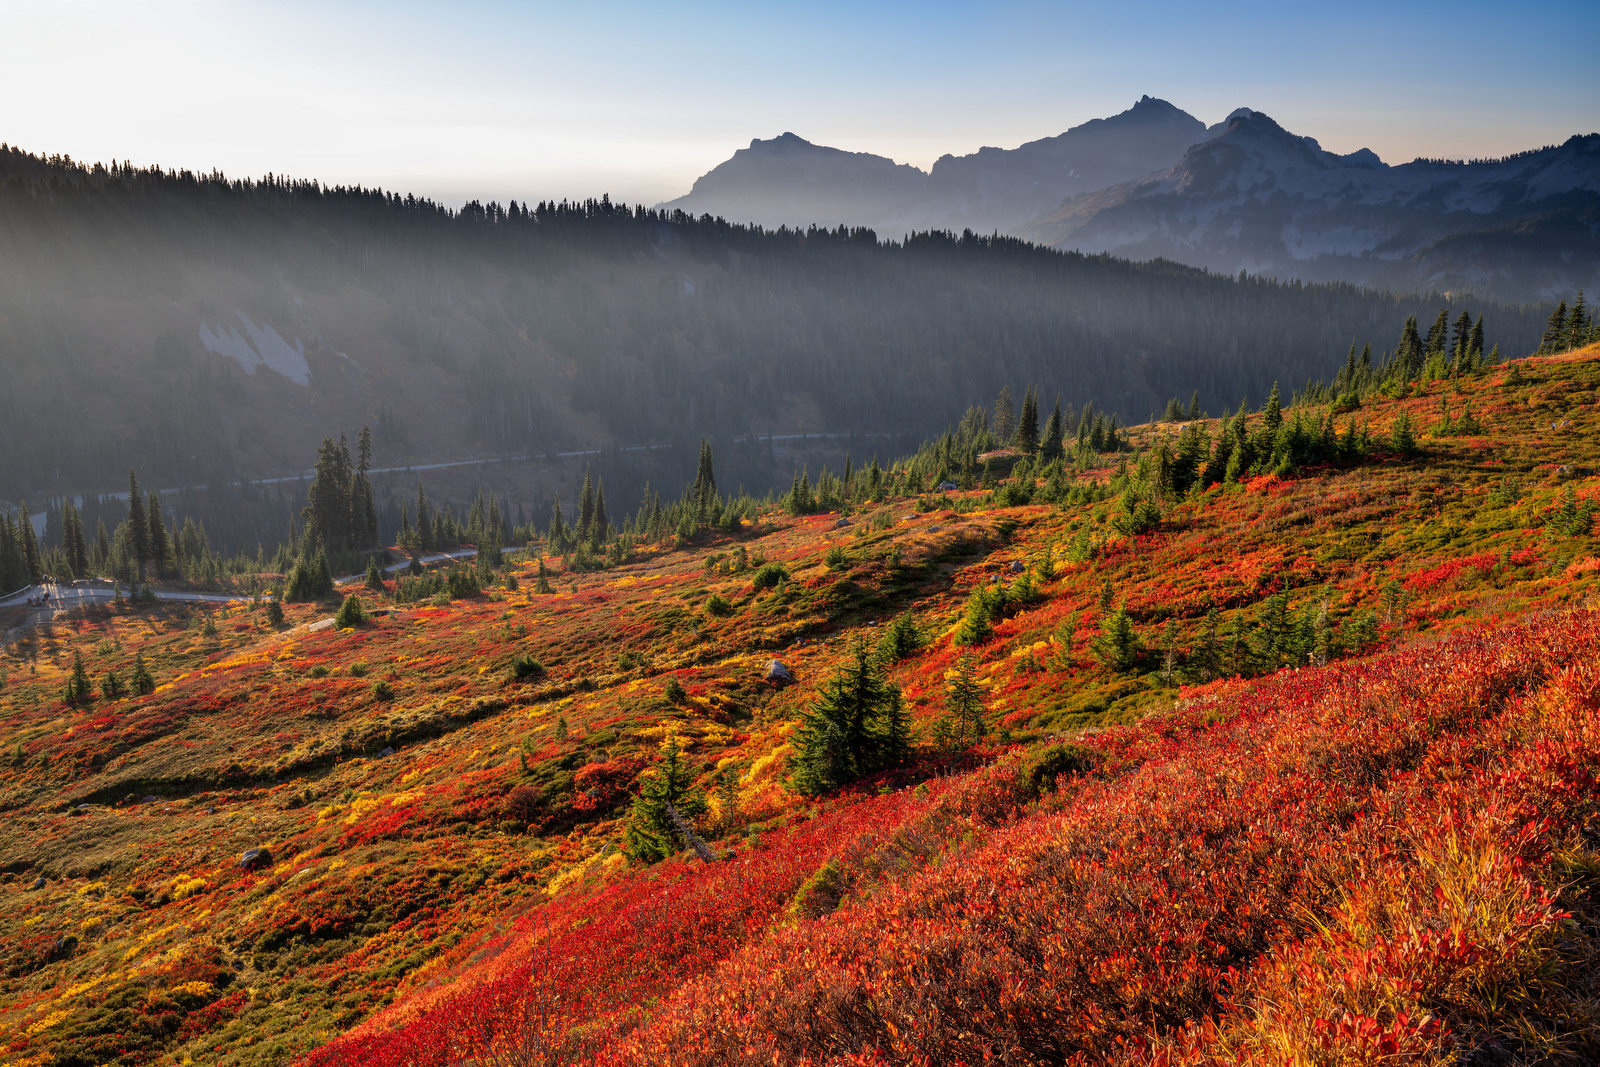
But on Mt. Rainier, you tend to look down, as it is the shrubs, bushes, and subalpine plants closer to terra firma that allow the meadows to burst with color. At some elevations, trees like the Western Larch, Cottonwoods, Willows, and Aspen can add another vertical layer of color. In the meadows, like in my Mt. Rainier photo above, the colors come from:
- Vine Maple (vibrant red and orange, often found along roadsides and under firs)
- Huckleberry (these bushes create deep red carpets in the meadows)
- Fleeceflower (bright red)
- Arrowleaf Groundsel (bright yellow)
- Broadleaf Arnica (subalpine plant with yellow daisy-like flowers)
- Oregon Sunshine (yellow blooms
- Goldenrods (small yellow flowers)
- Sitka Mountain Ash and Wild Rhododendron (can add splashes of yellow and orange)
The hills are alive (with color)!! Another view near Mt. Rainier:
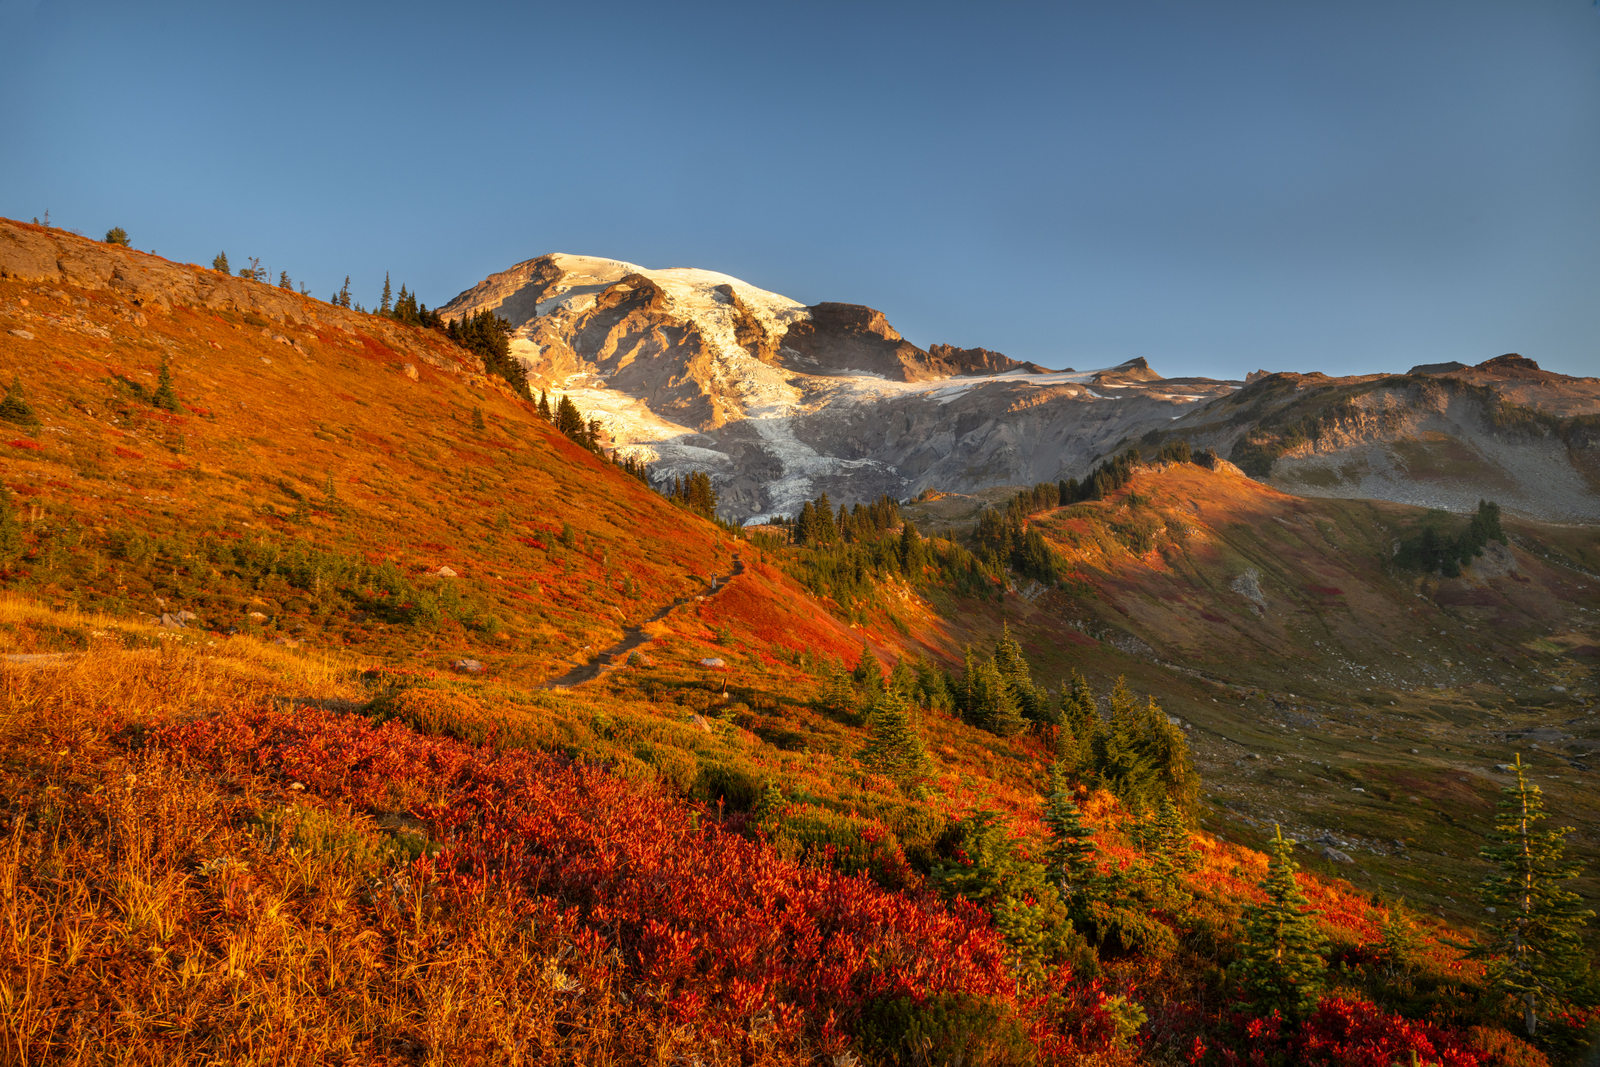
Another view of Mt. Rainier, with the meadow aglow in the morning light:
A more subtle palette I found at this spot near Mt. Rainier:
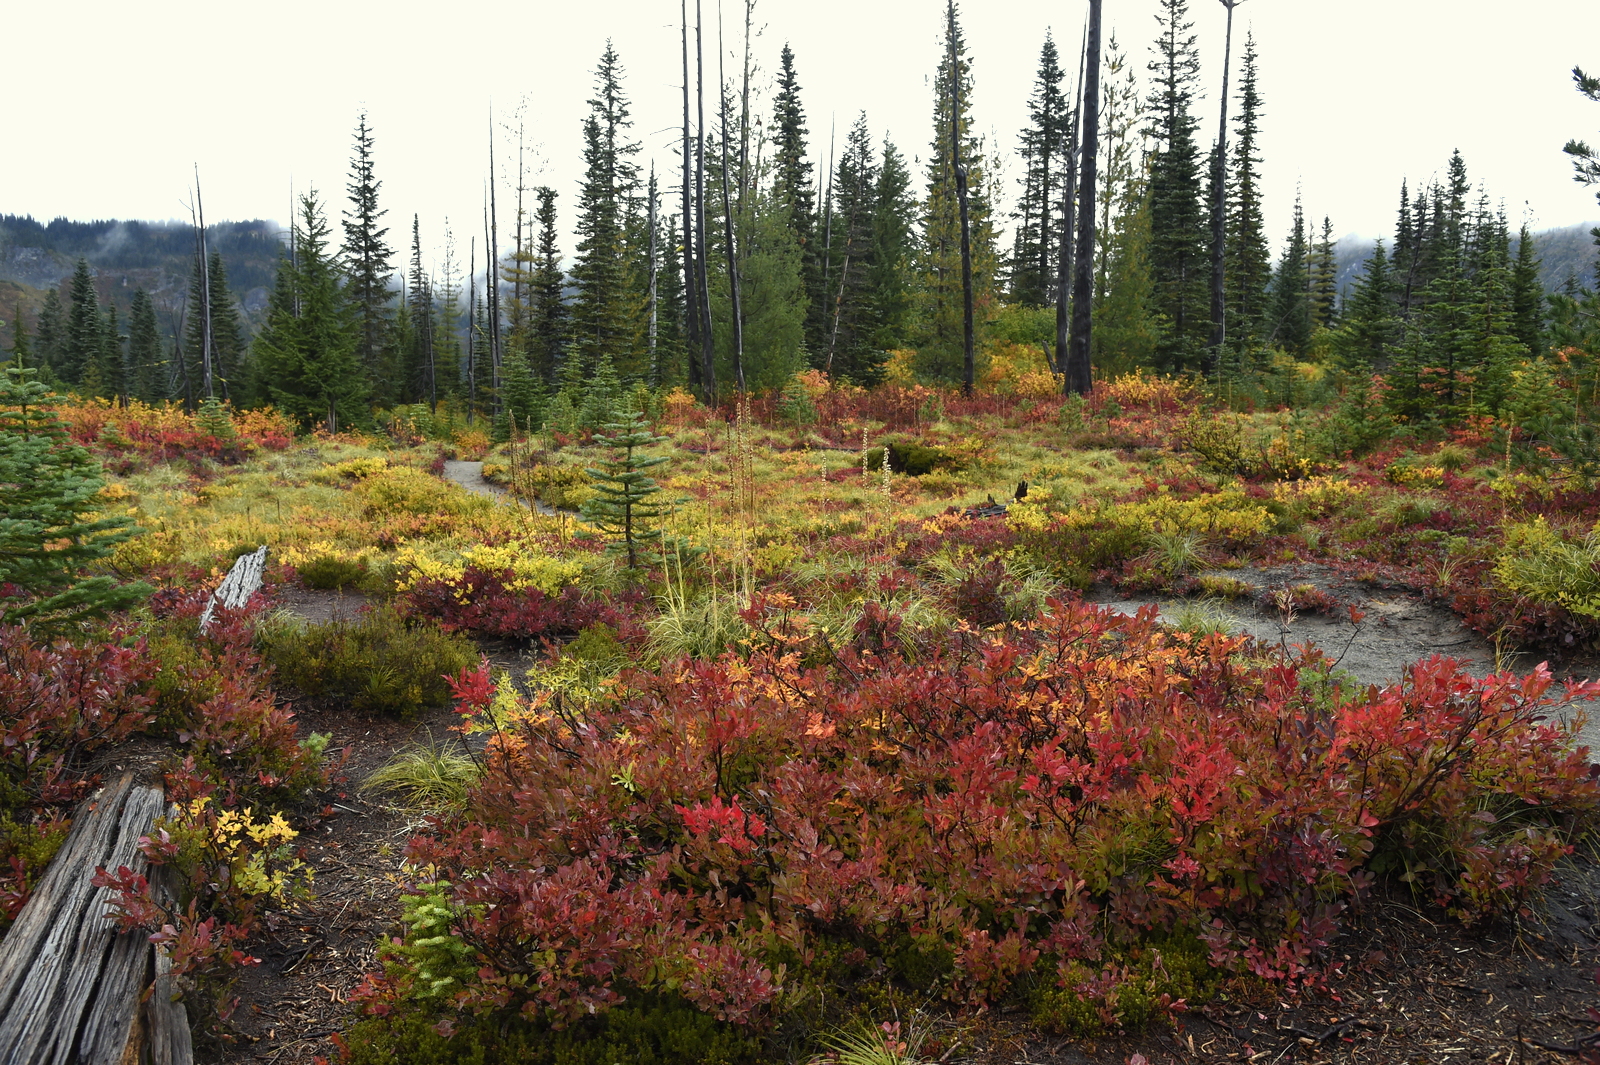
East or West. Up or down. Either way, Mother Nature’s fall colors always astound.
Until next month…….m
Nikon Z9, Nikon 14-30mm (@30mm), f/11/ 1/15 sec, ISO 64
Oct
31
Shot of the Month – October, 2025
Opportunities to photograph wildlife are often rare and fleeting. When lightning strikes, I often struggle to keep calm. My natural reaction is to pull the camera immediately to my eye and fire off shots wildly to capture anything I can before the scene is gone. But I know that my best images happen when I stay calm and look carefully at the scene before me and ponder,
“What is the story that I want to tell?” Or, rather, “What story is the most interesting here?”
Or even better, I think about the potential stories that I want to tell given the subject and setting BEFORE the action begins.
Pondering even briefly can help get beyond the obvious snapshot and offer something a bit more meaningful for the viewer. Once I have clarity on that, all the technical stuff comes into play – where to position myself, what elements do I include in the image that help tell the story? And just AS important, what elements do I leave out because they distract from the story? And all the other tech stuff..what aperture is best? shutterspeed? How close to zoom in? Get low? Get high? Blah blah….
Let’s look at how different compositions of the same scene that I saw while at Katmai National Park in Alaska, earlier this year, tell different stories:
Story #1:
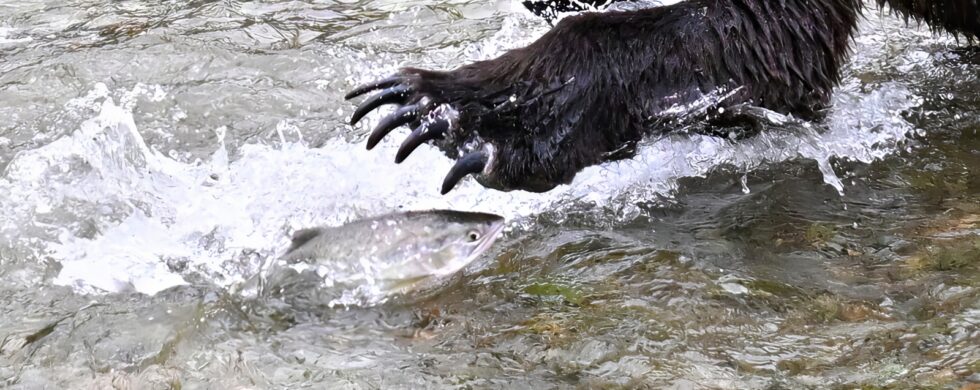
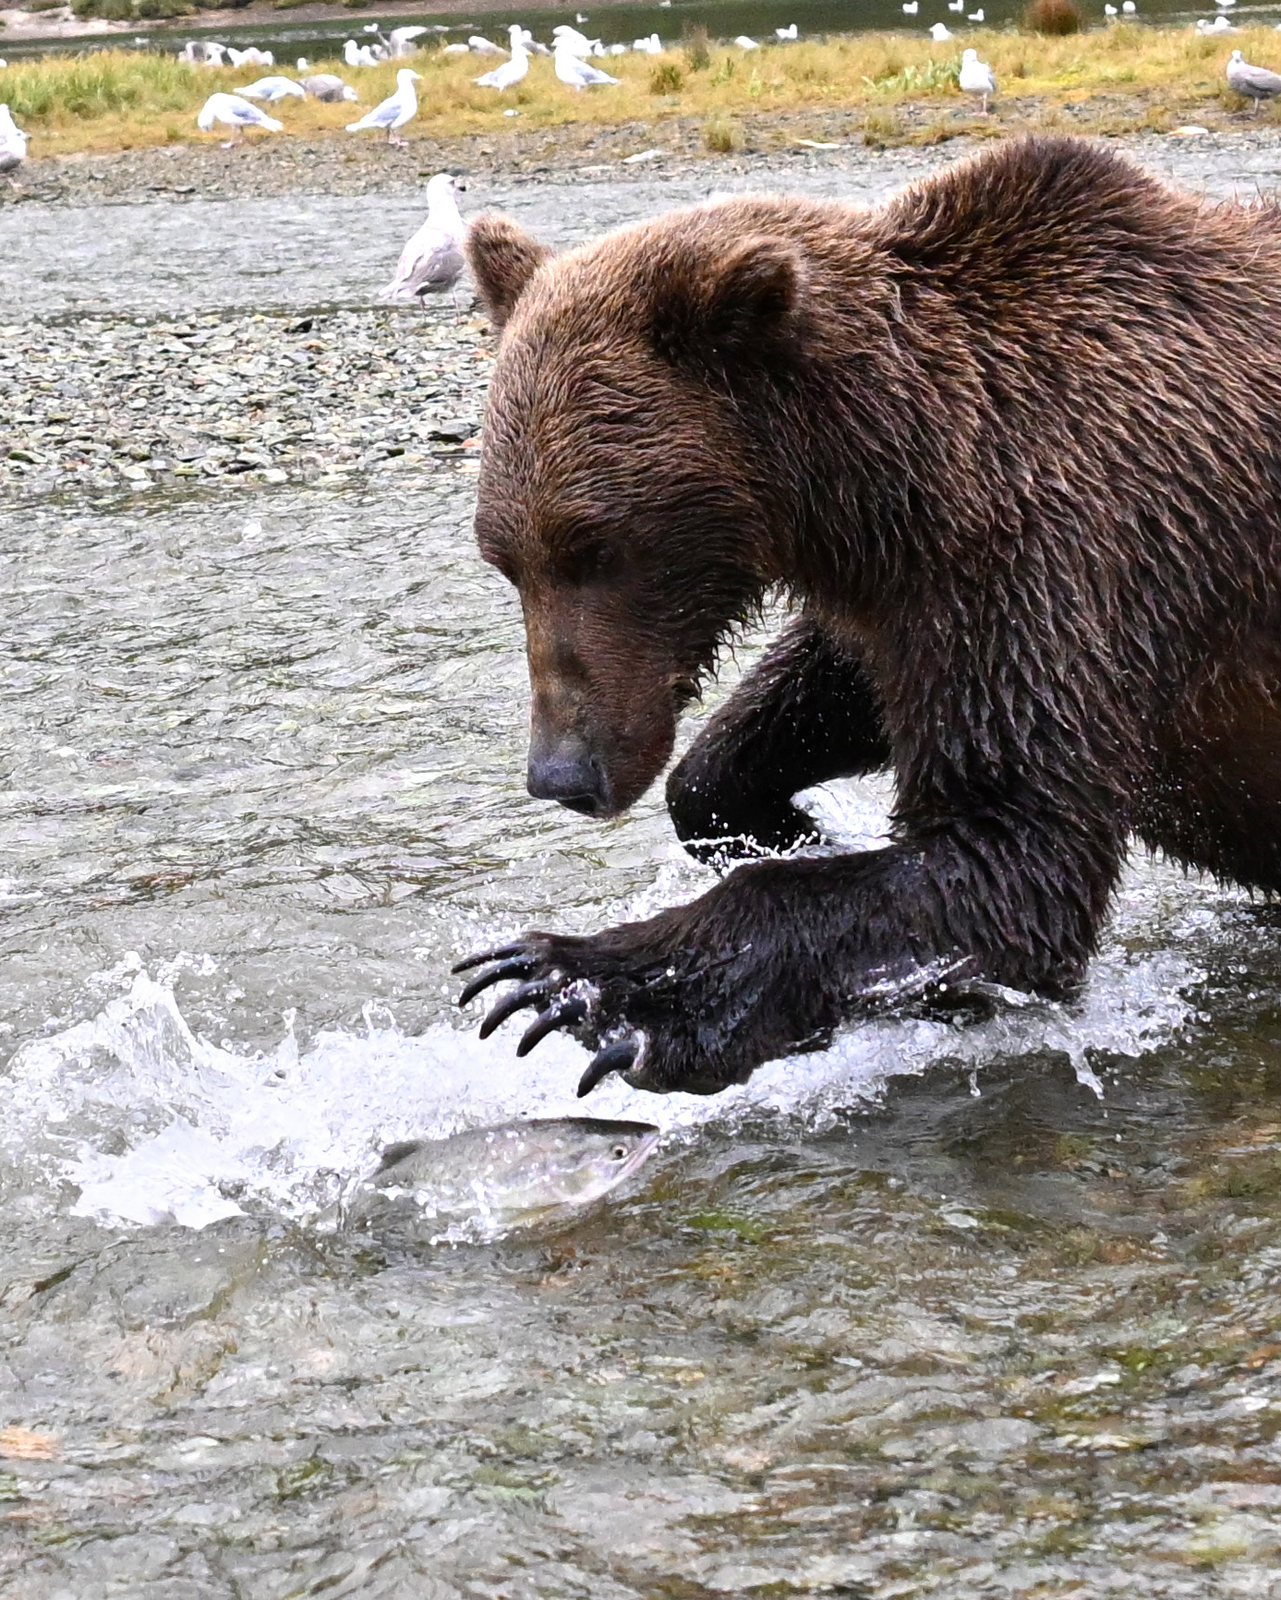
In the image above, we zoom in tightly to tell a very intimate tale of a life-and-death struggle between two individuals. The brown bear has come to this river outlet in Alaska to feast on the spawning salmon. The salmon are practically bursting with calories, up to 4,000 per fish, and the bear needs every calorie to fatten up before the long winter settles in. The salmon, for his part, is racing against time to reproduce before he dies – with or without the bear, he will die within a few weeks of this final act. It is part of the salmon’s ultimate sacrifice for its young. The coastal rivers are nutrient-poor, and the parents’ rotting corpses infuse essential nutrients into the waterways that their offspring will feed upon once they hatch.
In this scene, the action is intense as the bear lunges forward with her plate-sized paw, striking downward as the salmon makes an evasive leap out of the water. The bear’s massive 4-inch claws are spread wide to create a lethal “net.” For the fish, this is a potentially life-ending encounter, while for the bear, this is just one of hundreds of paries that she will make that day. I find myself tensing up as I make eye contact with the salmon and absorb his panic. In this story, we not only look closely at each subject but FEEL something palpable for another life.
Story #2
If I zoom out, I capture an image where a broader story unfolds:
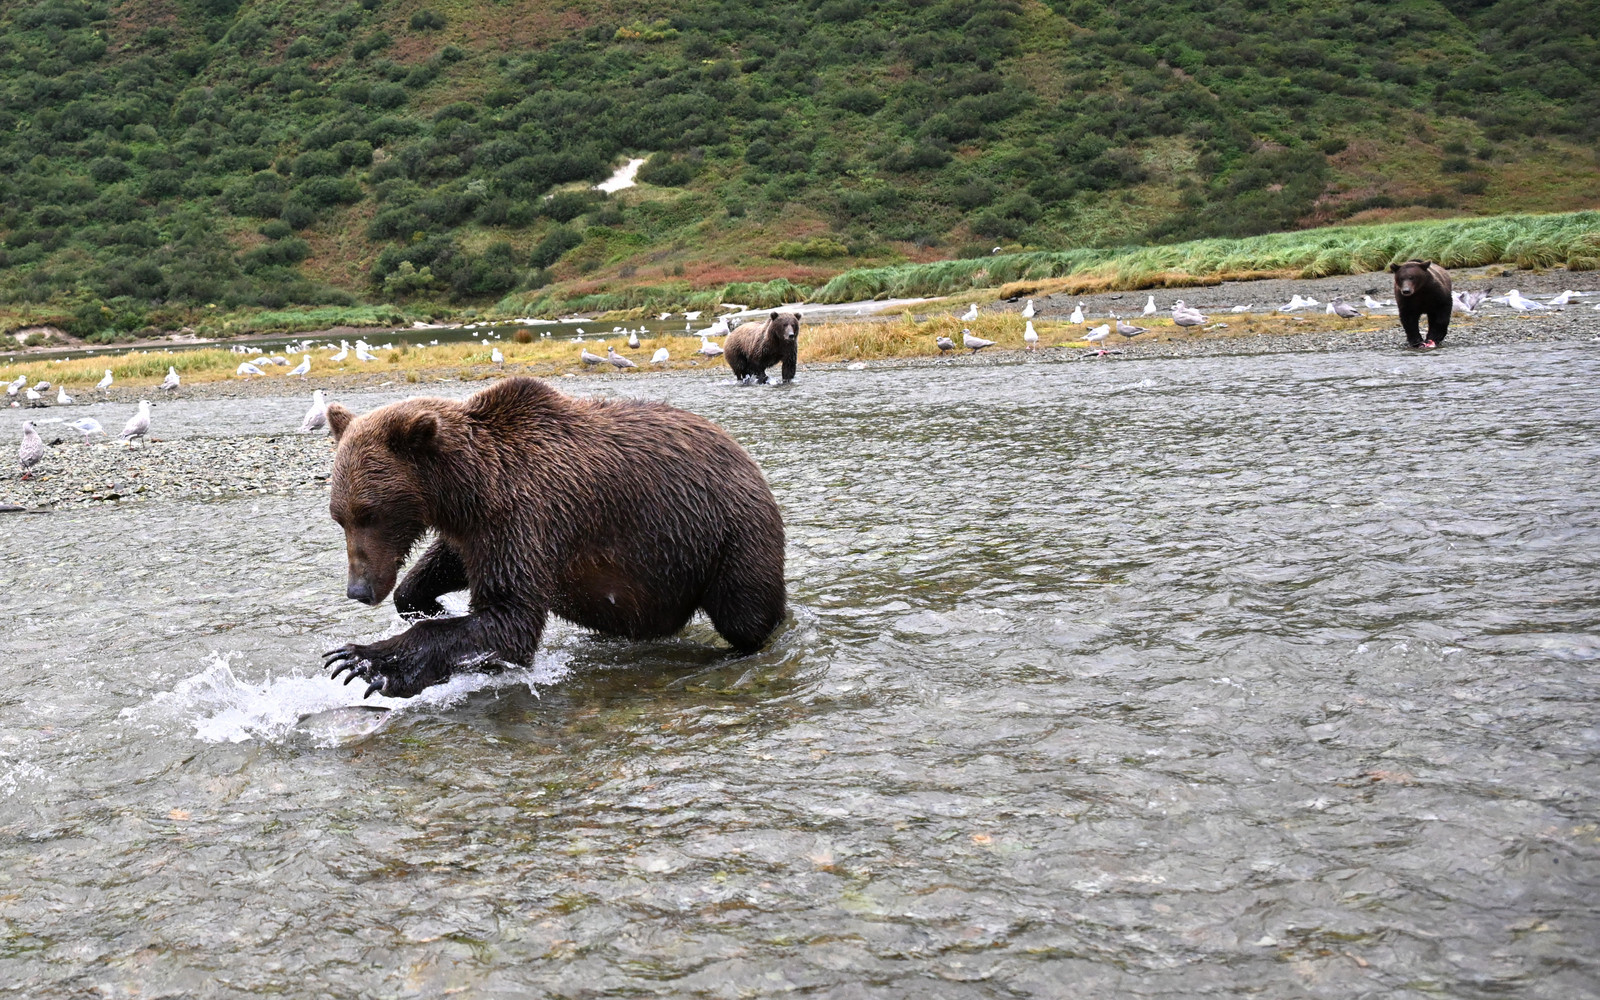
In this photo, we have a wider view of the environment and see other actors. The story becomes less about an individual bear or fish but rather about the natural cycles that drive many ecosystems. Brown bears normally are solitary, so having three in one shot indicates that something special is going on. They have all been drawn to the coast for the annual salmon migration – the movement of millions of fish from the ocean into coastal waterways that attracts untold numbers of species of mammals and birds to feast on the brief bounty. It is an epic tale that affects millions of creatures in this ecosystem and countless others along the northern Pacific Ocean.
Learn more about this in my post – Keystone Krisis
The individual life-and-death struggle is now more subtle but ever-present. The bear in the back right is feeding on a just-caught salmon. The bear in the lower left has been frozen mid-strike. The life of that fish is less than a second from ending. And the bear in the back left is walking up the river in search of an opportunity. Numerous seagulls wait for their chance to feed on the leftovers. The shrill squawks from the seagulls can be deafening, and the water churns as salmon flee in all directions.
The second image pays homage to the sweeping cycles of nature that have gone on for millennia, while the first shot poignantly reminds us of the very real lives of the victors and the vanquished caught up in these epic movements. The difference in scale and nature of reflection caused by each image reminds me of this quote:
A Single Death Is a Tragedy; A Million Deaths Is a Statistic
As I mentioned here, I often push myself to shoot a range of compositions of a given scene to help me find the range of tales possible.
Well, enough chatter, time to grab my camera and get out there and find my next story….
Until next month…..michael
Sep
30
Shot of the Month – September 2025
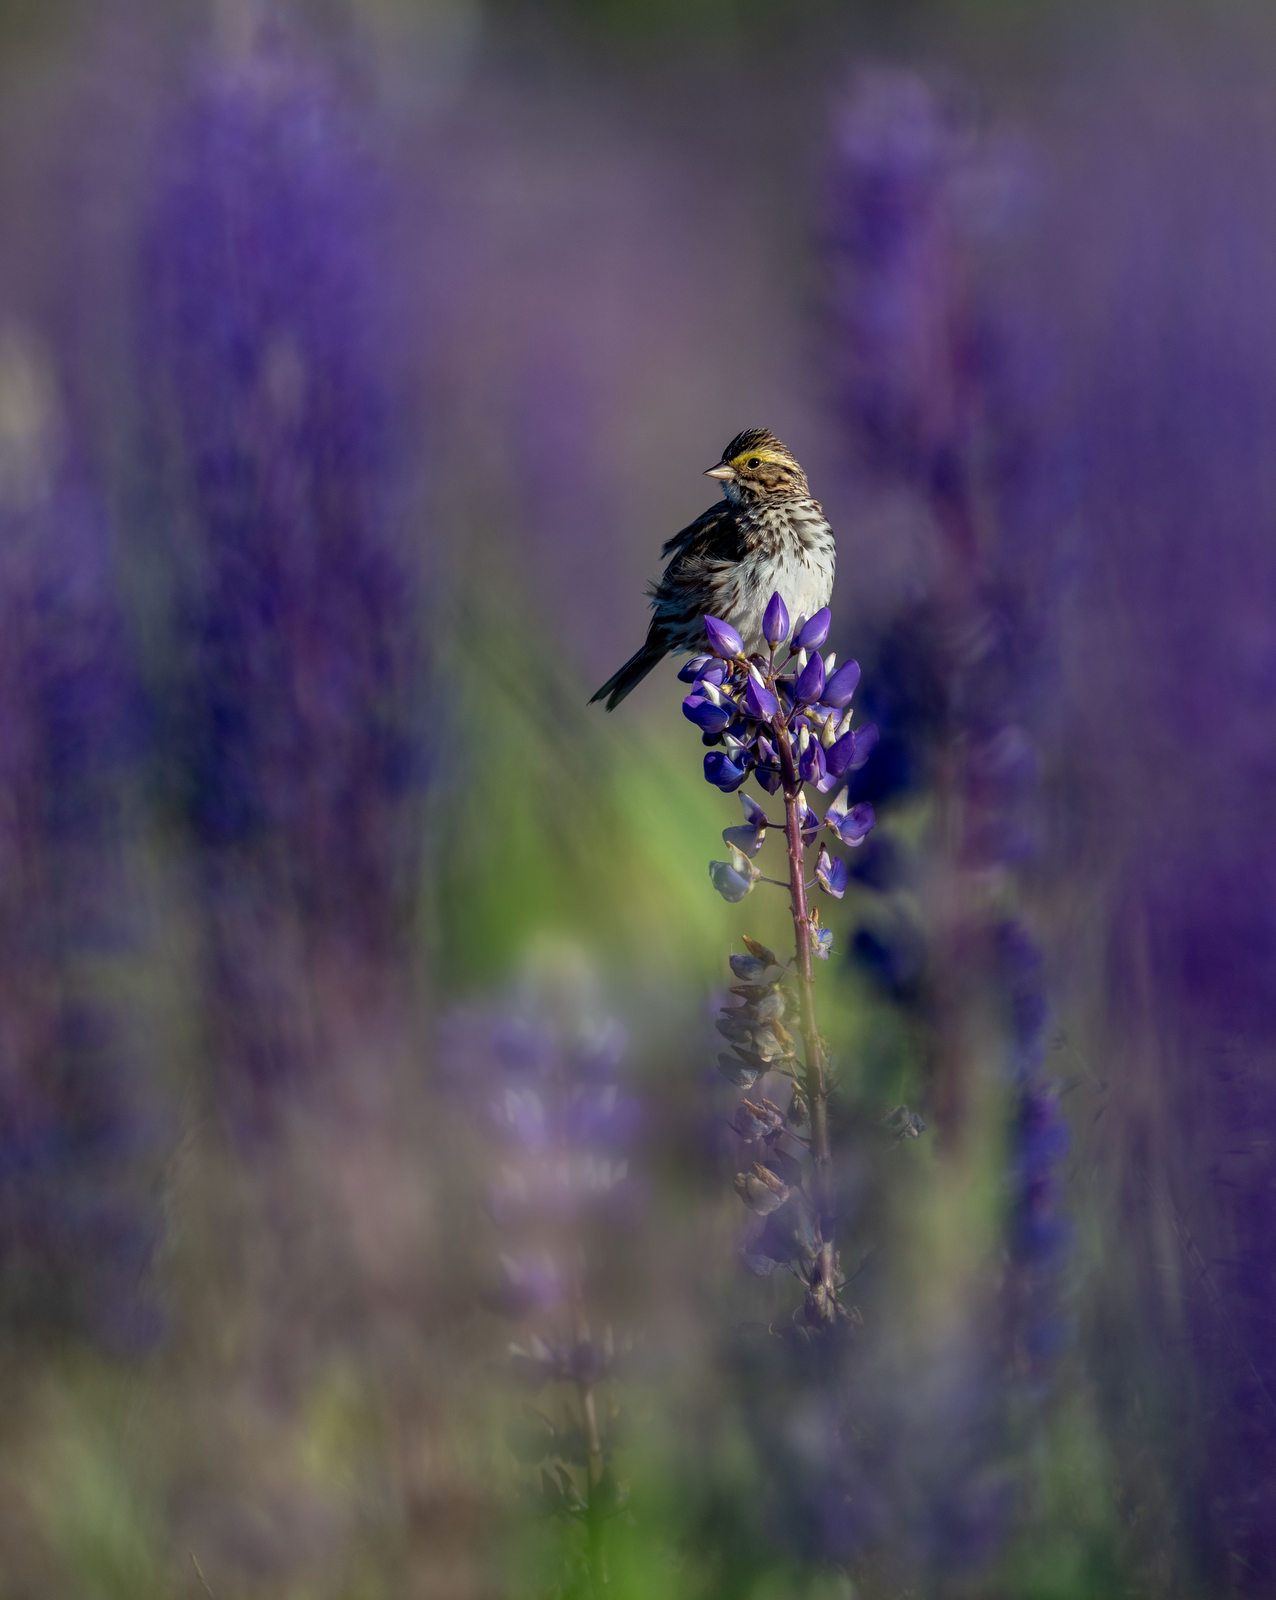
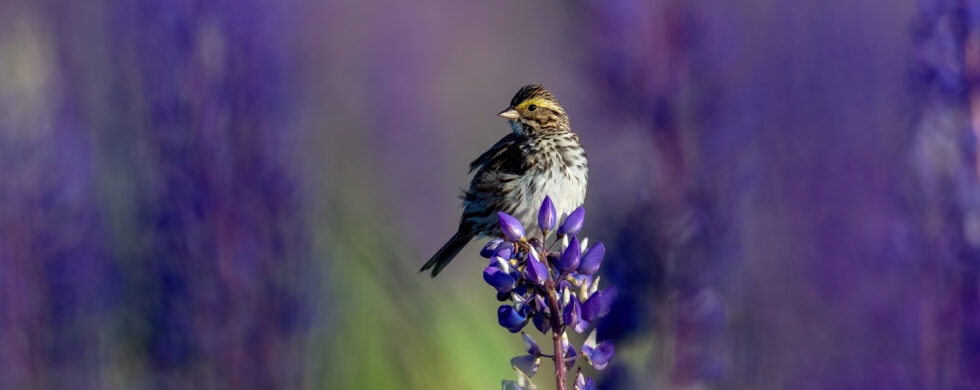
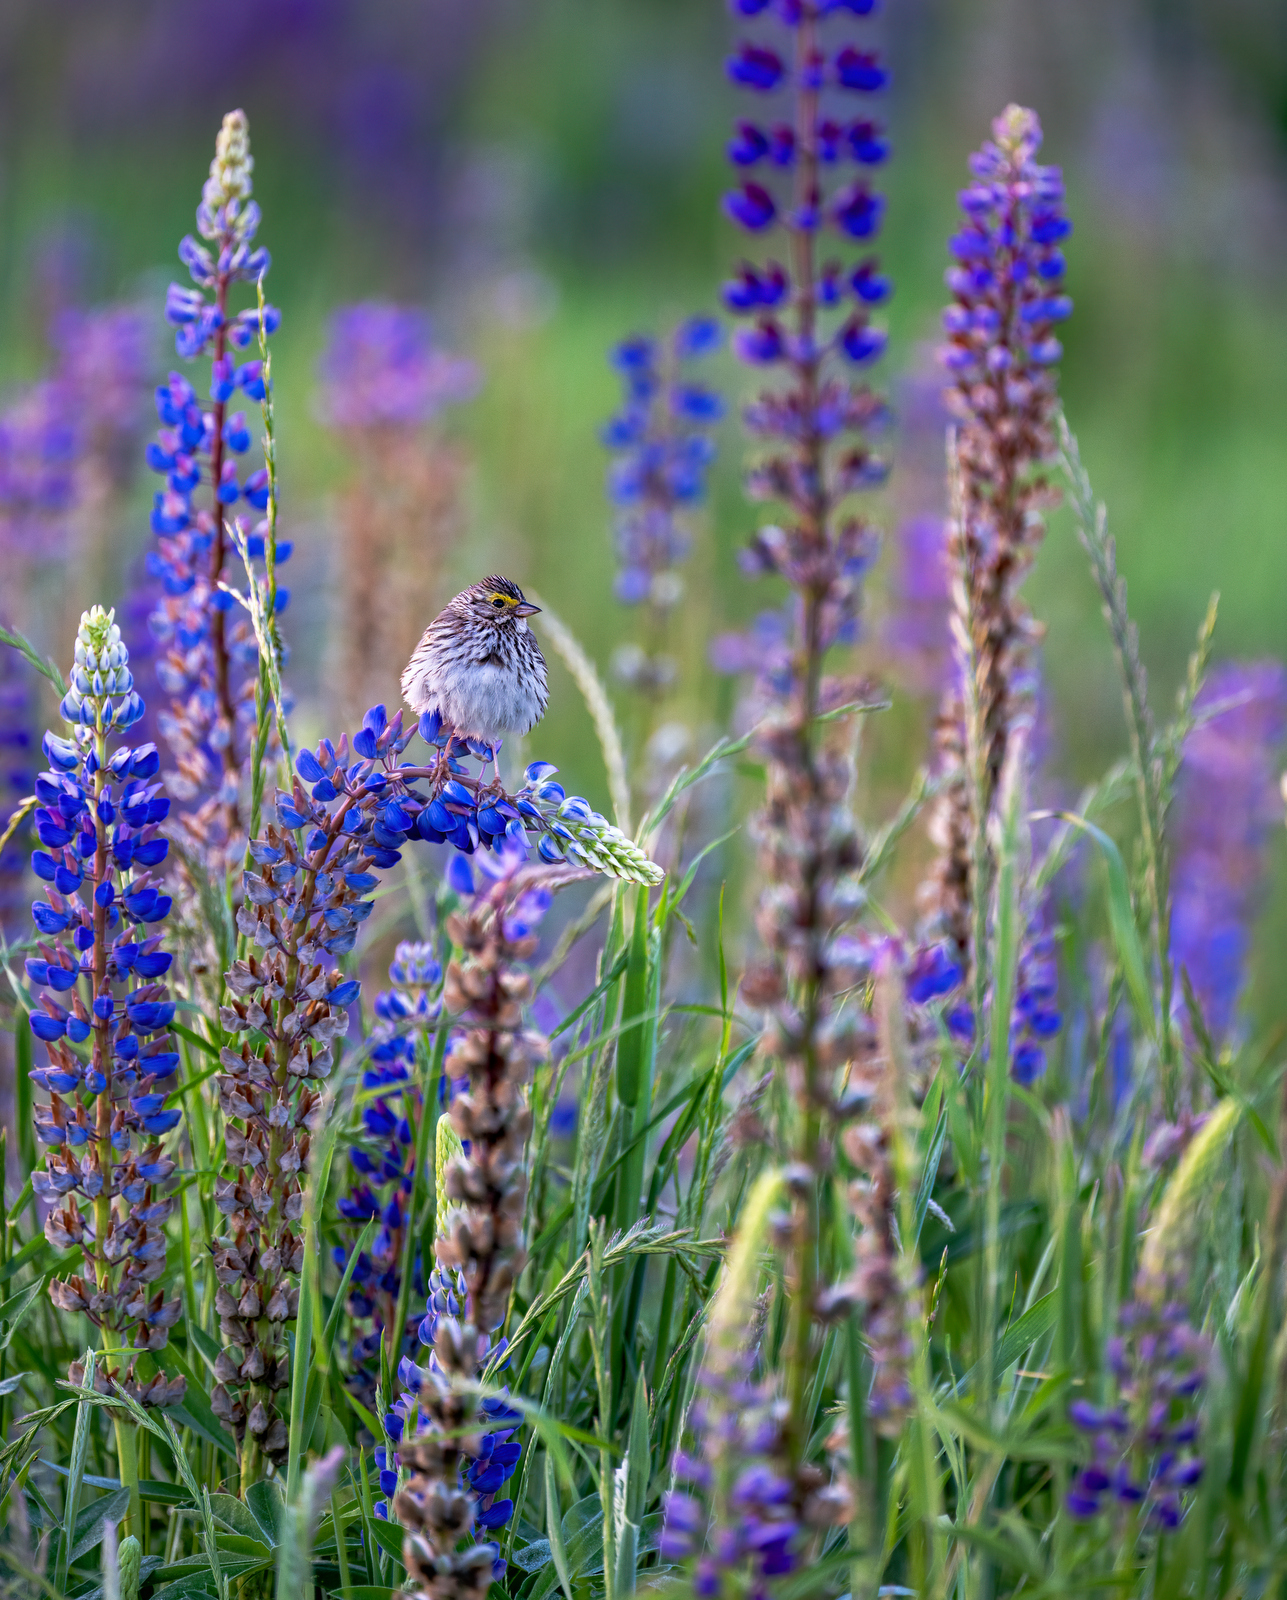
In the early morning light, I scurried about the field photographing Savannah Sparrows as they fed on Lupines. A bird would land on a perch, and I would hurry over and fire off a few shots. After each opportunity, I checked the camera’s LCD screen to review the results (one of the wonders of digital photography – you can get immediate feedback on what is working, or in this case, what is not). An hour in, and I still had not captured anything to write home about.
The challenge was that the field was a cluttered mess of plants, colors, and shapes – at least from a photography point of view. The field was actually quite lovely in the morning sun, with vibrant purple and green flowers and dapper-looking birds with yellow war stripes. But I was struggling to find a scene where the bird stood out from the cacophony of competing details.
After thirty more minutes, I wandered to a far corner of the field where it all came together. In this scene (the image above), the bird is finally isolated, and the subject is clear. The flowers in the background are far enough in the distance that they fade away into a lovely, colorful blur that allows the sparrow to really pop. The image is evenly lit, so there are no dramatic hot spots from other elements in the frame to distract the eye. All the different layers create this wondrous, hazy, color-infused meadow dream of an image.
In photography-speak, this composition is an example of creating good “separation” between the subject and the background or using “isolation” to highlight the subject. Two words that describe the same technique. Simply put, isolation is about composing an image to make the subject clearly stand out from the background.
“…..separation is the art of visually isolating your subject from its background and other elements within the frame. This technique enhances clarity, draws attention to the subject, and minimizes distractions.” (source)
Ways to make your subject stand out:
- Compositional isolation: Visually separating a subject from its surroundings to make it stand out and minimize distraction.
- Depth of field: Using a wide aperture (low f-number), a telephoto lens, or placing the background far behind the subject to create a blurred background.
- Color contrast: Positioning a subject against a background of a contrasting or complementary color to make it pop.
- Atmosphere: Using natural elements like fog or mist to soften the background and enhance depth.
- Negative space: Including enough empty space around a subject so it isn’t cluttered or confusing.
Let’s look at some of my failures to make the point clearer.
Example 1:
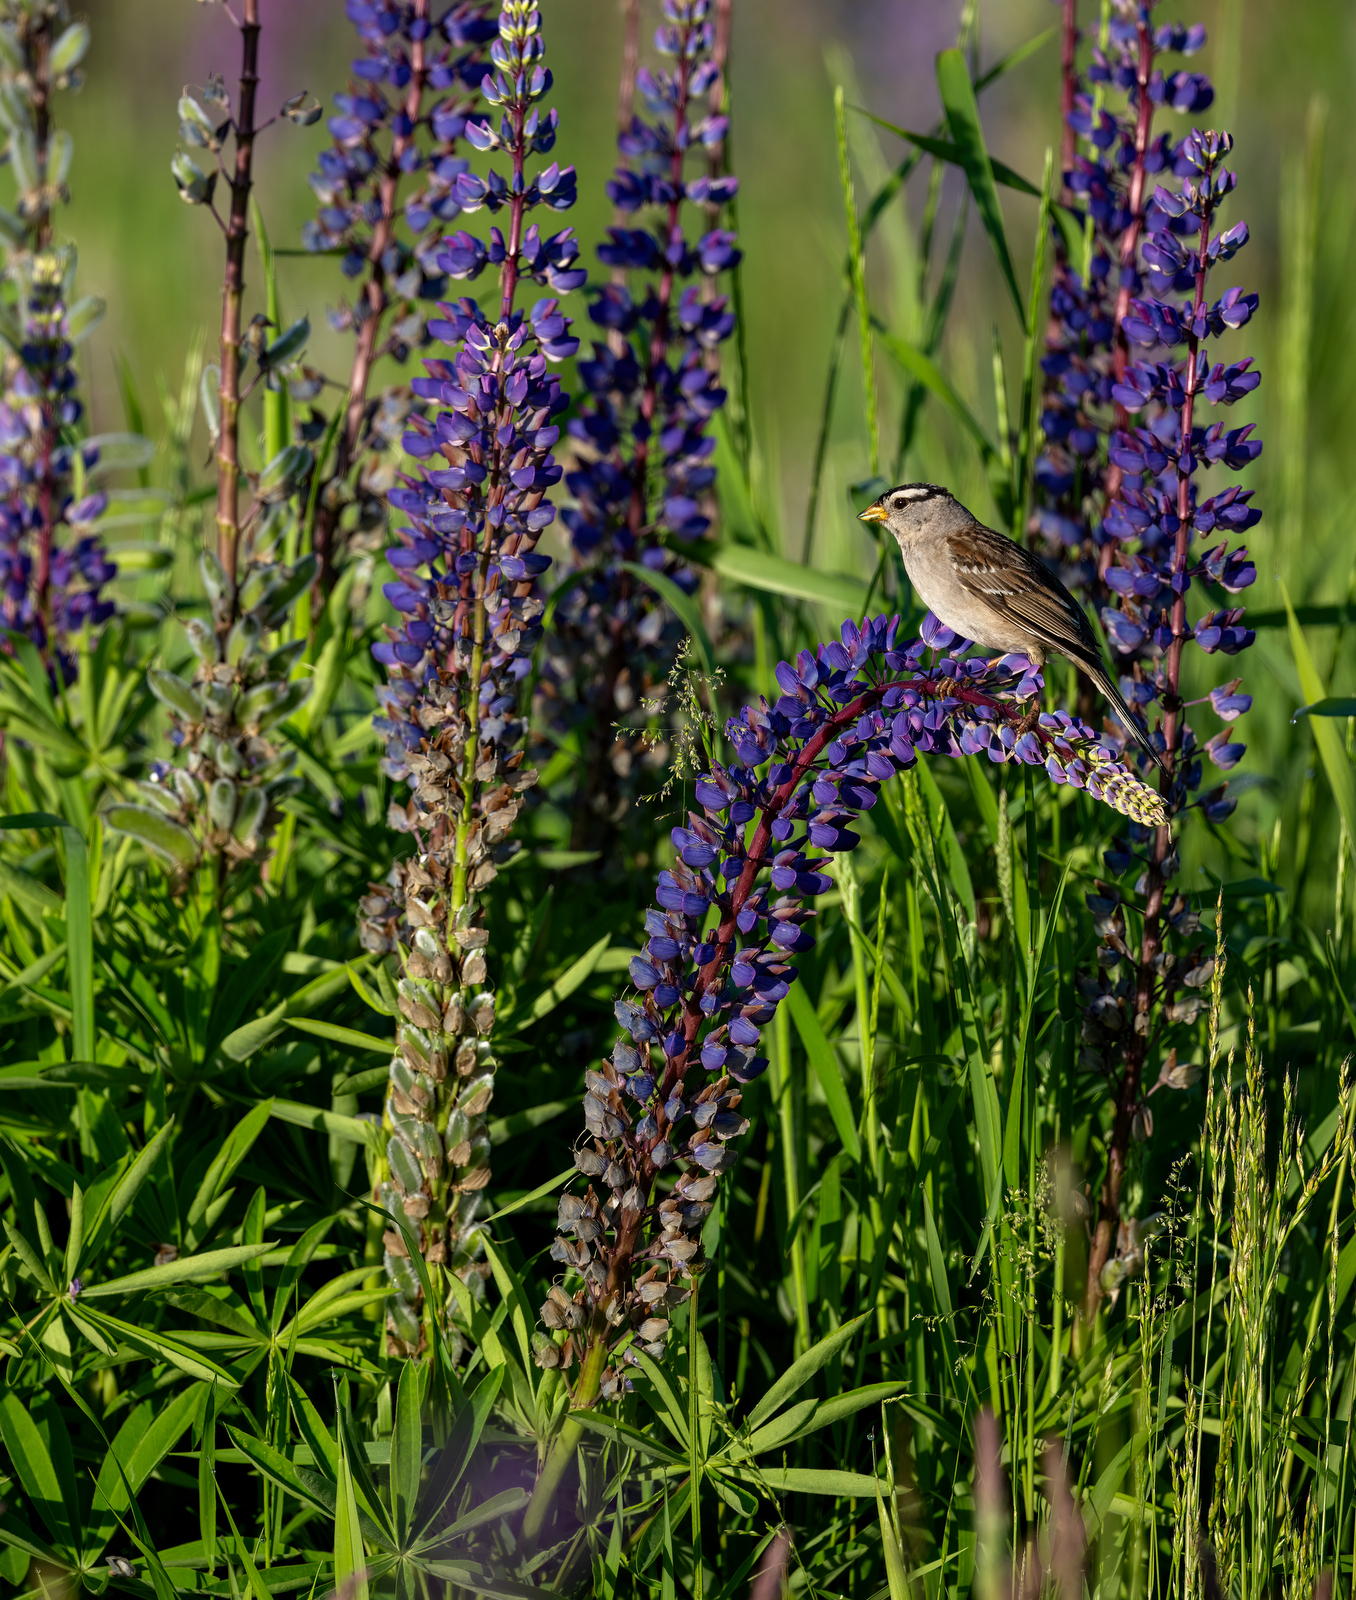
The white-crowned sparrow is properly exposed, but the image is rather boring and too “flat.” Why is it not as visually pleasing/interesting as the first shot?
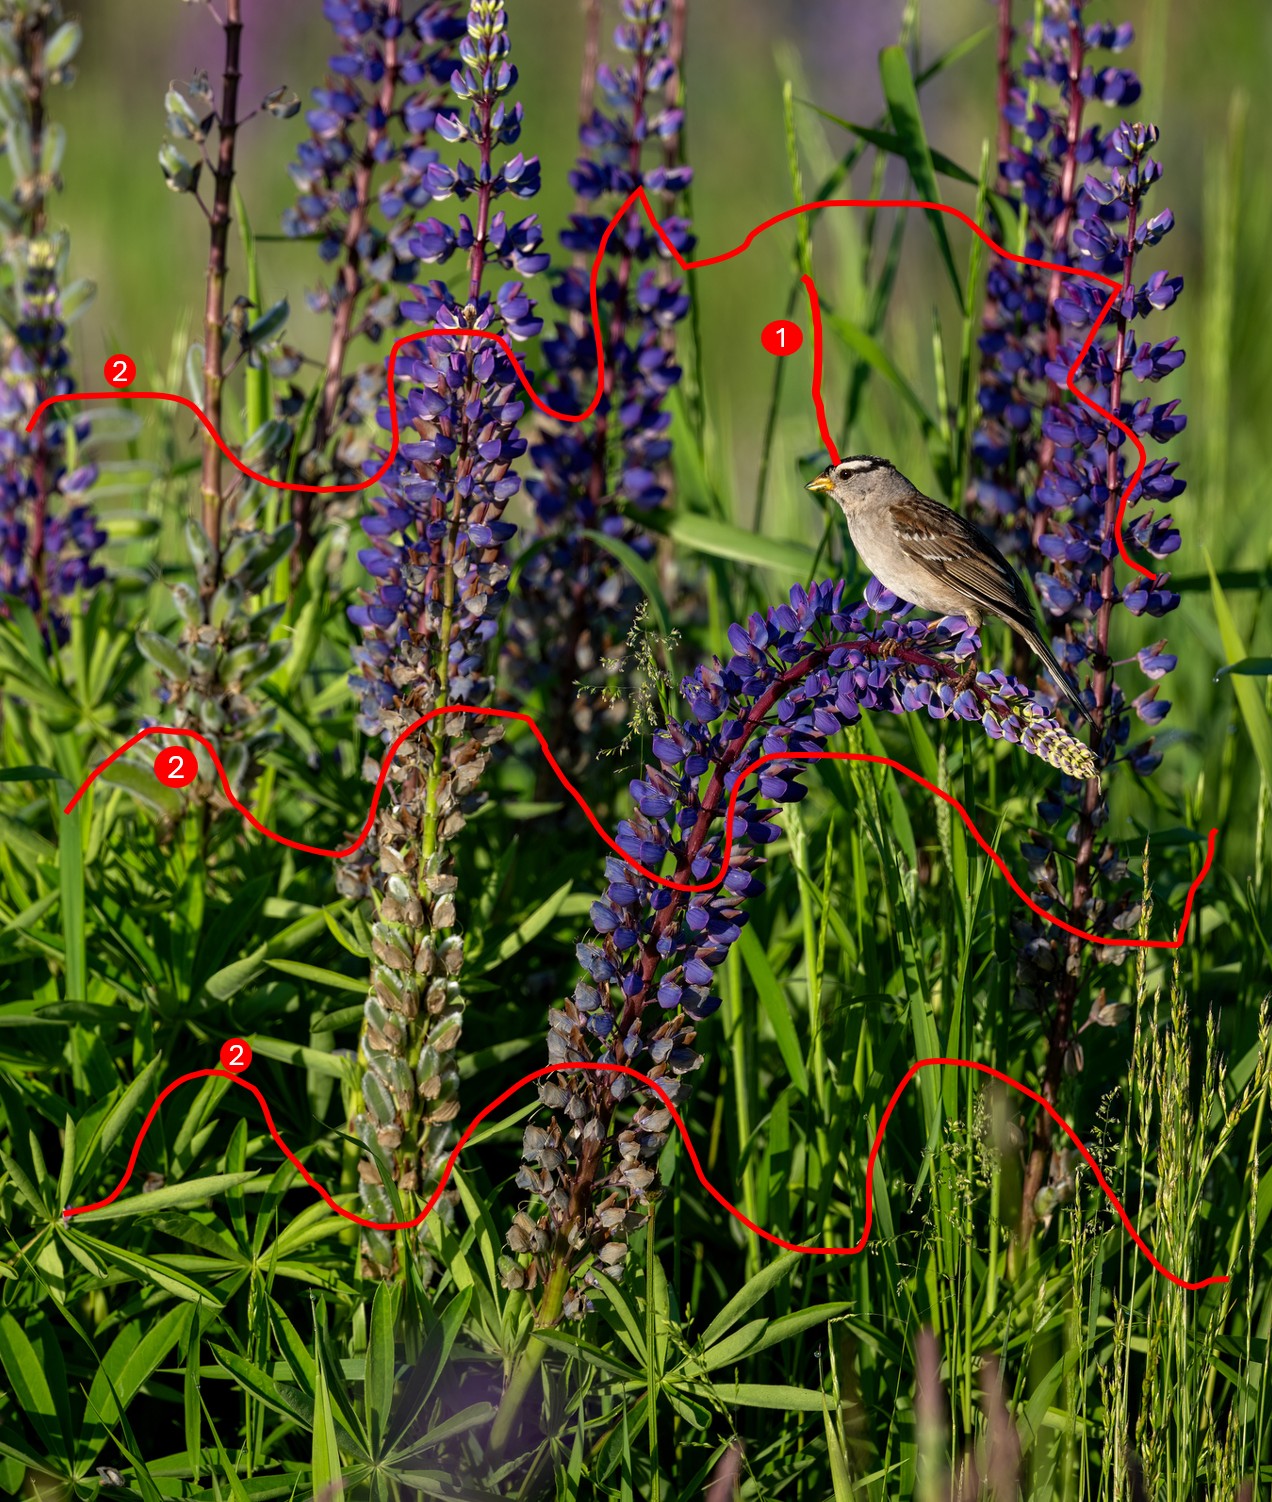
Distractions:
- There is a plant stem coming out of the bird’s head. The background is slightly blurred, but still has too many details that are distracting.
- The biggest problem is that so many plants are at the same focal length as the bird, so they are all in focus and fight for our attention. It can be hard to find the bird in all this visual clutter. The bird and the plants are compressed so the bird blends in – not a good thing for photography.
Speaking of clutter, check out this mess:
Example 2:
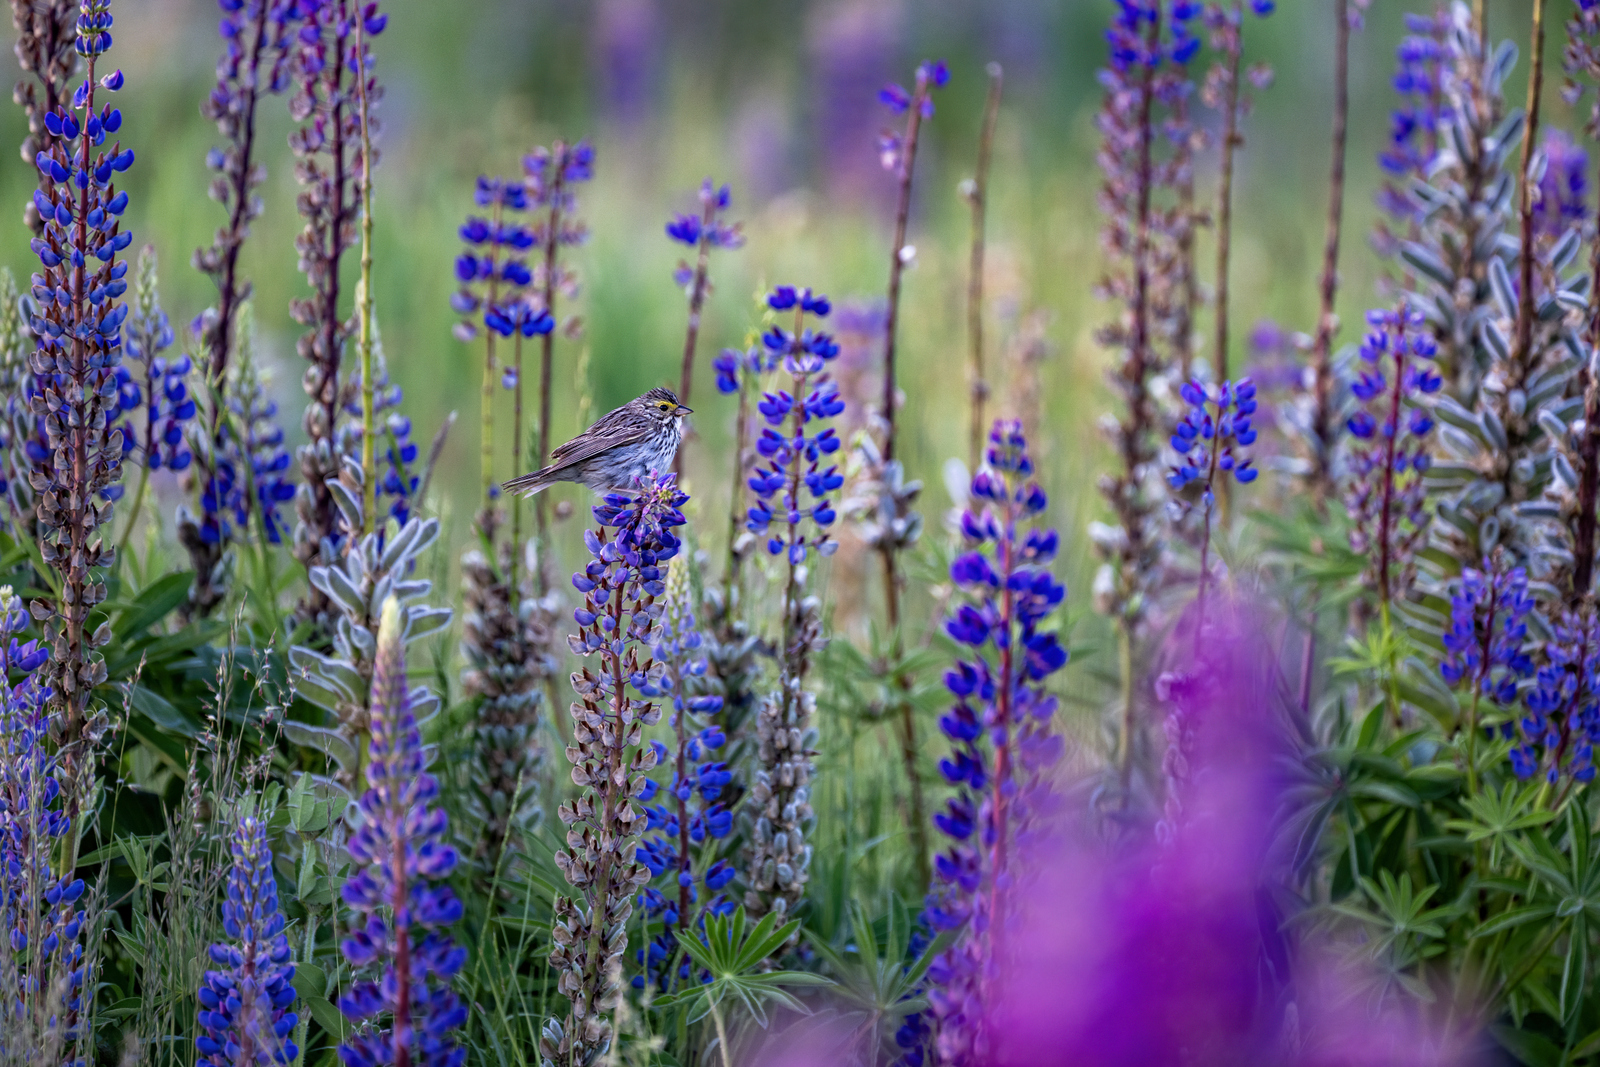
Yuck! How many problems do you see? Let’s break it down:
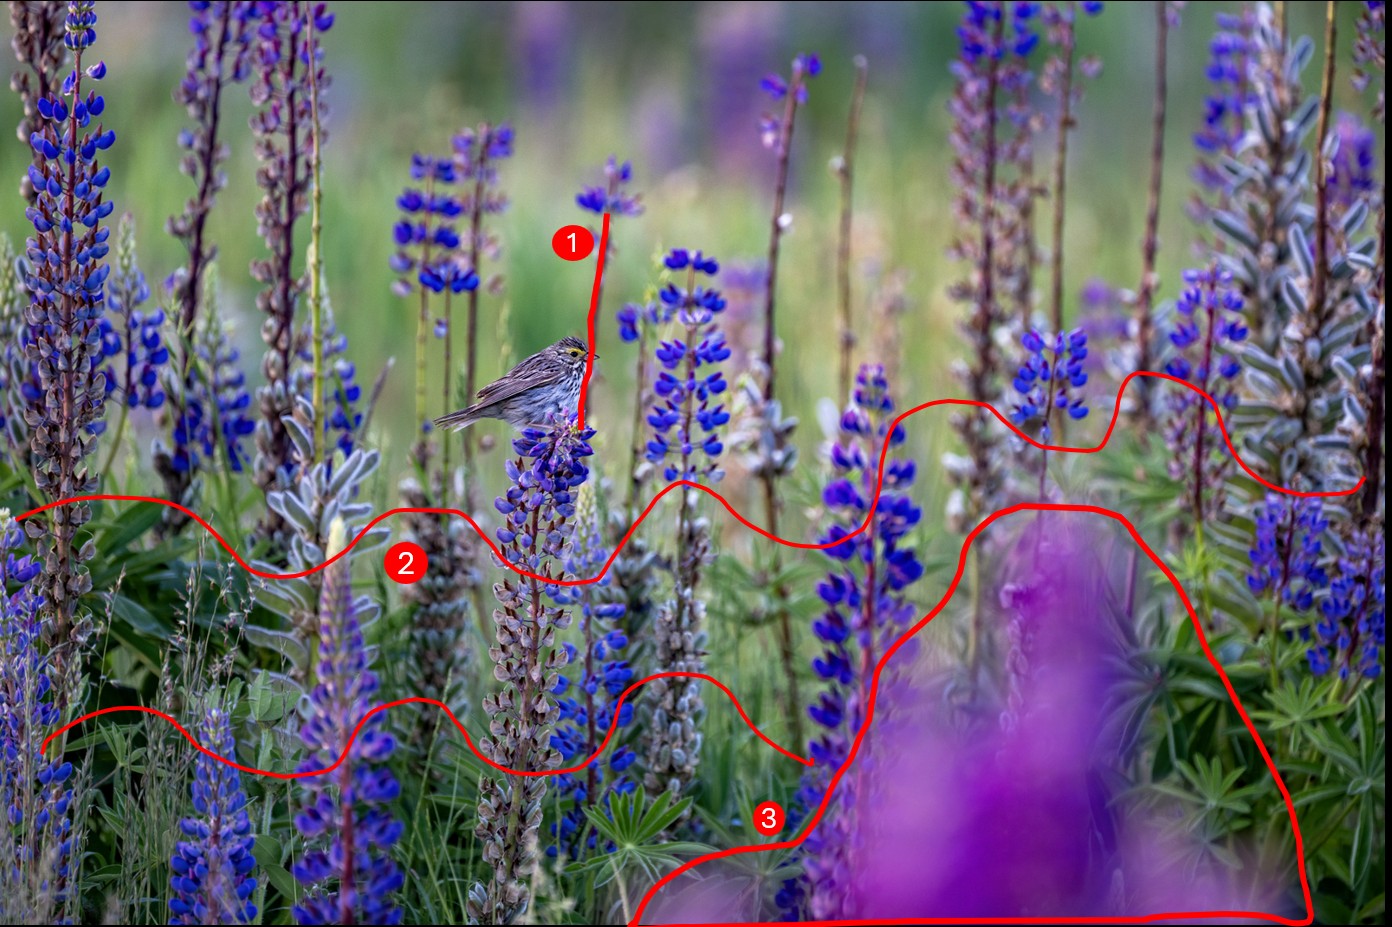
Problems:
- Plant stem going through the bird’s head – ugh.
- Far too many plants at the same focal length and in sharp focus, competing with the bird for attention
- This flower is out of focus, which is good, but it is too bright, so the sharp tonal contrast becomes a big distraction and draws the eye away from my intended subject.
Example 3:
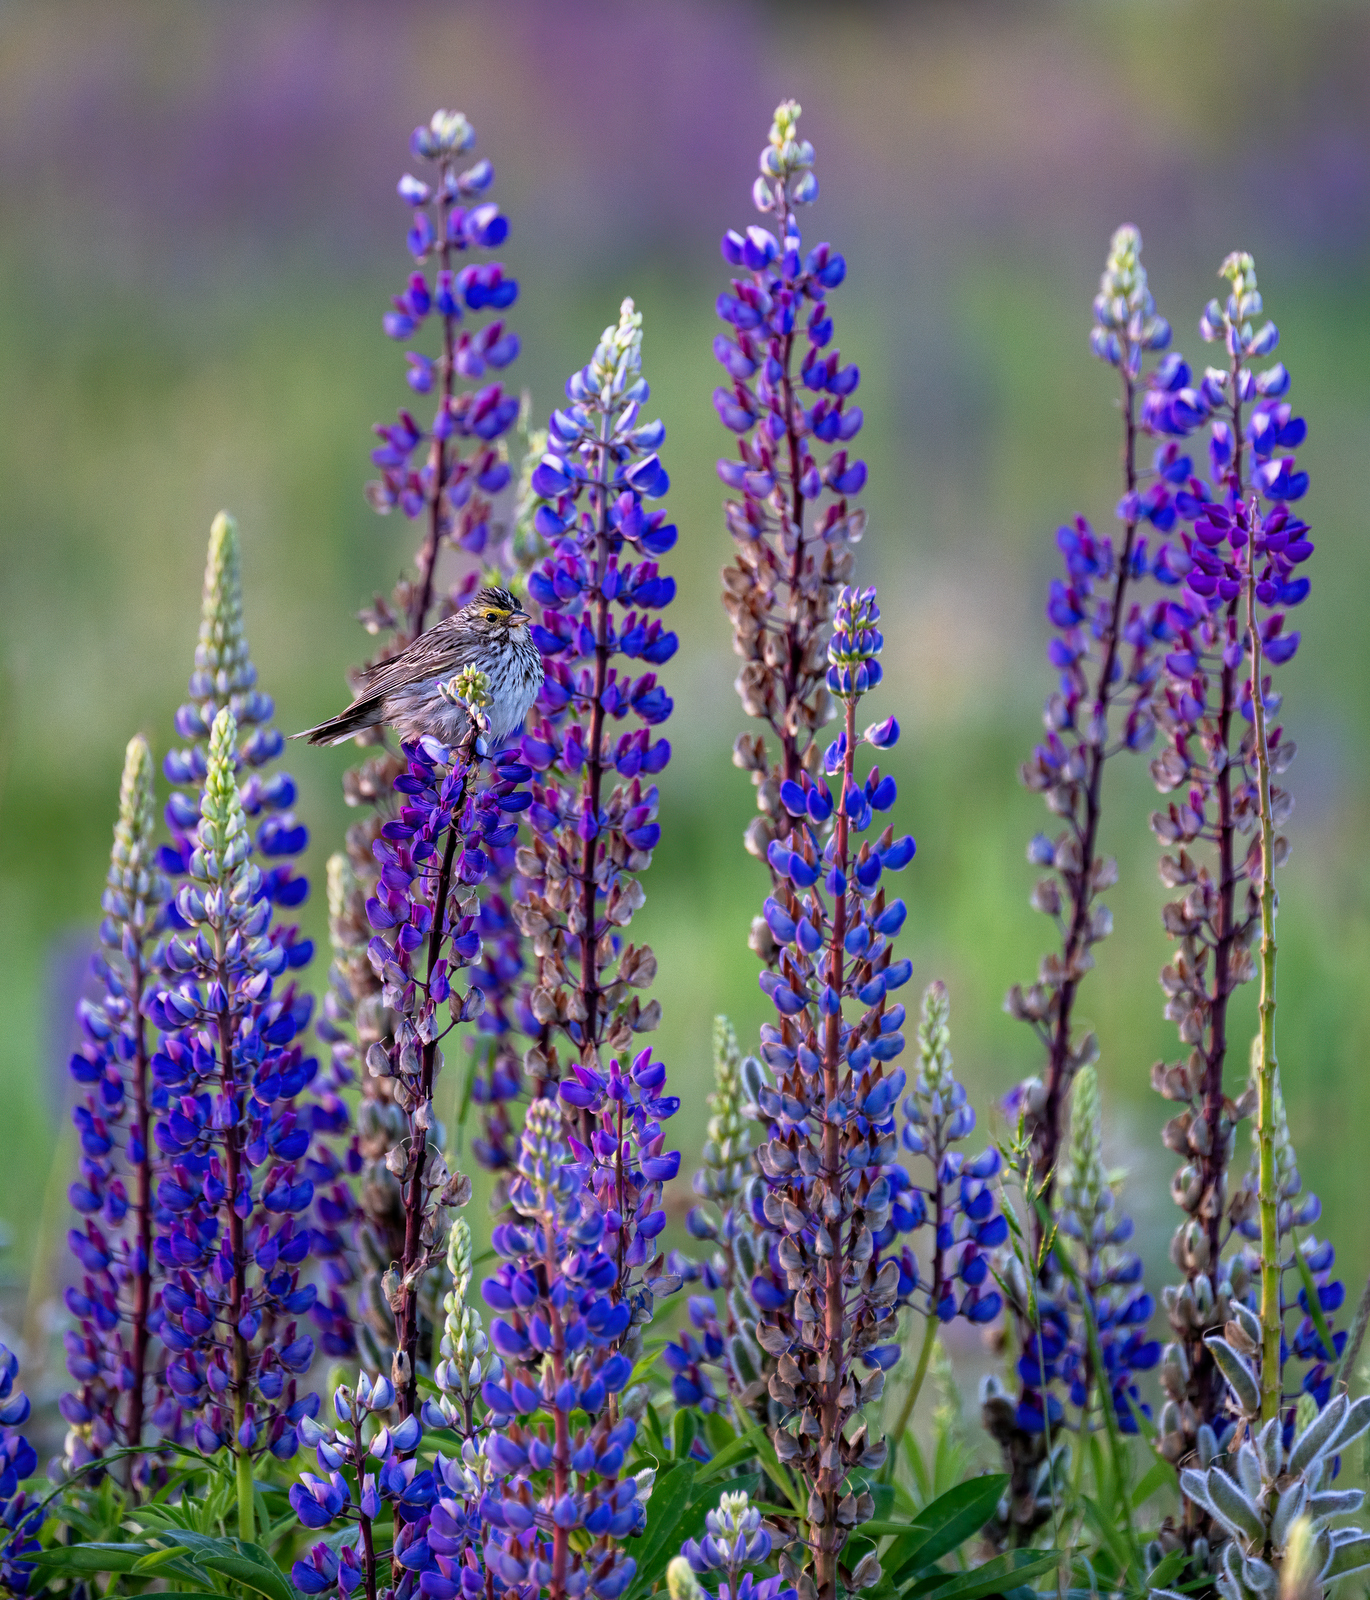
Ok, if you are playing at home, can you tell the class what the problems are here? I spy three issues hindering good subject isolation.
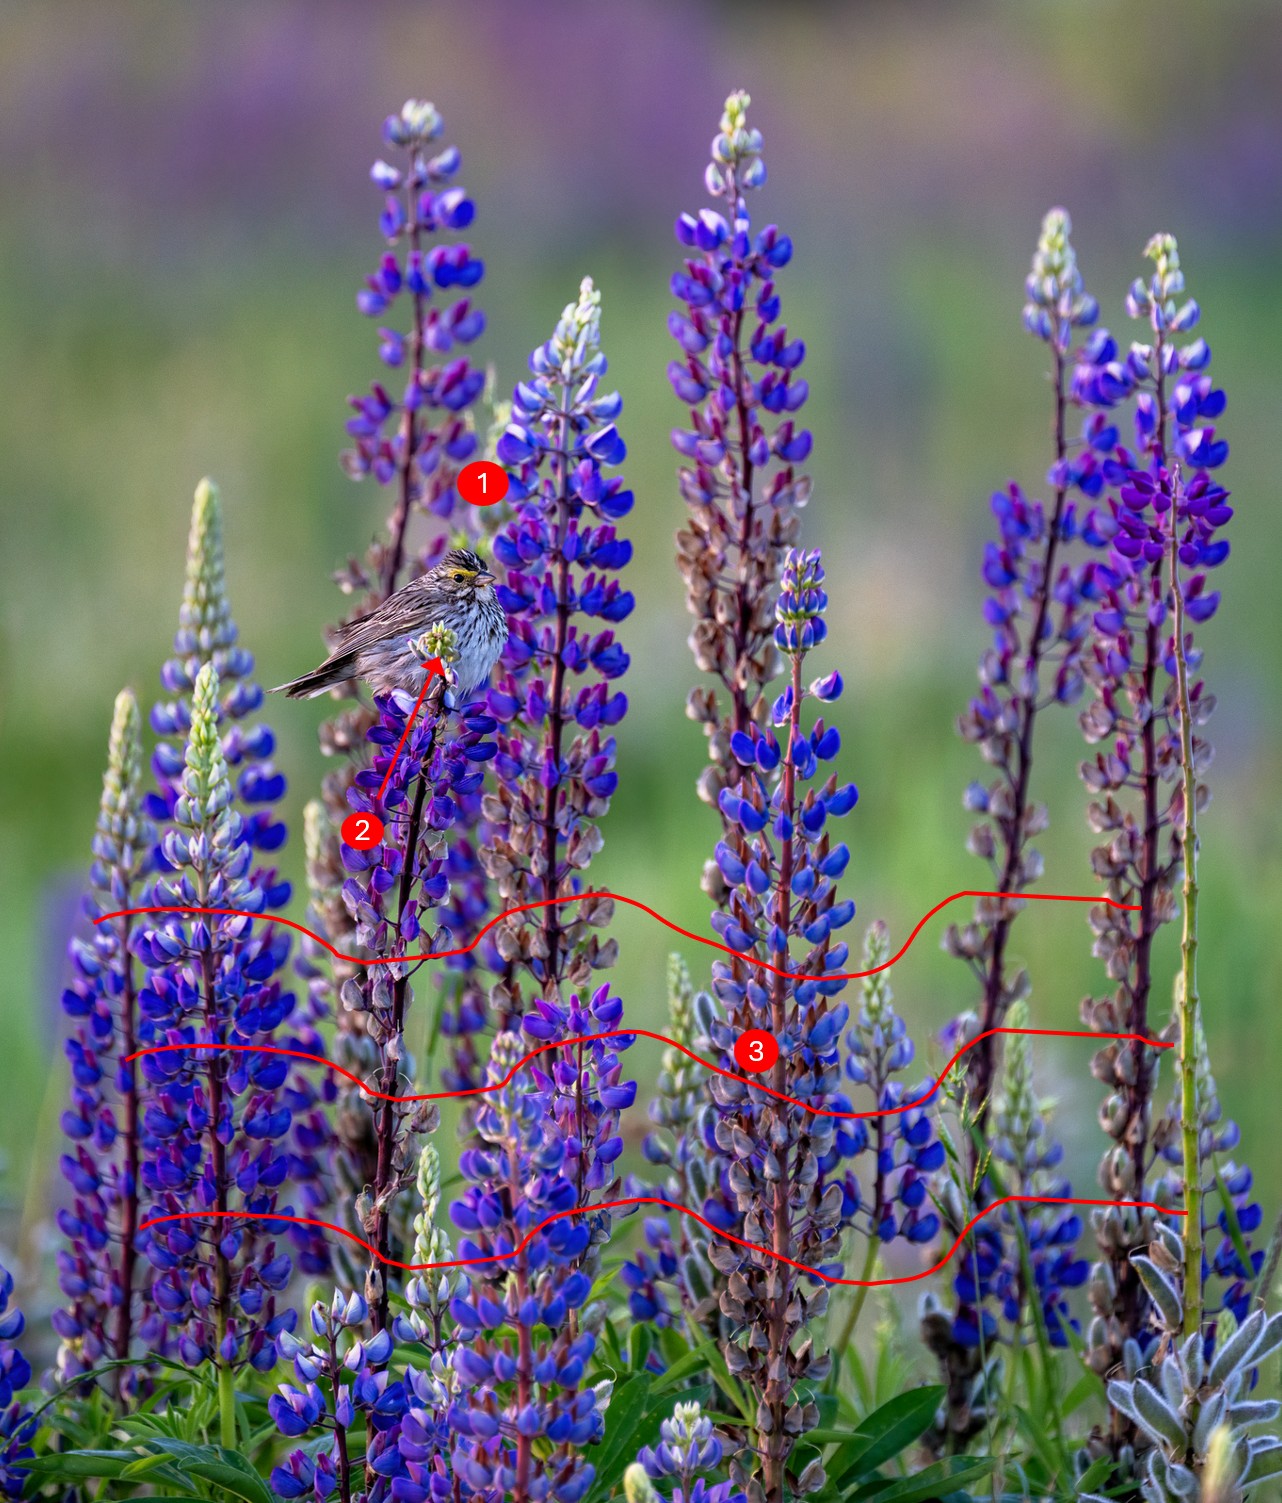
Problems:
- Those plants directly behind the bird are still in focus, which makes it hard to see the bird (our subject)
- That plant is directly in front of the bird, blocking our view of the subject.
- Lots of plants in the foreground are in sharp focus, competing for our attention. The bird gets lost amongst it all.
Are we having fun seeing what a crap photographer I am? Ok, one final example:
Come on, you got this. What are the issues that send this image to the trash bin?
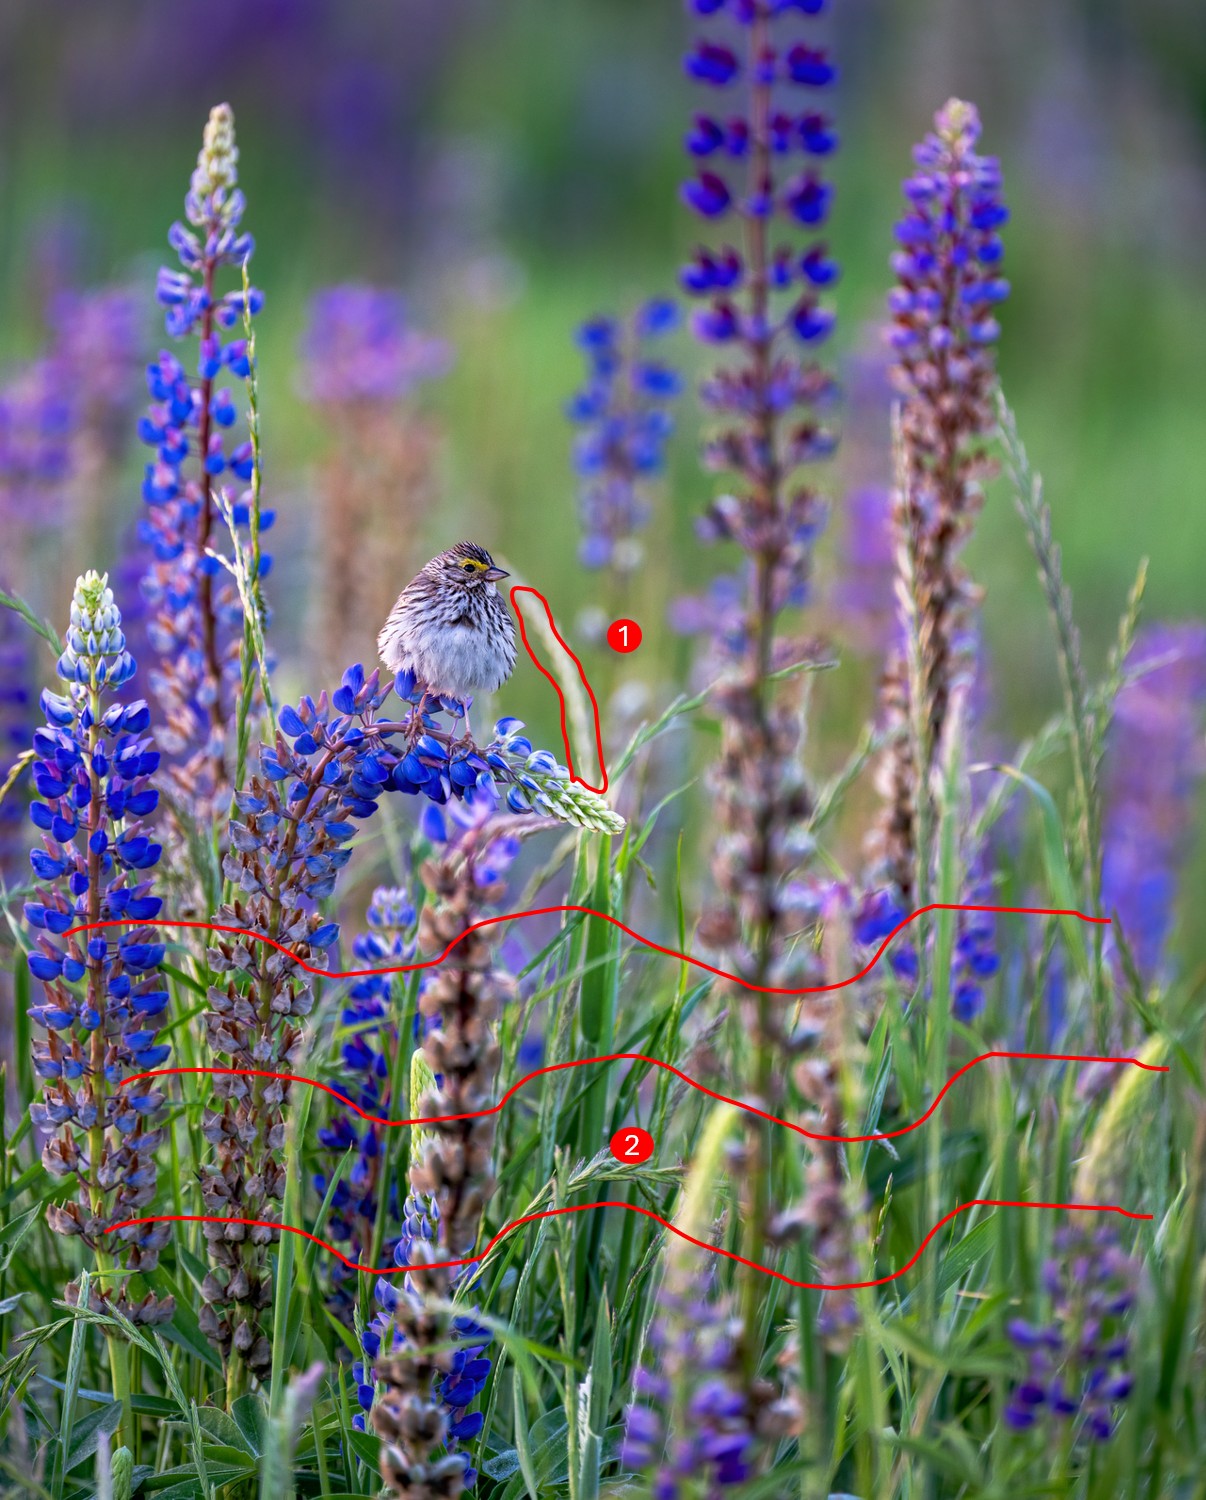
Isolation fails:
- That stem leads the eye to the bird, which is nice, but goes through his head. And it is too bright (too much contrast) so it draws the eye away from the bird.
- Too many plants in the foreground are in focus and fight for our attention. Our eyes won’t stay on the bird as they keep jumping back to these other competing elements.
The sparrows had their preferred perches, so I found myself returning to the same compositions again and again. After enough time, I realized that some perches were simply not going to give me the right mix of compositional elements. I had to abandon them.
If I was going to get anywhere, I needed to search out prime locations and force myself to be patient and not get lured back to those other perches. Hearing the shutter fire away was fun and made me feel like I was making use of my time – but that was just a delusion.
Sometimes you have to know when to walk away (just like what Kenny advised here). The shot simply wasn’t there, and no amount of “willing” would make it so.
Congrats on completing your “isolation” crash course. The key message is simply this: when you are composing your images, whether it be at your family barbeque or on the Serengeti Plains, stop and take a second to look at what ELSE is in your viewfinder. Any elements that distract from your main subject? Do they help or hurt your composition?. If the composition does not work, see if you can change your position, or if possible, remove the offending elements.
“Sorry, Uncle Gus, you gotta go….”
Ok, grandma, say cheeeese….”
Until next month…..
Nikon Z9, Nikon 600 mm f/6.3, 1/500 sec, ISO 125, -1.0 EV
Aug
31
Shot of the Month – August 2025
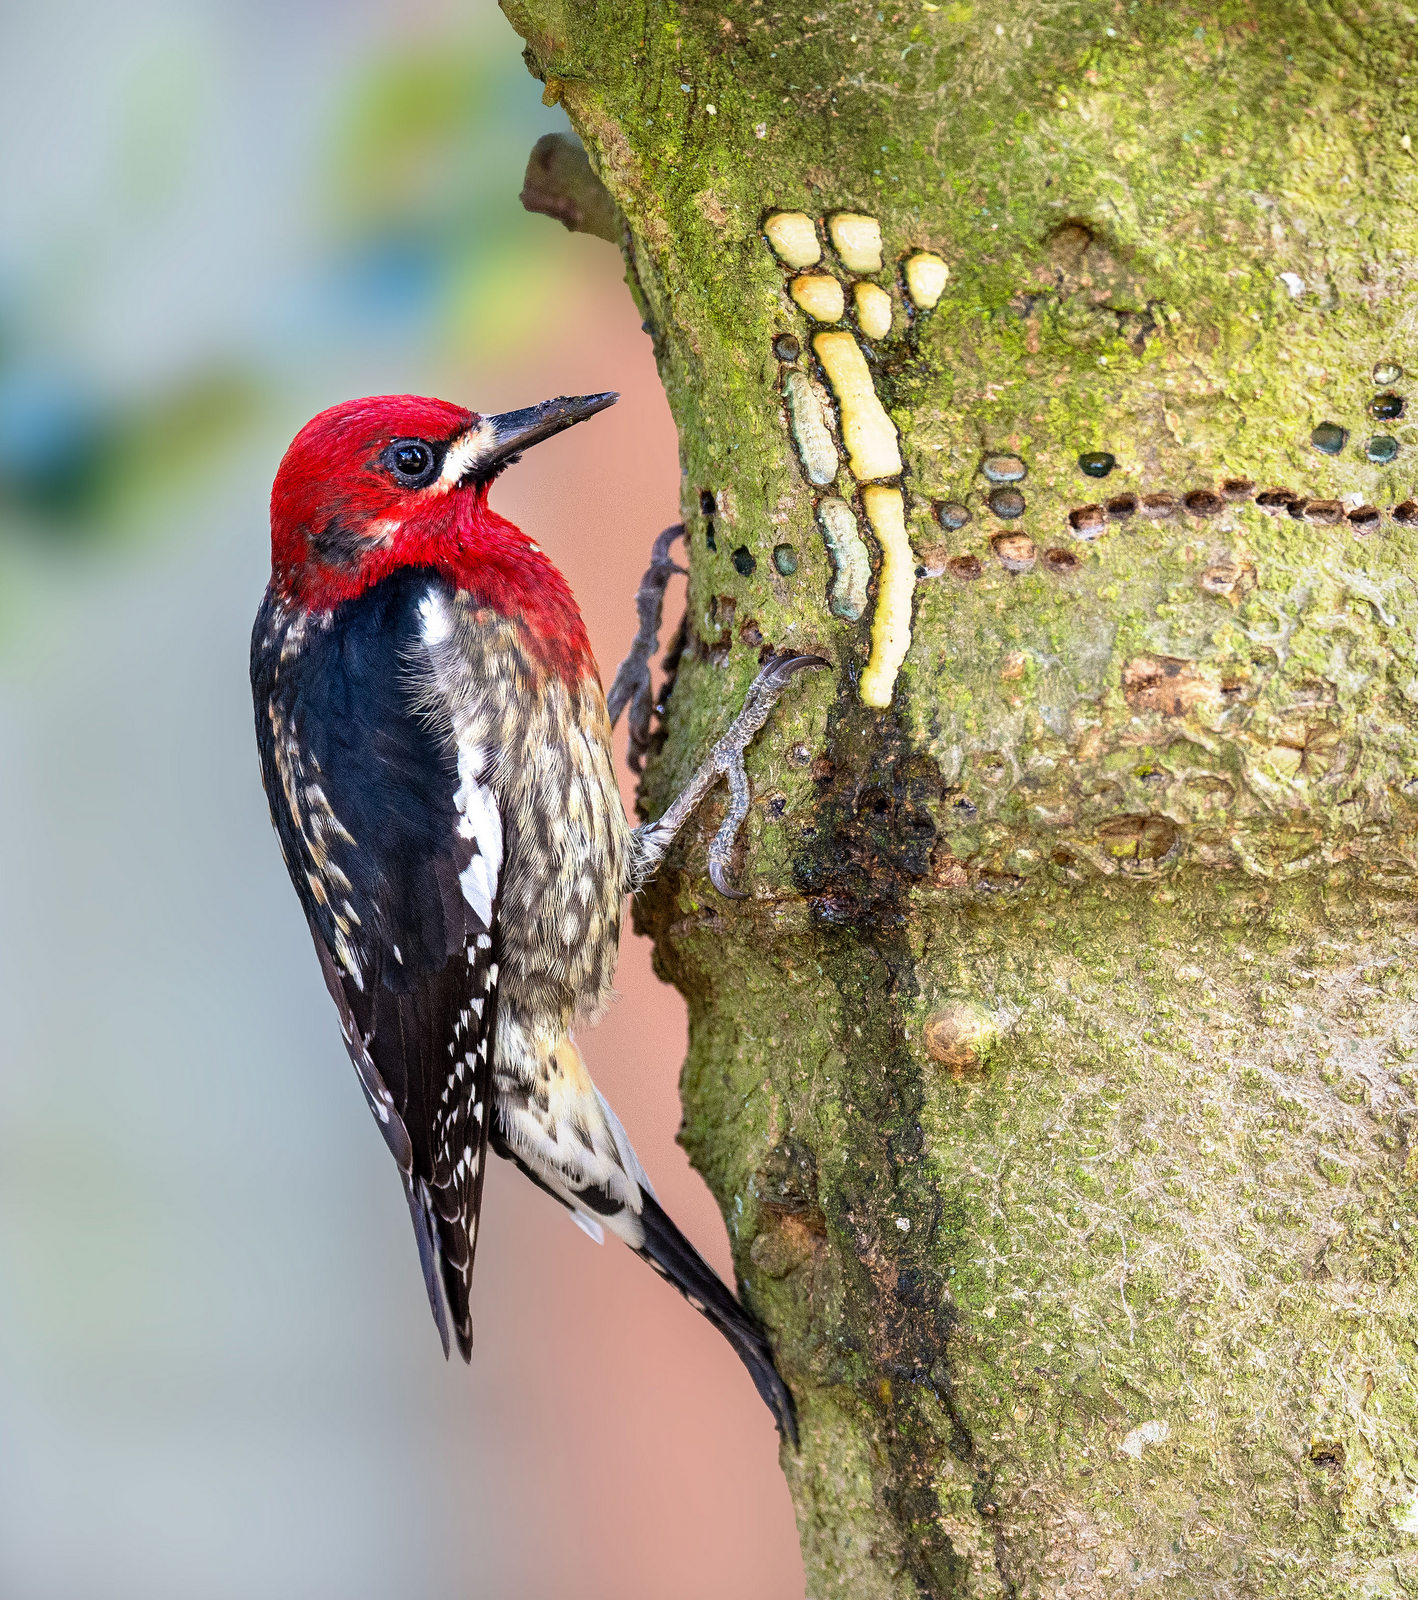
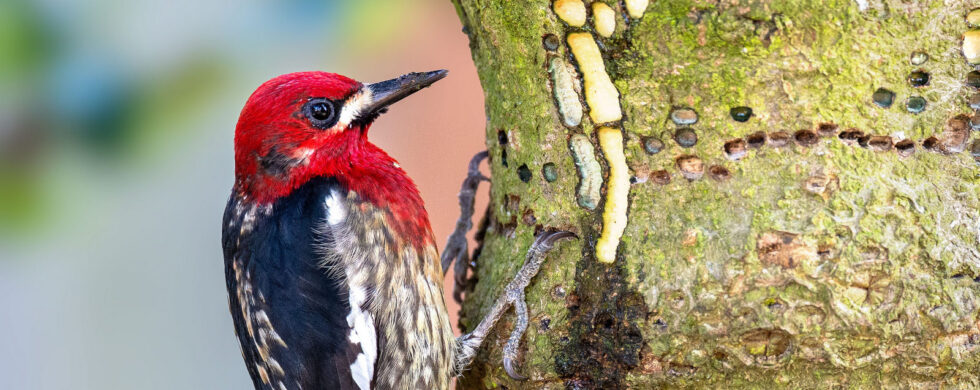
This month, we visit with the Red-breasted Sapsucker (RBS). I photographed this fellow in the yard on our Holly tree.
Let’s break it down:
Red-breasted
As we can see, this bird, especially the male, is dashingly adorned in a vibrant red covering his head and chest. The RBS is a US robin-sized bird found in western North America, as shown here:
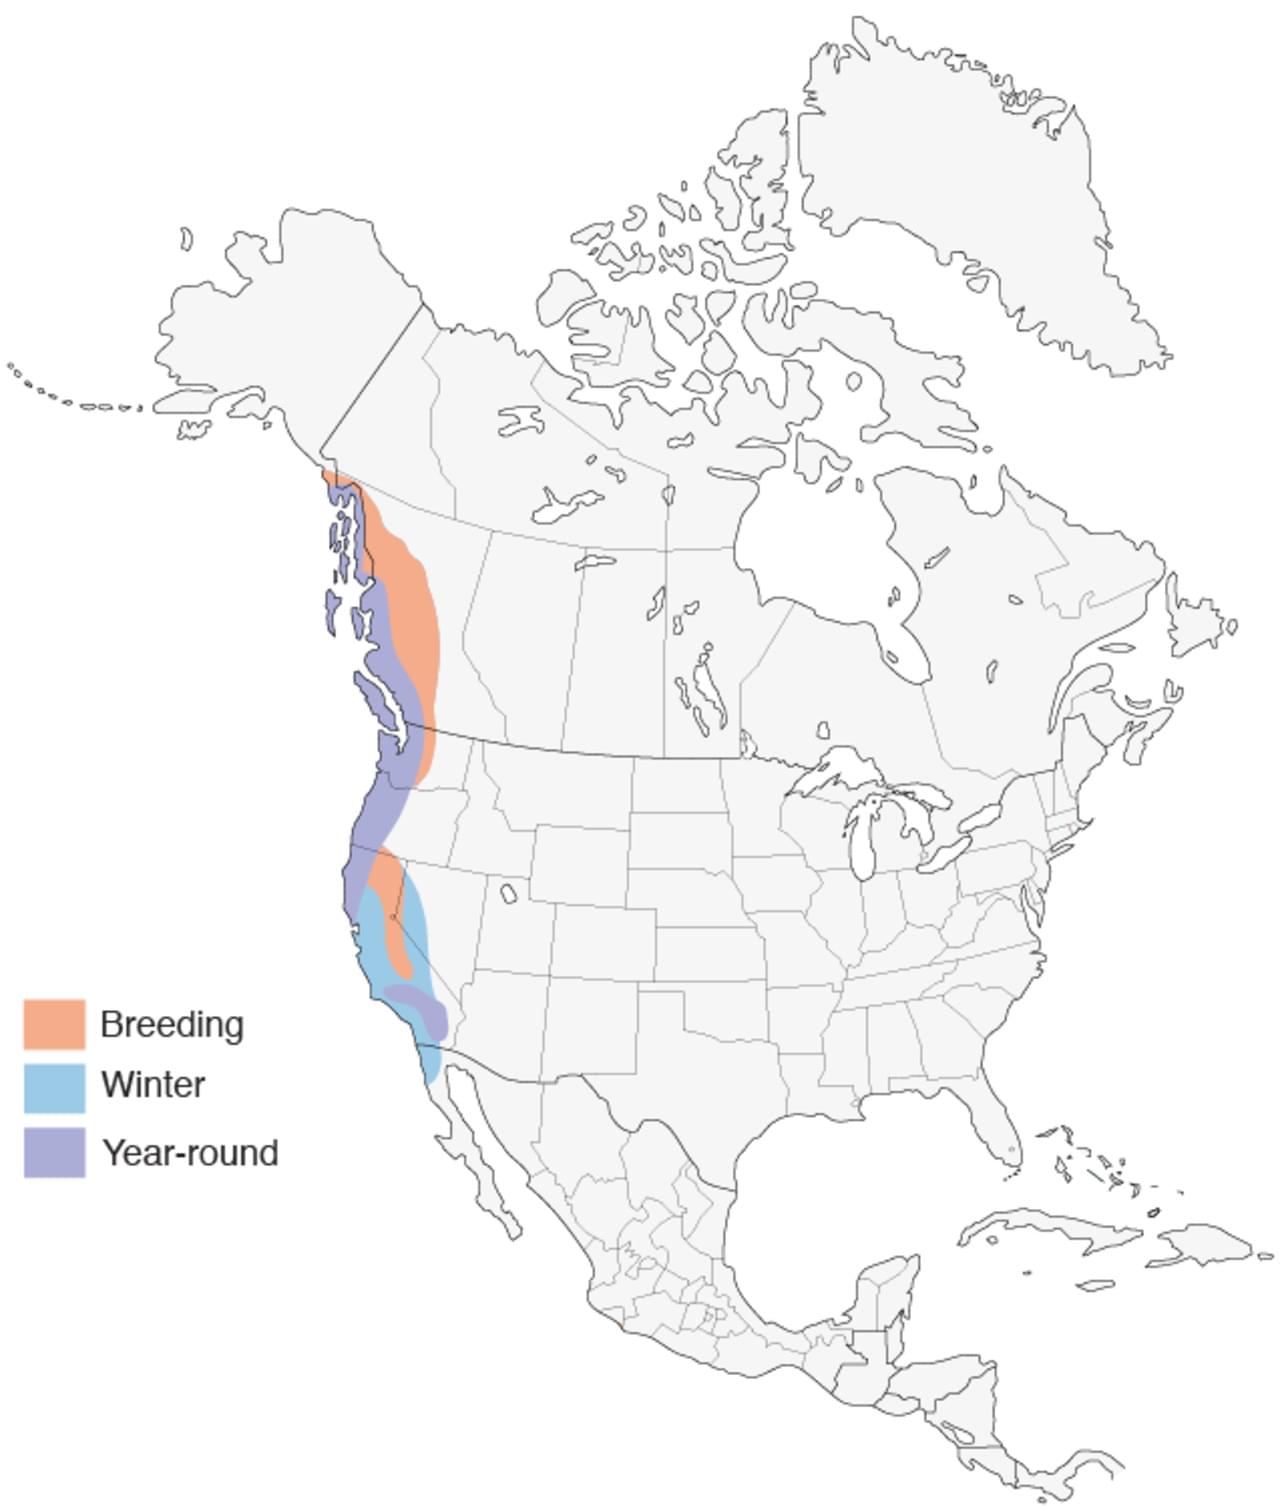
If you wander about in the western regions of Canada, Alaska, Washington, Oregon, California or the western tip of Mexico, you have a chance of seeing this dapper dandy.
Sapsucker
The red-breasted sapsucker is a type of woodpecker that specializes in collecting and eating sap from trees. Hence, “sapsucker.” Of the 400+ species of woodpeckers, only 4 are considered sapsuckers. The four are:
- Red-breasted Sapsucker
- Red-naped Sapsucker
- Yellow-bellied Sapsucker
- Williamson’s Sapsucker
And all are found in North America.
Sap Story
The RBS drills shallow holes or wells in the trunks of trees (most commonly aspen, cedar, pine, birch, or maple) and drinks the collected sap as it oozes from the open wound. Despite their name, sapsuckers do not suck the sap out of the tree wells, but rather, lick it up with their tongues, which are equipped with stiff hairs designed just for this task. The birds make regular rounds to their active sap trees to keep the wells open and ensure that the sap keeps flowing.
Below is a photo of the other side of our holly tree — the RBS has drilled shallow wells around the entire trunk. If you look closely, you can see where the larger wells have produced heavy sap “streams” oozing down the bark.
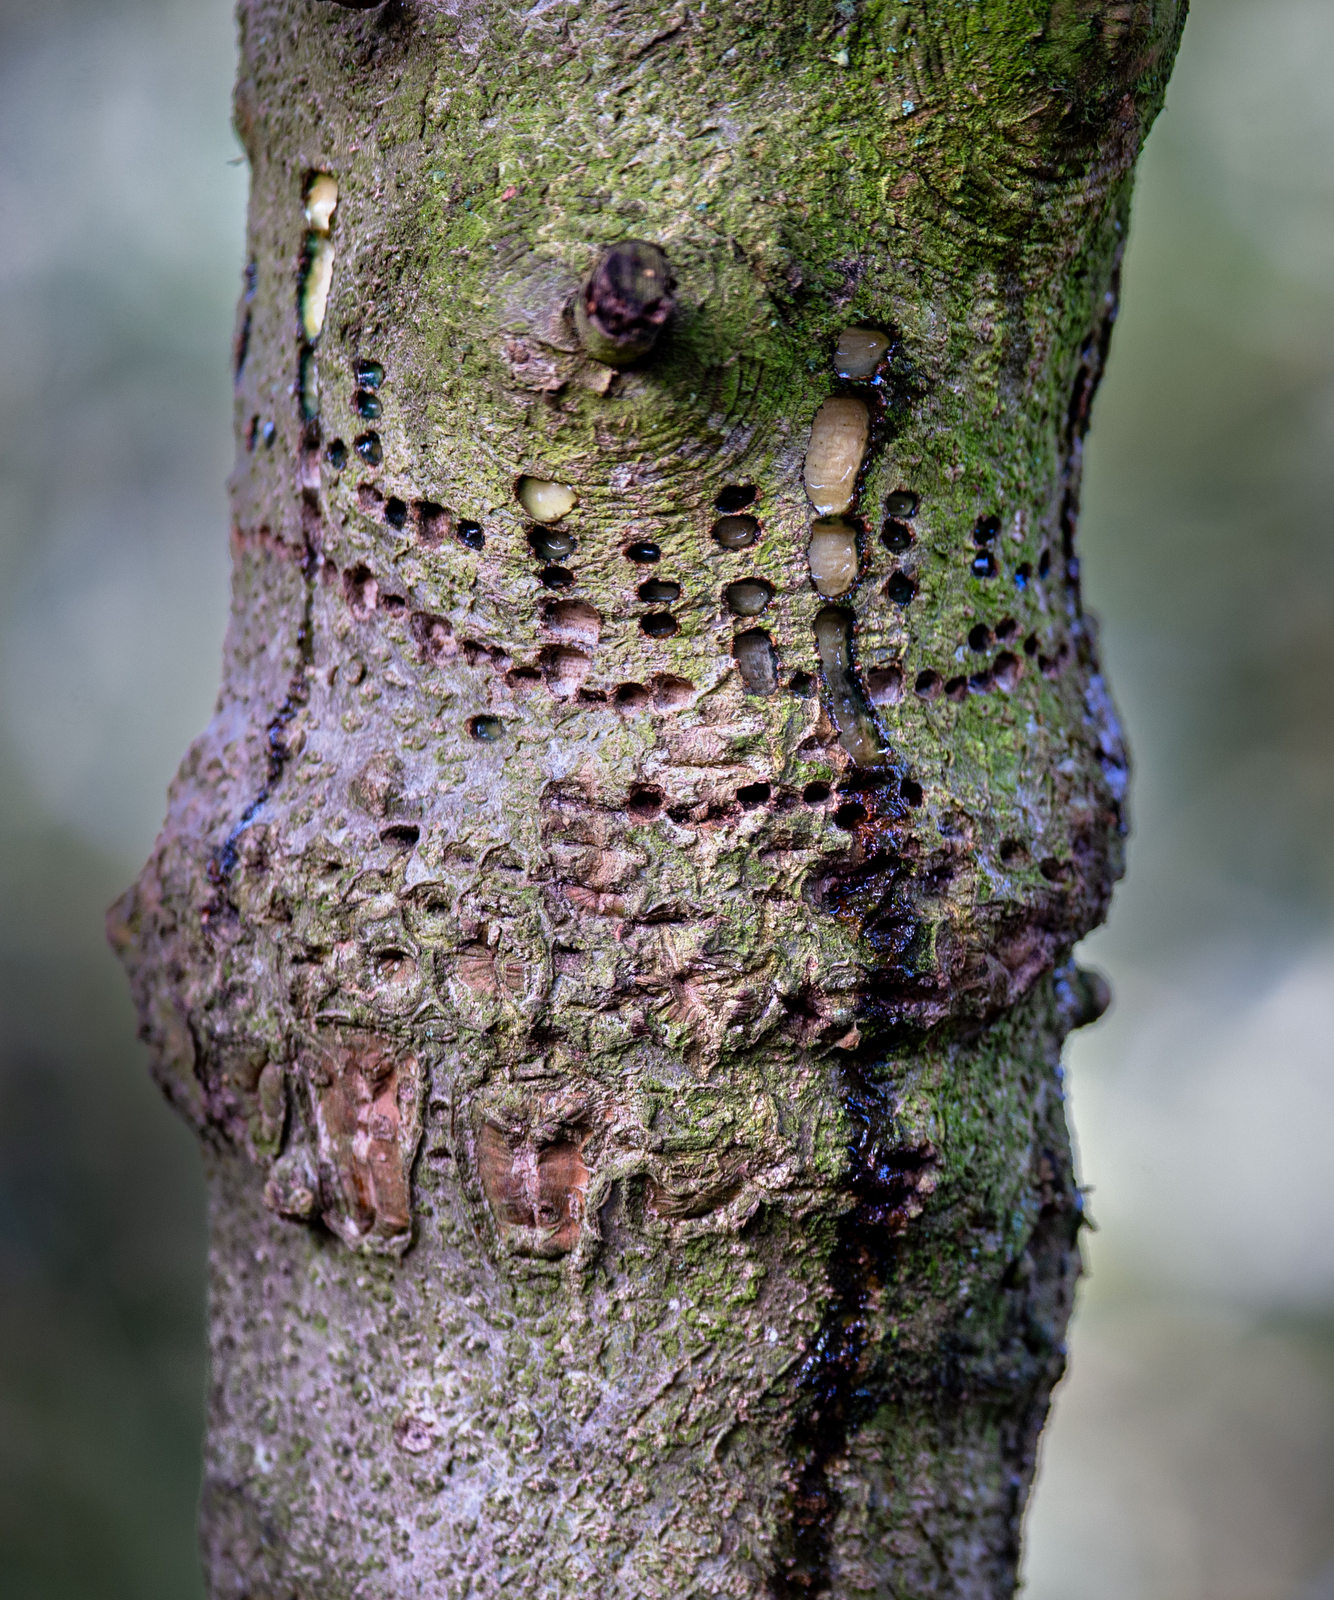
The sap attracts insects, which often become trapped in the gooey mess, and the bird benefits from the extra protein. During breeding season, the parents collect insects at the sap wells and feed them to the chicks to enrich their diet. The parents sometimes catch ants at other locations but bring them back to the sap tree, dip them in the sticky stuff, and feed them to the young as a tasty treat!
Sapsuckers cannot live on sap alone, and they round out their diet with spiders, caterpillars, berries, fruit, and tree cambium (the slender plant membrane located under the bark of a woody tree or plant).
Community benefits
Quite a few animals benefit from the sapsuckers’ hard work. The Rufous hummingbird, in particular, follows the RBS to learn the location of the sap wells and regularly feeds from them (sneaky little bugger!). These wells can provide essential calories to squirrels, chipmunks, porcupines, and bats in the spring when flowers are scarce. Many birds (hummingbirds, warblers, nuthatches, orioles) and other insects (bees, wasps, moths, flies) also feed at the sap wells.
Habitat
RBS are cavity dwellers and excavate holes in dead trees for their nests. They build a new nest each year, so over time, there are numerous cavities available for other bird species and mammals.
Keystone
Sapsuckers are considered a “double keystone” species given the essential role they play in their ecosystem. What’s the double part?
- Nutritional Hubs: As highlighted above, the sap wells provide essential calories and nutrients to a broad range of animals and insects. For example, hummingbirds will time their spring migration to coincide with the arrival of sapsuckers so they can feed on the sap wells.
- Habitat Creators: The tree cavities provide essential nesting sites for birds and are especially important for swallows and small mammals.
Put it all together, the sapsuckers have a disproportionately large effect on their ecosystem, granting them keystone species status!
I don’t want to get all sappy, but that is a beautiful story…sniff, sniff.
Until next month……m
Nikon D4S, Nikon 600mm with 1.4x TC (@ 850 mm), f/5.6, 1/320 sec, ISO 3200, +0.5 EV
Jul
31
Shot of the Month – July 2025
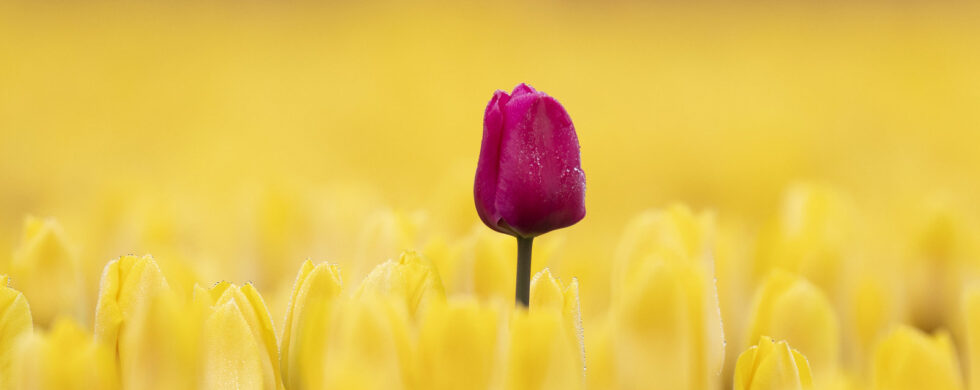
Last month we explored a non-traditional approach to Tulip photography using a “zoom effect.” This month, we will revisit a more traditional approach – subject isolation. You can read more about the use of subject isolation in this post:
For tulip photography, we are looking for a composition that allows one flower to stand out amongst a field of so many. The image from that original post:
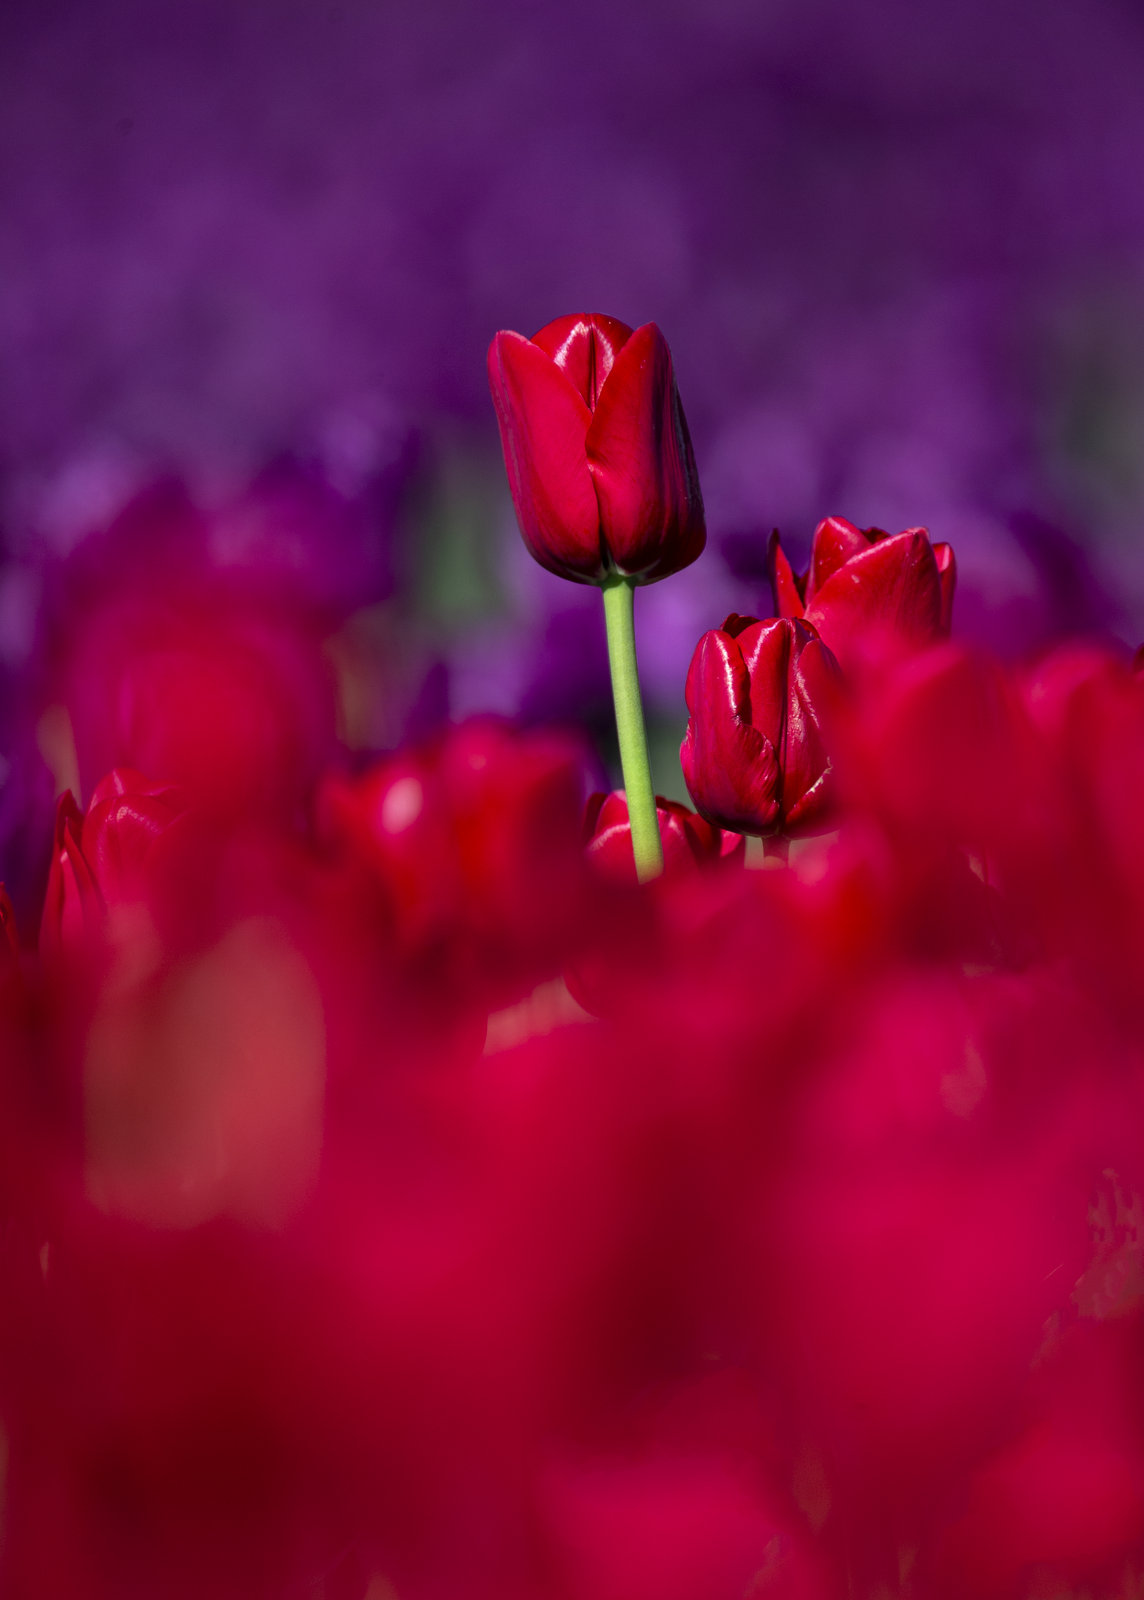
In the image above, I positioned myself to highlight the contrast between the flower and the background, allowing the subject to stand out clearly. A fairly shallow depth of field also helped isolate the flower.
In the next image, I used a shallow depth of field to blur the background with only the subject (flower) being in sharp detail to catch our eye.
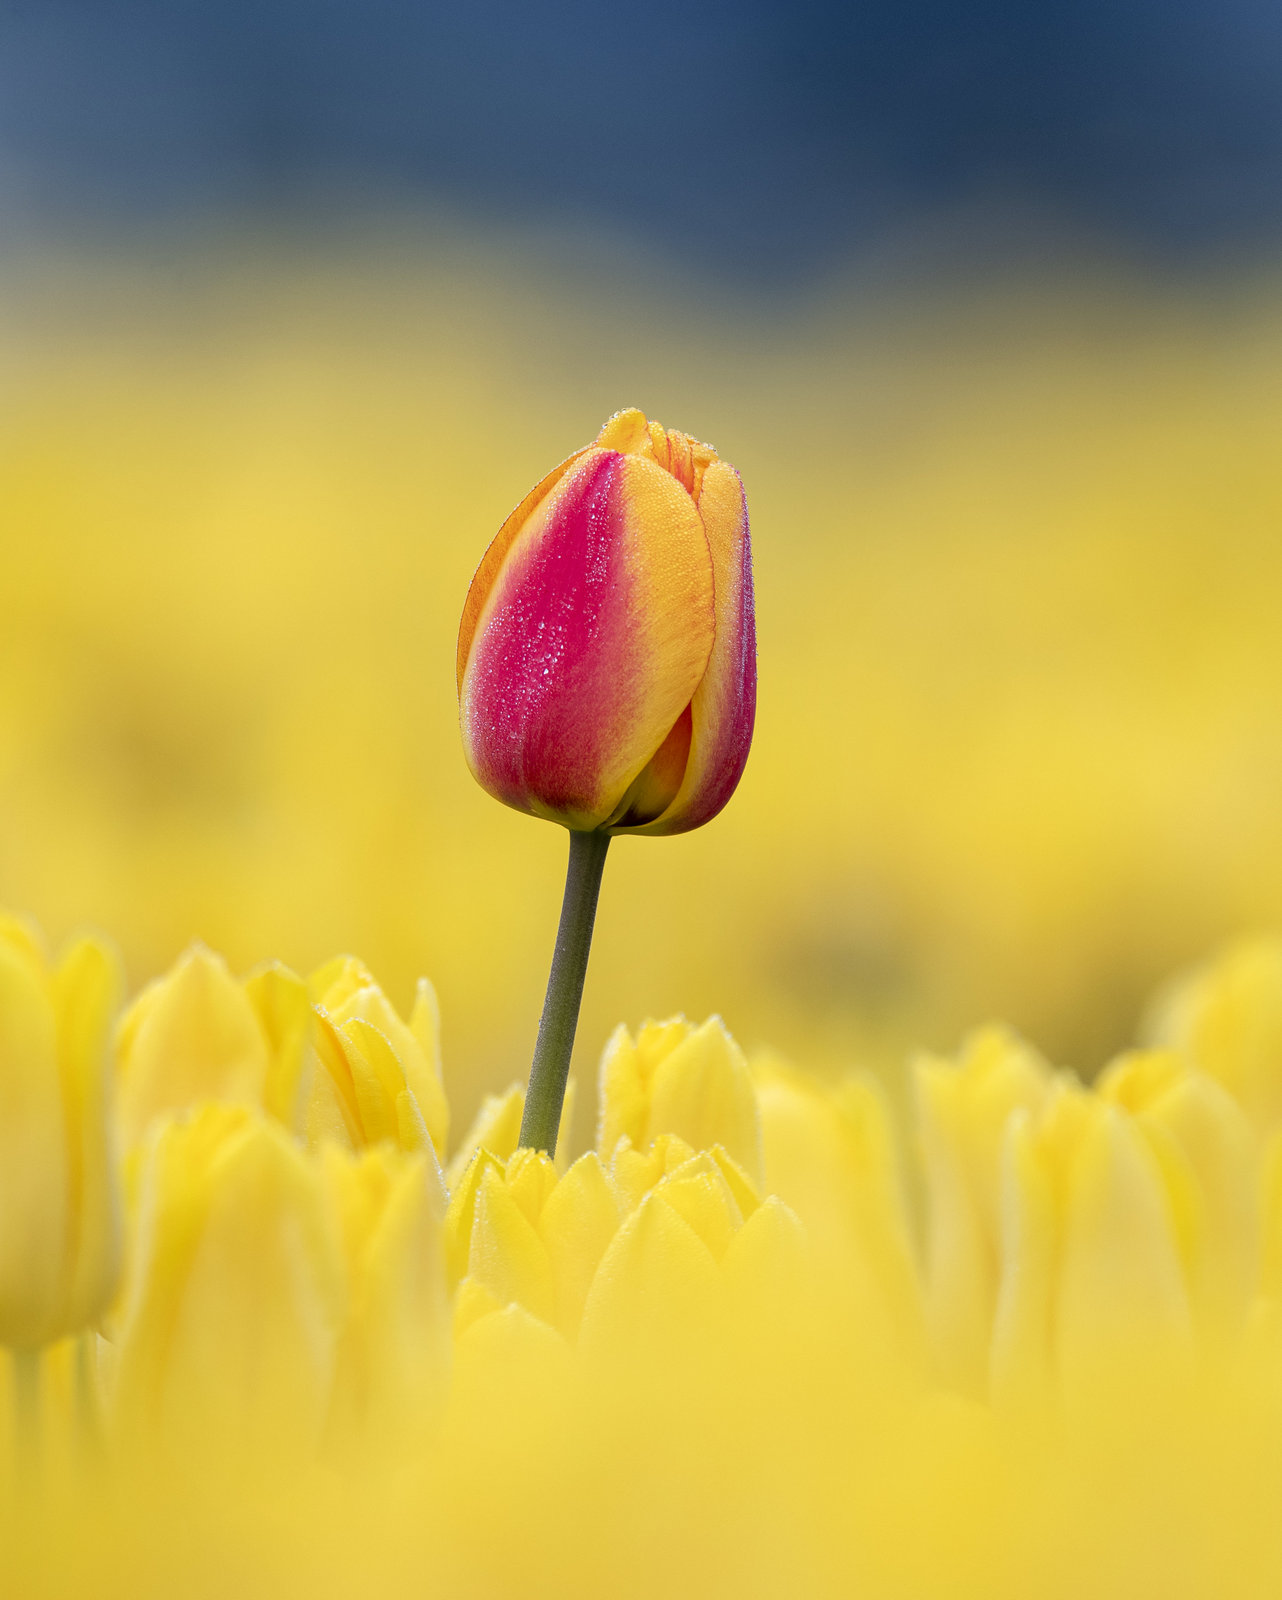
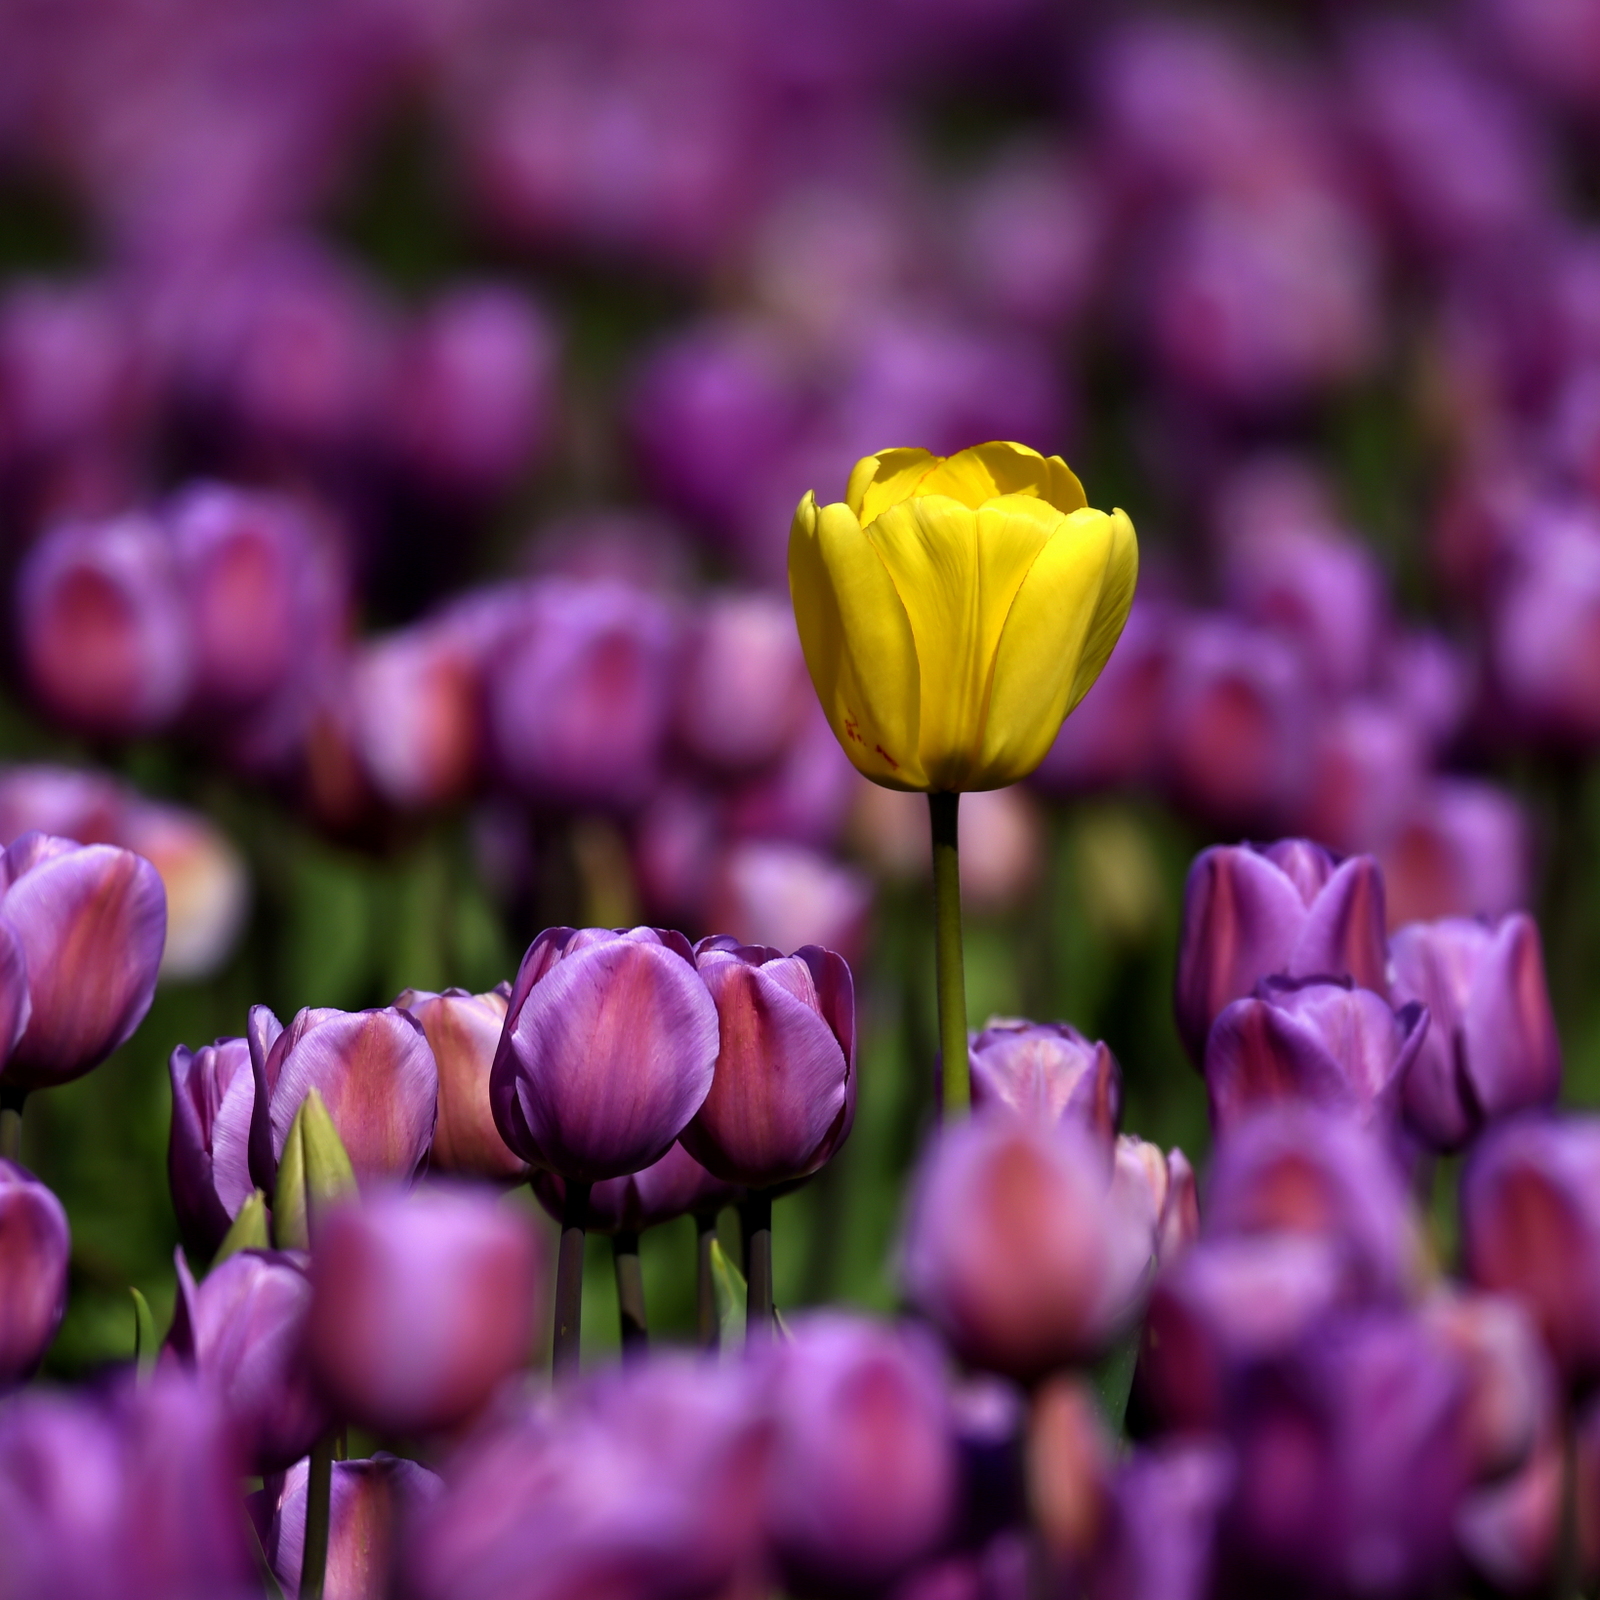
In this shot I used both color and depth of field to isolate the yellow flower.
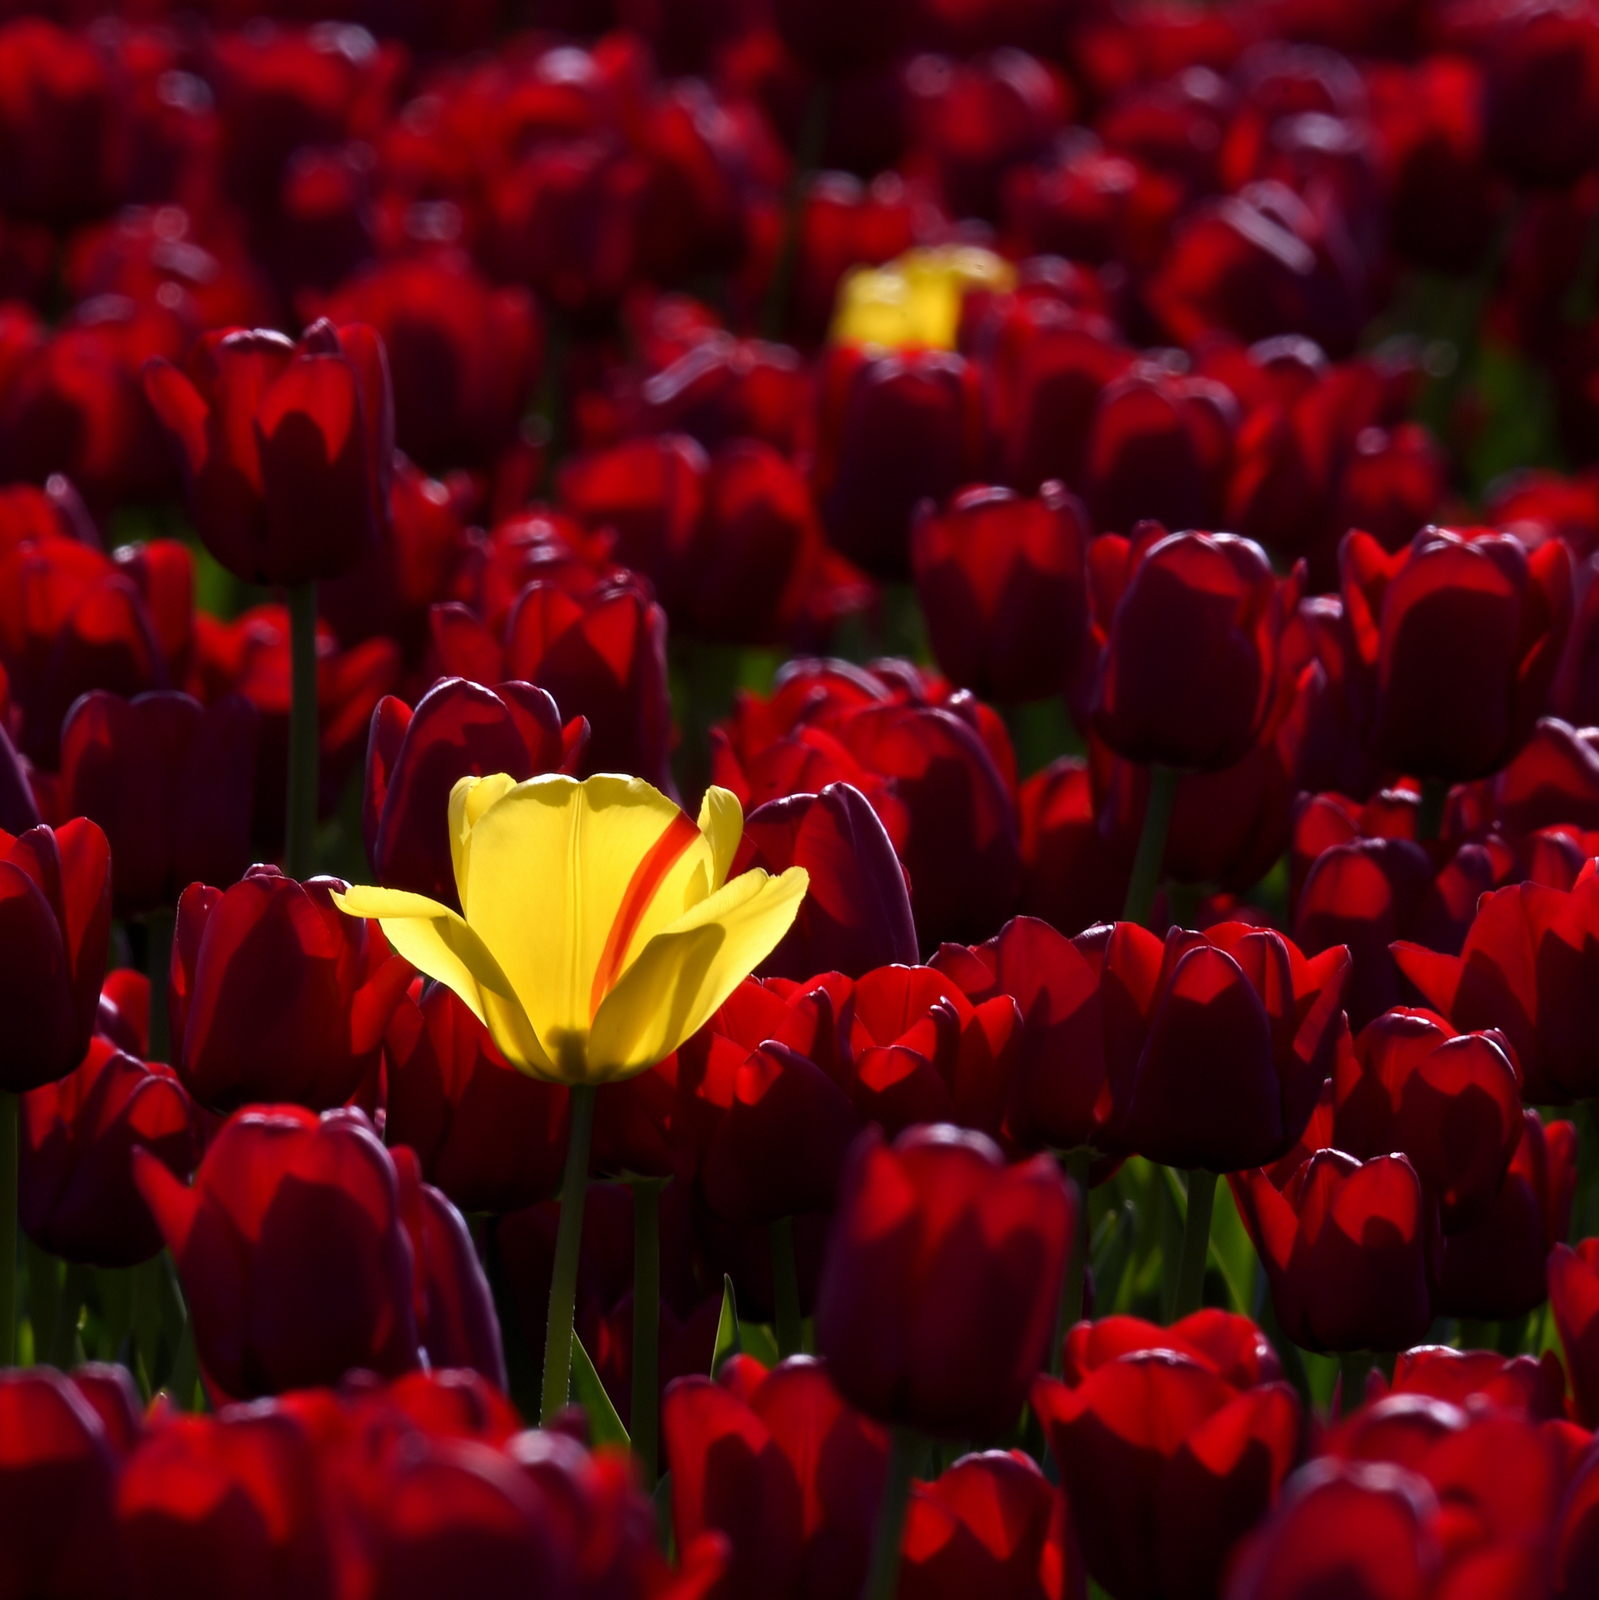
In the next image, I used the difference in color to highlight the yellow flower. The backlighting adds a nice dash of drama to the scene:
And for the next flower, we will explore how different compositions of the same scene offer a different feel:
Version 1:
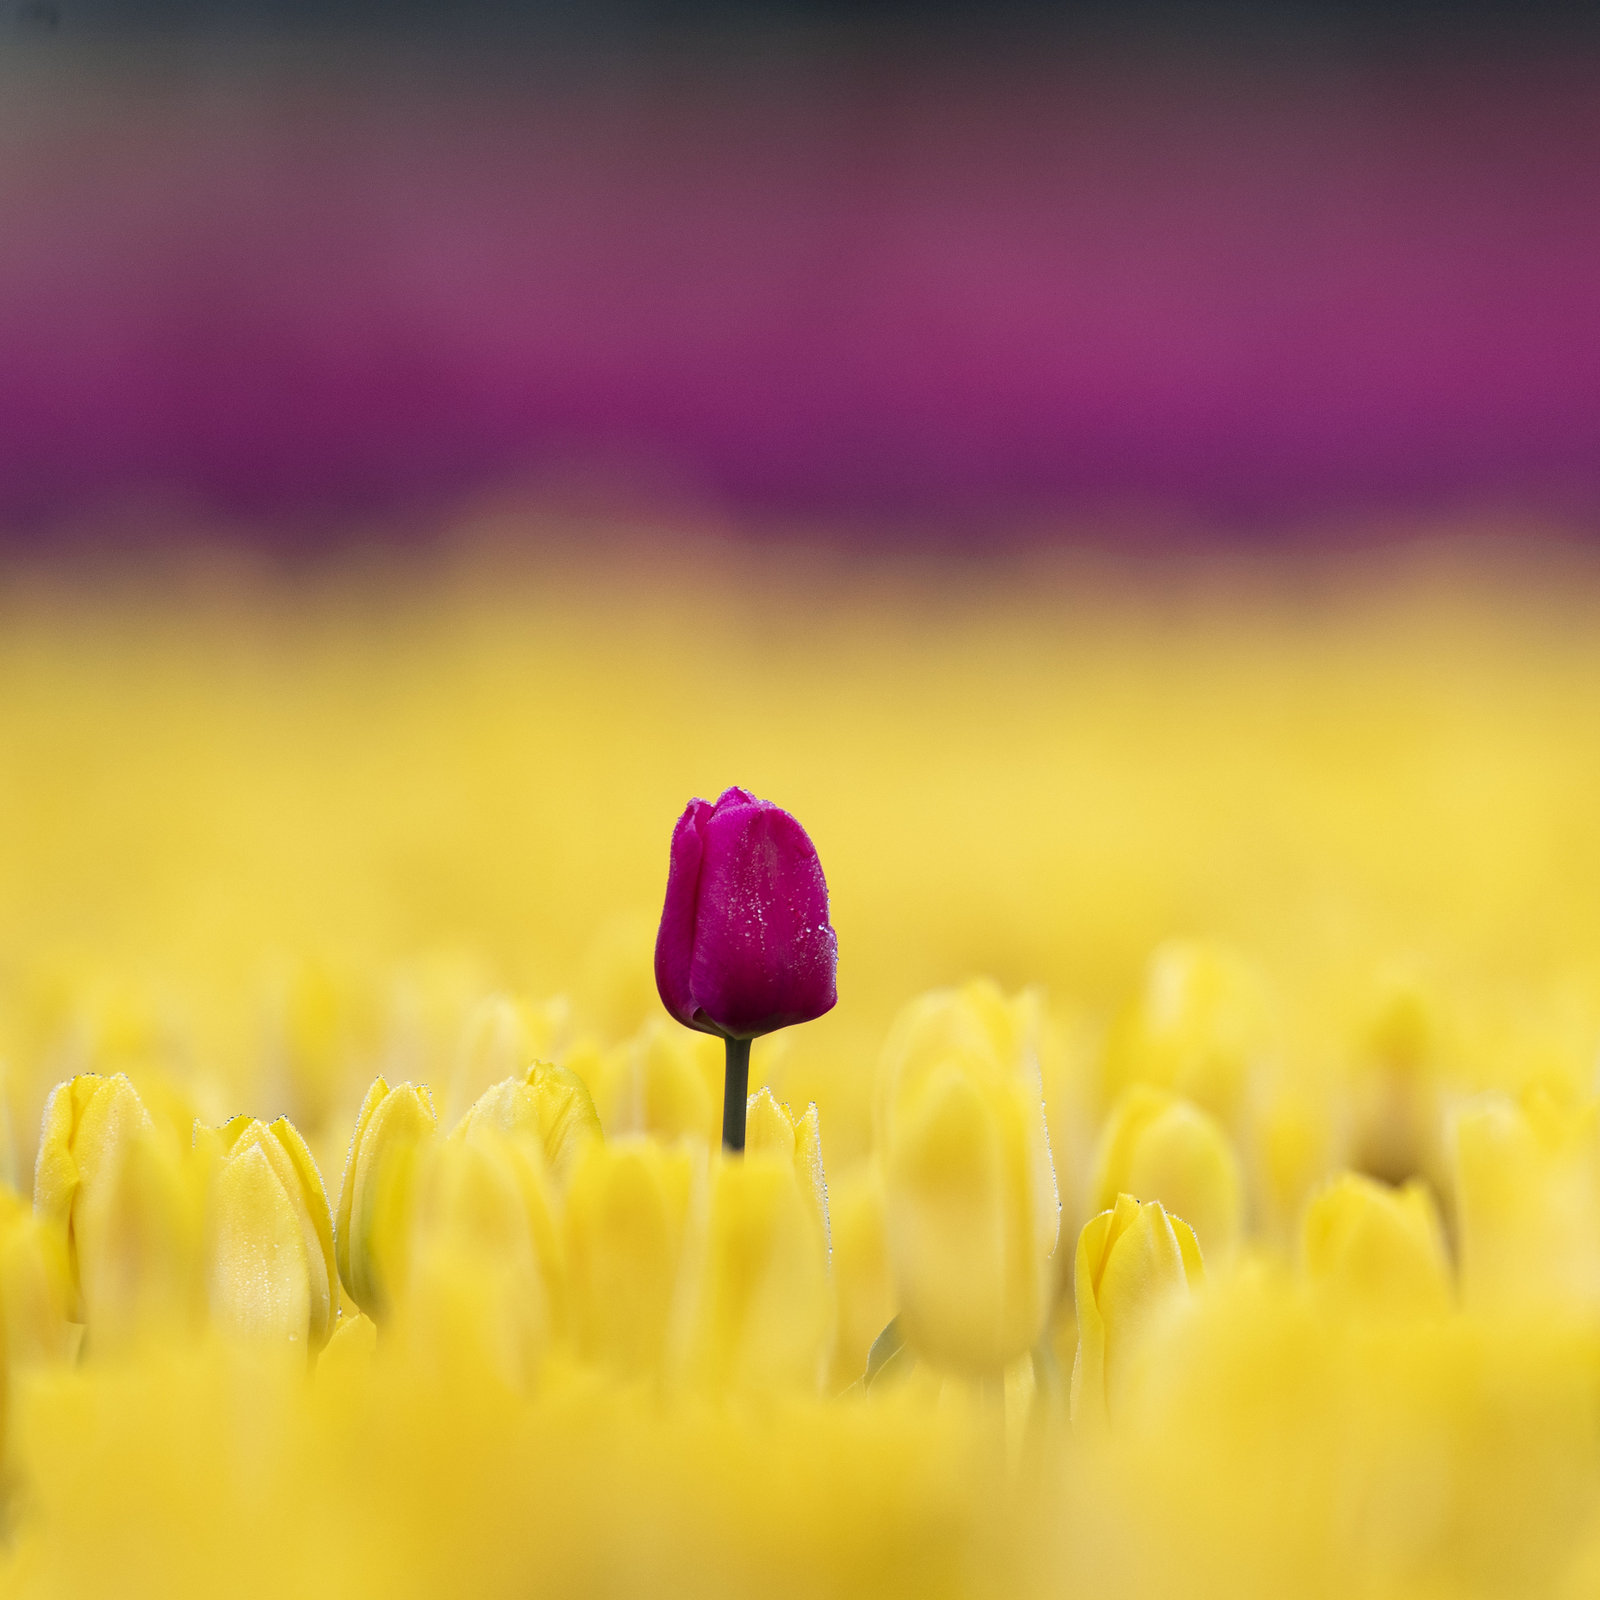
Version 2:
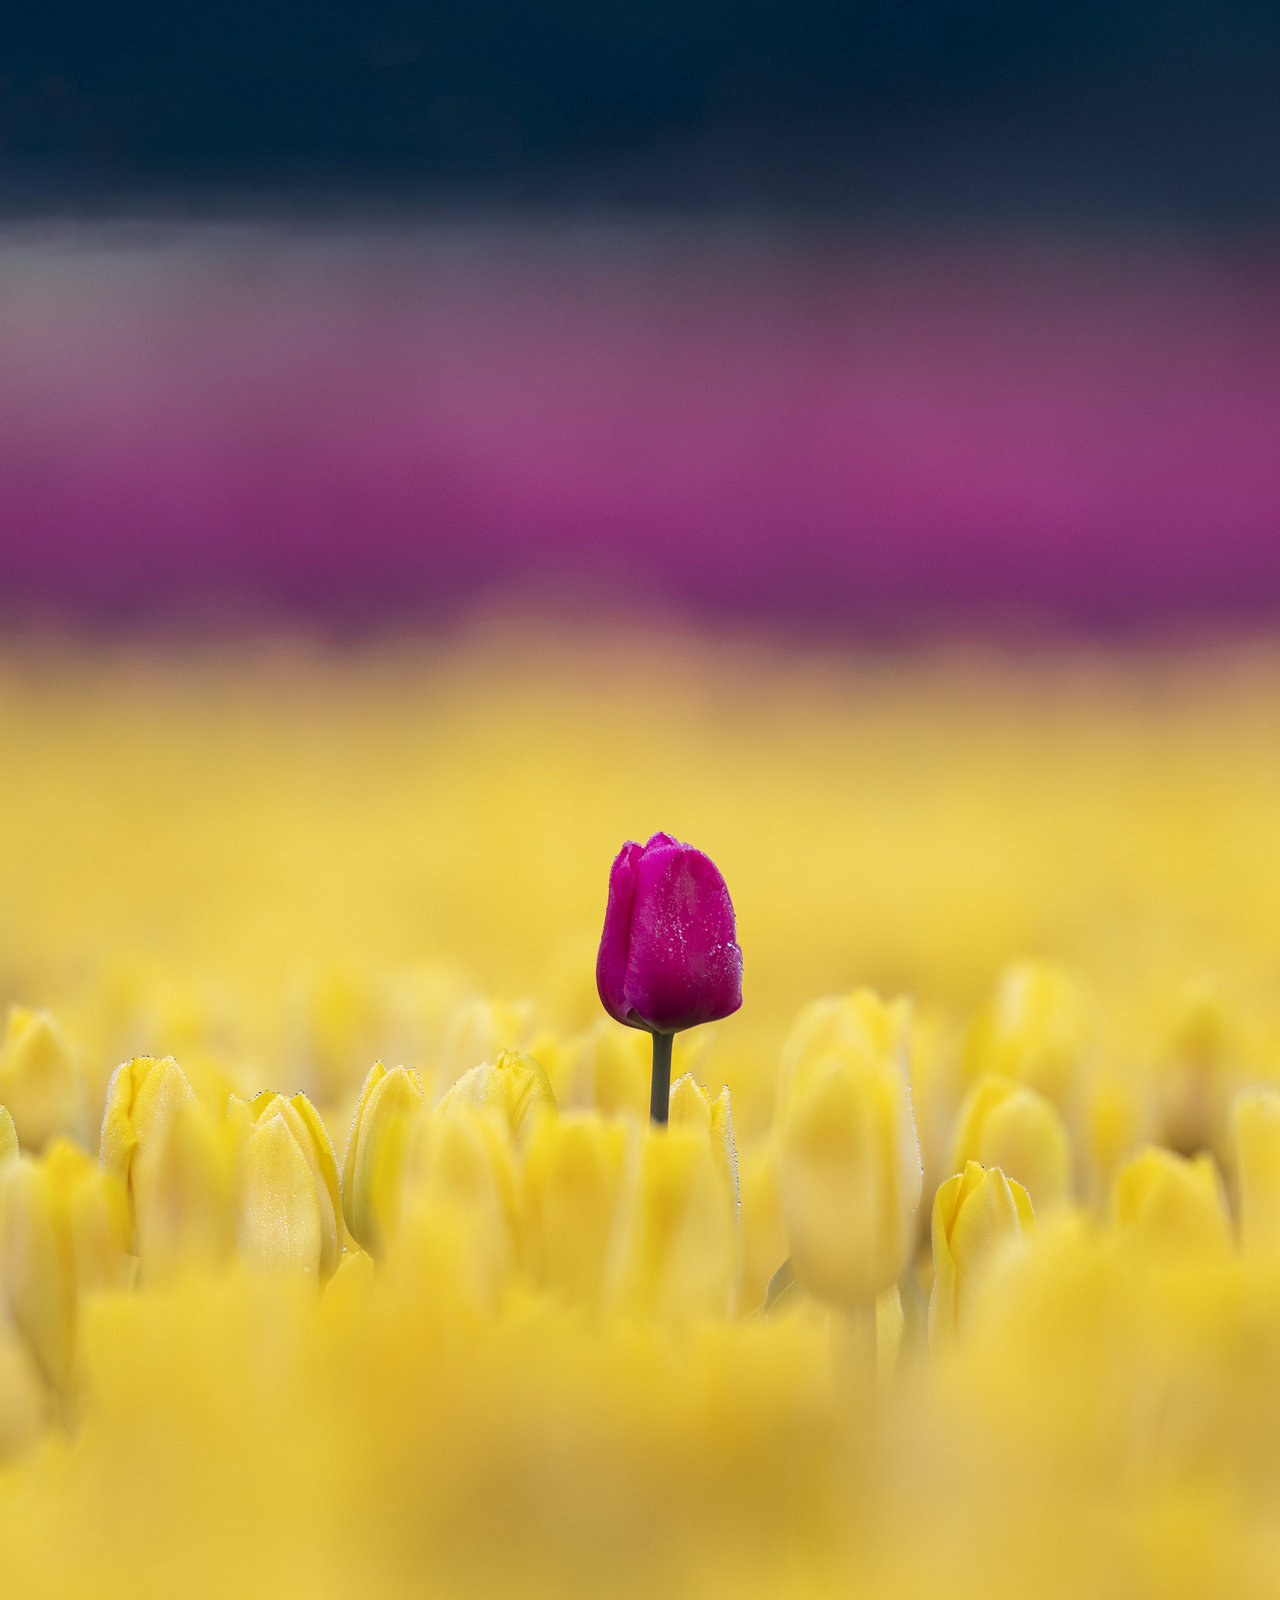
Version 3:
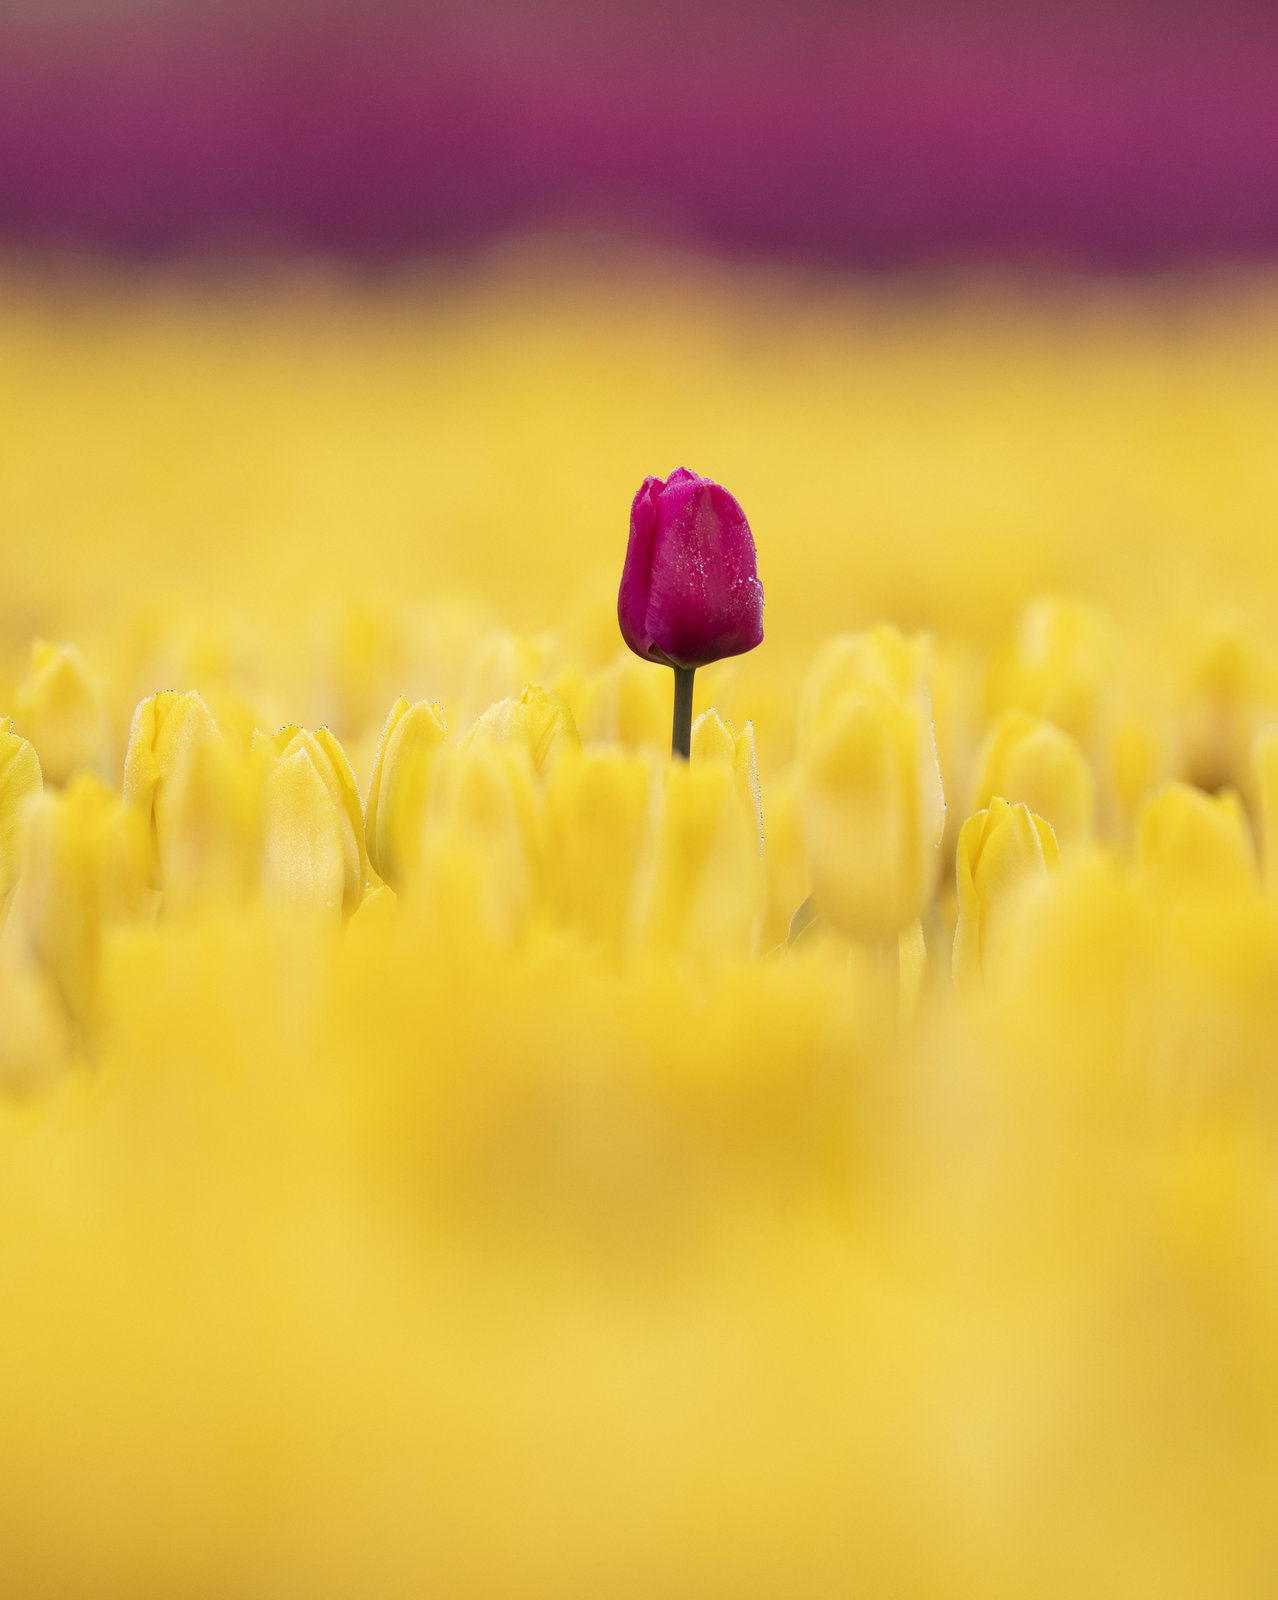
And Version 4 in Landscape:
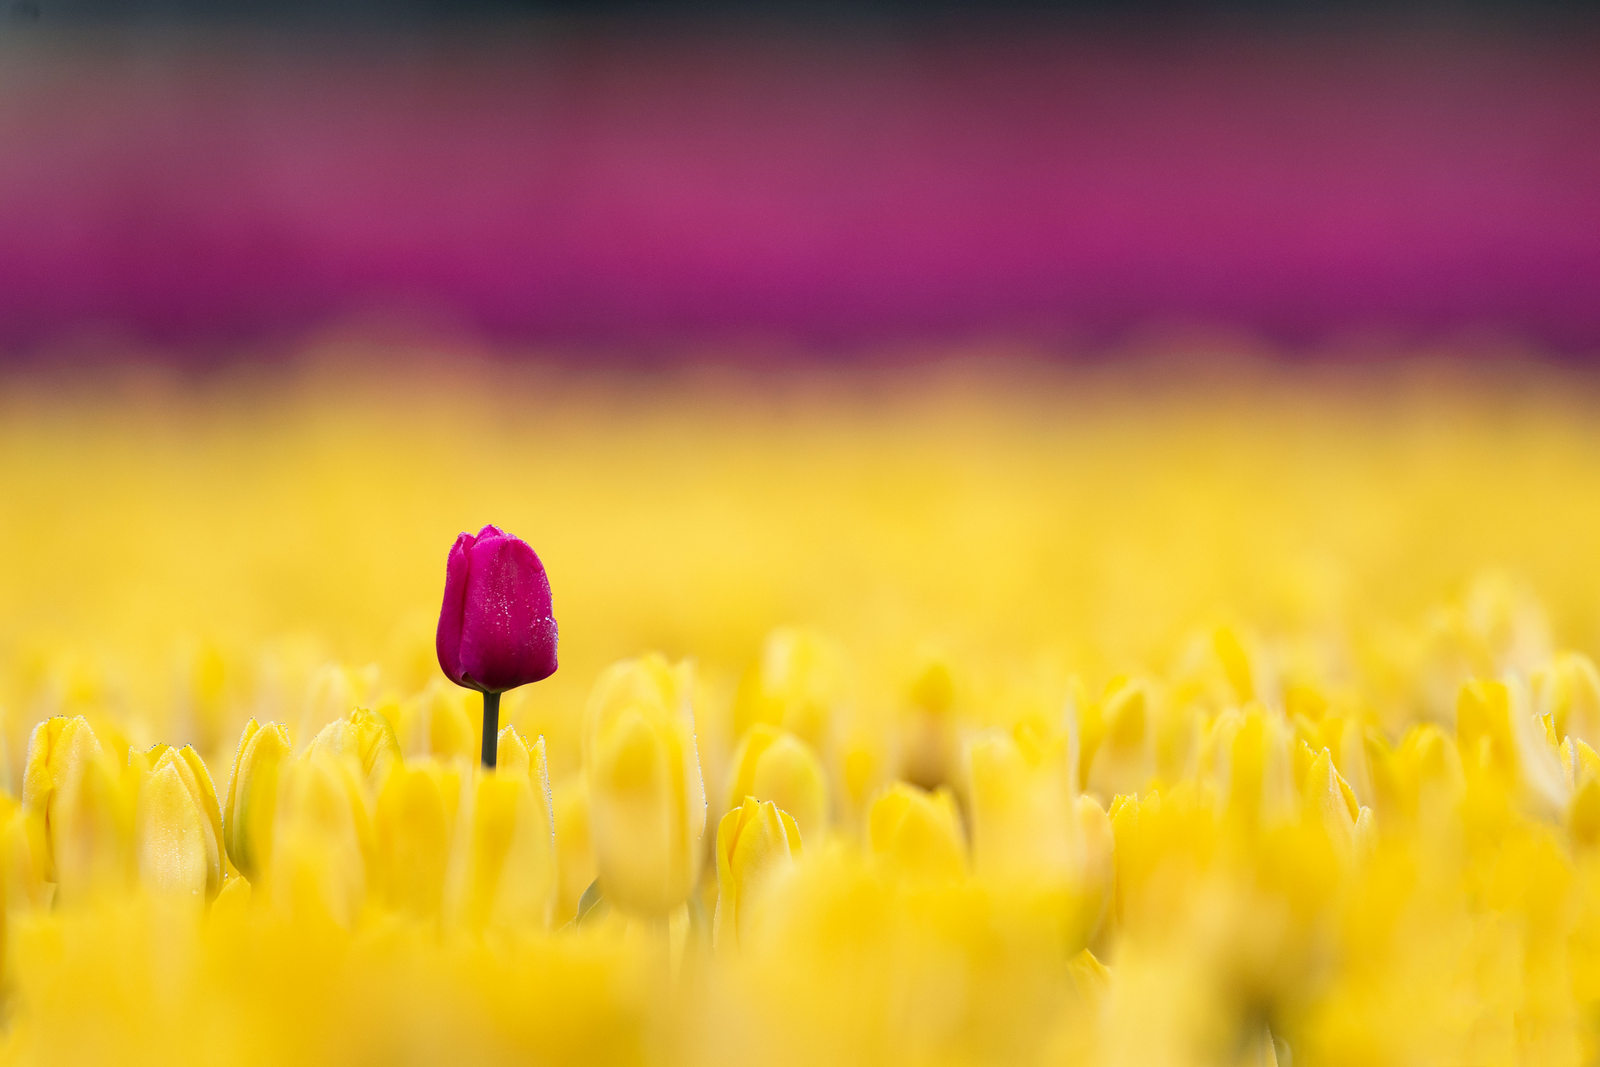
Have a favorite? And between versions 1 – 4, do you find that one appeals to you most?
In terms of visual impact, I love the vibrant colors and fun contrasts. And nonsensically, I find myself rooting for the lone flower standing bravely on her own. Another example of the wonders of art and how we apply our own meaning, stories, and sagas to an otherwise “neutral” scene.
Until next month…..michael
Nikon D500, Nikon 600mm, 1.4x TC, 1/640 sec, f/5.6, ISO 320

